 Tweet
Tweet
Just thought I'd share how I came up with keys for my '56.
Maybe it will help someone here......as long as they are patient and like messing with tiny tedious pieces.
The '56 I recently acquired came without keys. I lucked out and discovered the original key to my '67 C10 truck fit the ignition. Awesome.
Turns out the car has '55 doors on it, and they apparently did not switch the locksets. Boo.
Not all is lost though. I've filed key blanks before to fit locks in old Volkswagen Beetles (my first and lasting passion), so I set off to see what I could do with the '67 key and the door lock cylinders.
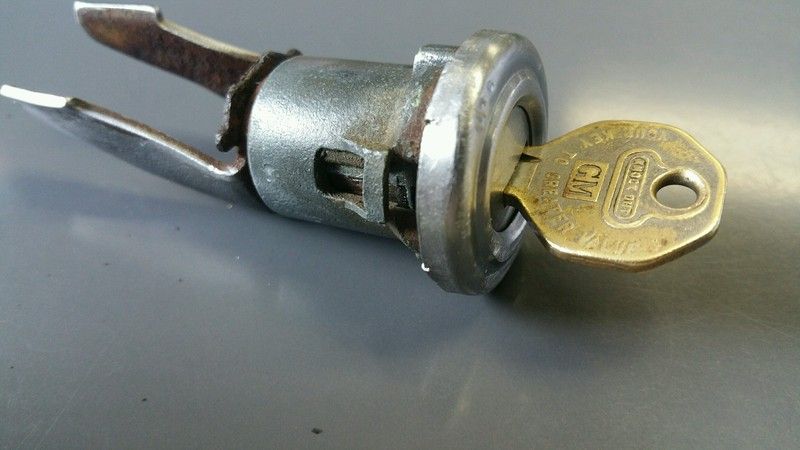
First pull the locks out by sliding the clip near the latch and weatherstripping towards the rear of the car. My door panels were already off which makes it easier to see what is going on, but it can be done with the panels still in place.
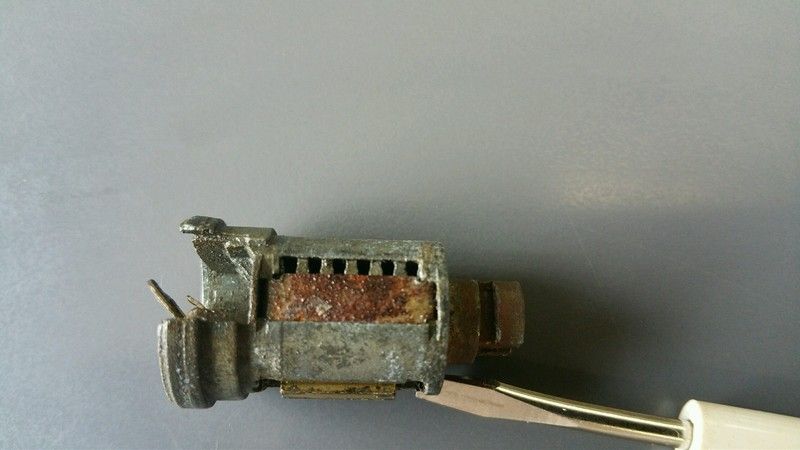
This is what we will be working with.
CAREFULLY straighten the 4 ears for the stainless cover so the cover can be removed. Don't go overboard here, just move them barely enough so the cover will come off. Too much deforms the cover and makes it look bad later when reinstalled. Easy does it.
Under the cover is the disc with the key slot in it. There are two tiny springs behind this disc - DO NOT LOSE THEM. Use lots of caution as the disc is peened in, it pops off easily but those little springs might decide to go for an adventure. Be ready.
At this point I highly recommend taking a picture of how the lock looks assembled correctly. The U-shaped piece can go on two different ways, and you want to know which is correct when we reassemble this. A sharpie marker line on the whole thing will help with realignment as well.
Now turn to the back of the lock. The roughly U-shaped piece is held on with a very hard to remove clip. One lock I was able to tap this clip out and grab it with small vise-grips.
The second one would not budge by tapping, luckily there was enough to grab with the vise-grips. Holding the lock with a rag in one hand and vise-grips in the other (and a lot of theatrics, probably looked like a goat rodeo) it finally moved. 10 more minutes of this and the clip came off. Persistance and patience are key here.
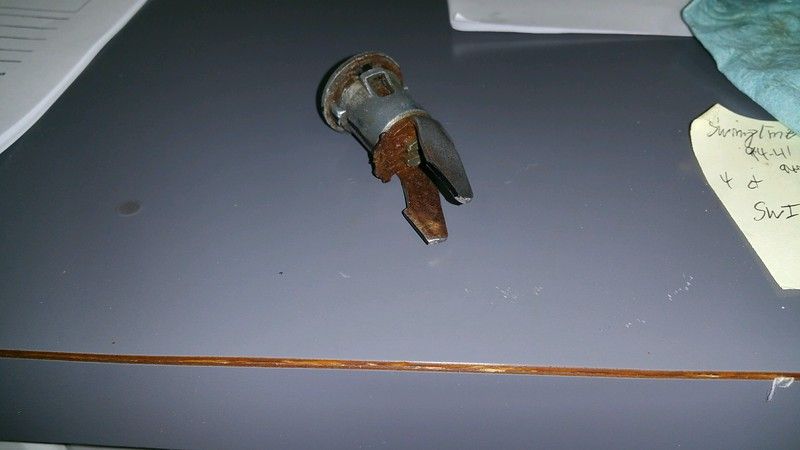
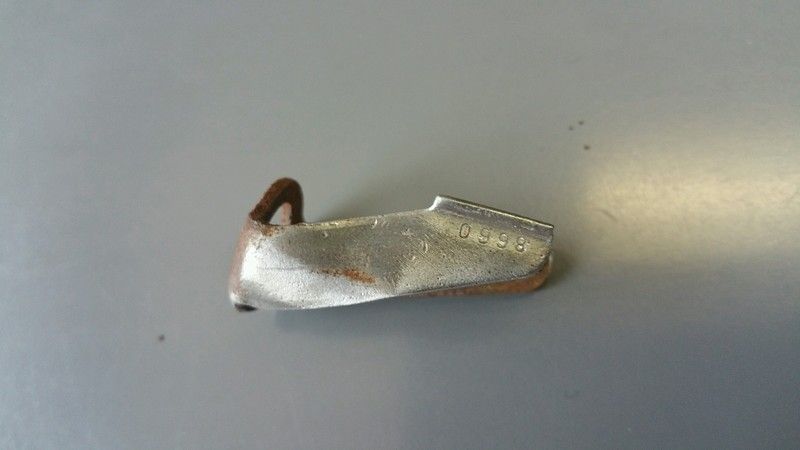
By the way, that U-shaped piece is the only place I found any numbers. I assume this is the key code. With this you could simply have a locksmith make a new key and skip the rest of this nonsense.
But that would make sense. I carried onwards.
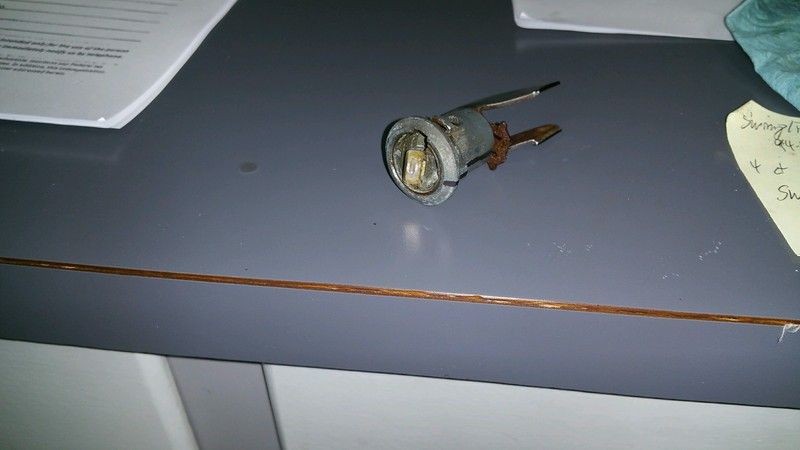
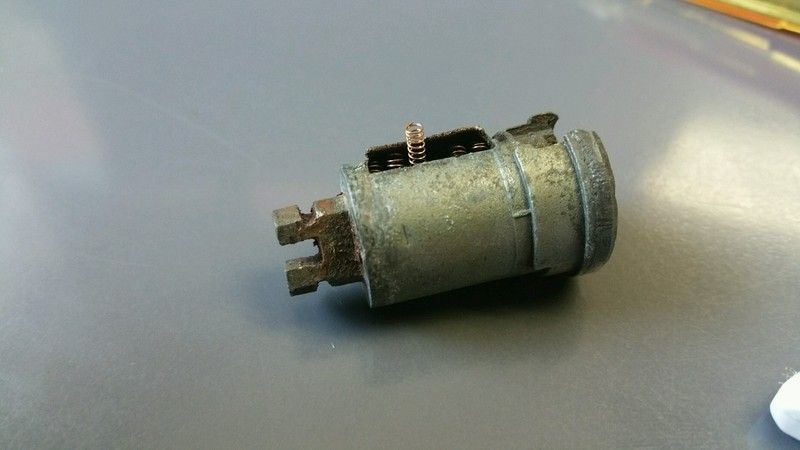
At this point, the tumbler will slide out of the lock body.
(Full disclosure - I liberally soaked these locks with PB Blaster for several hours before messing with them. Its messy but doing that and running the key in and out many times lets all the little bits loosen up. Very important for the next few steps.)
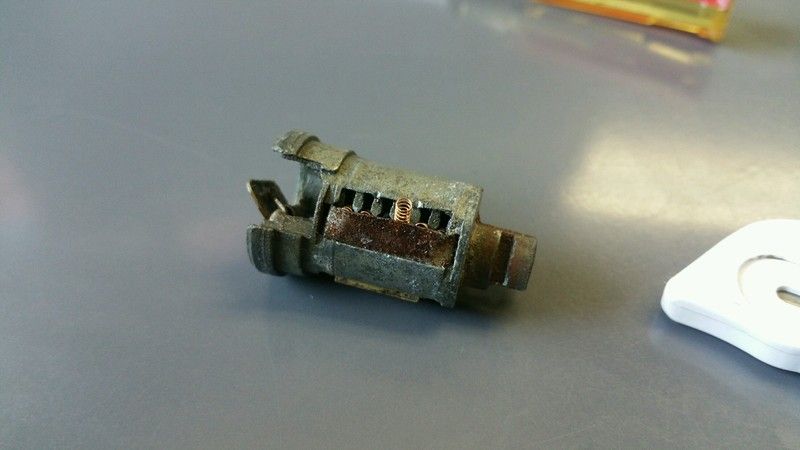
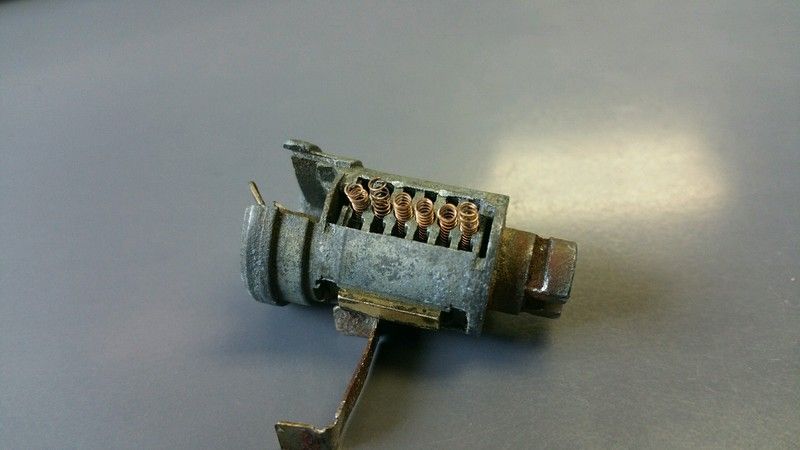
See that rusty metal strip? The six pins and six even more tiny springs are underneath it. Yeah, more springs. These won't fly out like the last ones, but they are very fragile. That cover pushes into the tumbler body on each end, what we need to do is GENTLY GENTLY slip a small screwdriver under the edge NEXT TO THE ENDS and pry up slightly.
Be super careful here. If you go gung-ho and shove the screwdriver all the way in you WILL bend the springs severely.
I got around this by just starting the pry job and stopping. Then use the gap created to fish the six springs out. Once they are out of the way go back with the screwdriver and pop the cover the rest of the way off.
And then spend a few minutes with a pair of pliers straightening the cover back to its original shape. Get as close as you can as it can stick up causing clearance issues later when reinstalling. More patience and persistance.
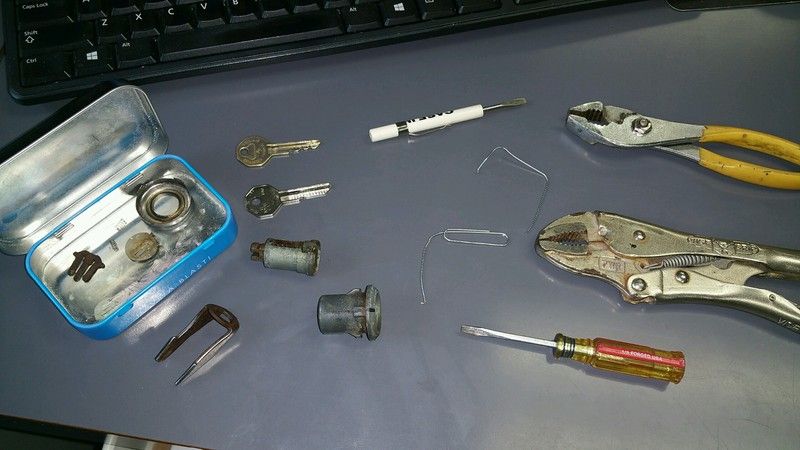
Here is a layout of everything I used. The little mint tin was a nice place to corral all those little pieces that like to escape during work like this.
Next remove the flat pins from the tumbler.
I bought a key blank uncut before I started this. Its a handy tool to help push those pins up and to work the PB Blaster in for soaking. Use a variety of techniques to get those pins to pop up enough to remove them. Some will fall right out, some will slide easily but not come without some careful persuasion.
The two different size paperclips with a small hook bent in one end are quite useful here. Just keep at it, they will eventually all cooperate.
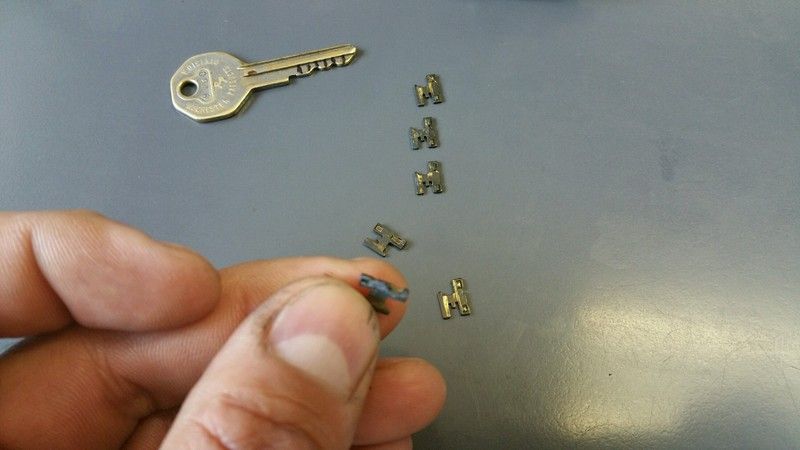
This is what the pins look like. NOTICE the different tiny notches cut into the upper righthand tang in the one I am holding? THOSE notches are the code. They are in different "heights" in each pin.
Match them up. I had 3 of one height, 2 of another height, and one loner that was very close to the 2.
Now take a fresh sharpie marker and lay the key with the last notch against the tumbler body as it would be if the key were inserted. Make a mark on the key for EACH notch where the pins go.
Now get ready to think spatially. On the tumbler at 90 degrees to the pin slots is a brass bar that sticks out and is spring loaded. With the pins OUT the spring loading can be felt, with the pins in AND PUSHED DOWNWARDS TO THE BOTTOM OF THEIR BORES this bar is locked out. This is what keeps the tumbler from rotating in the lock body. Play with it a bit to get familiar with how it all works.
Apparently this bar has a ridge running lengthwise along the inner part of it. This long ridge accepts the notch cut into the pins, and when the pins are all at the correct height (from the different key bumps) the notches cut into the pins line up allowing the bar to recess by its spring force.
Yes, more springs. But we don't have to worry about these. No need to go there.
I can't take a picture of this part......its all in your mind. Take the pins with the cut notch closest to the middle of the pin and align them with the tallest bumps on the key. Drop them in the corresponding pin holes in the tumbler.
I worked my way pin by pin. In my case, the first and last pin matched, and there was one near the middle that matched as well. Those got the 3 pins that matched in my case.
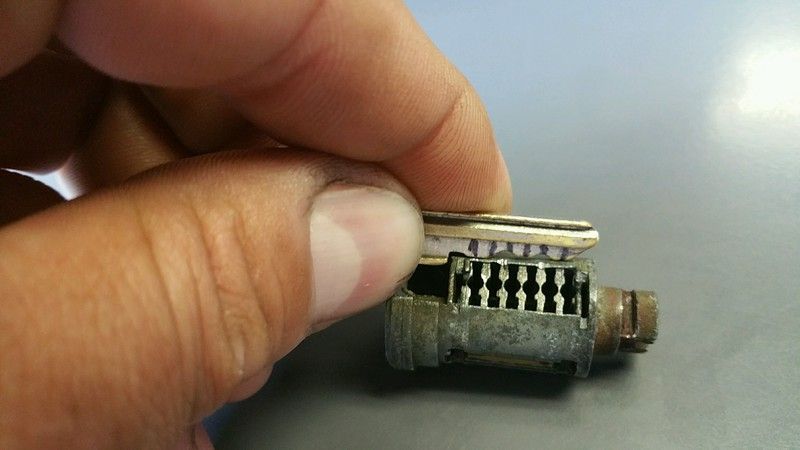
This is a good time to check things. Put the key in and put the tumbler in the body. It should turn easily. Take the tumbler, key, and body back apart.
Then I took the two pins that matched, and found that of the 3 bumps left on the key 2 of them were the same hieght. Those two pins went there.
Good time to check things again with the key and body. All good, okay. One pin to go.
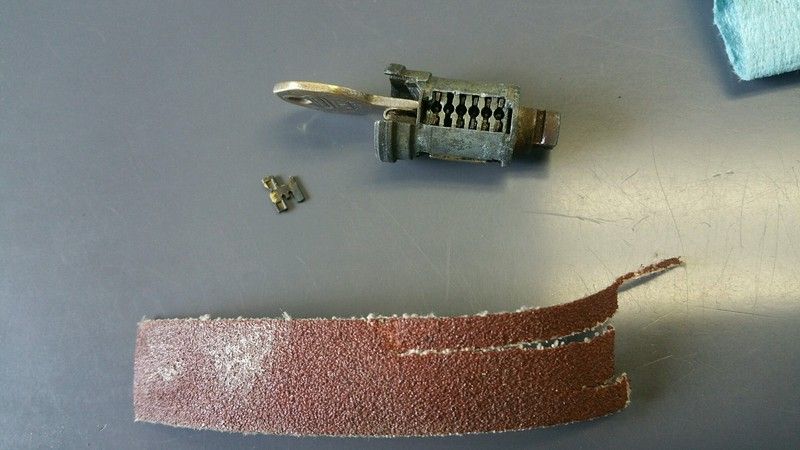
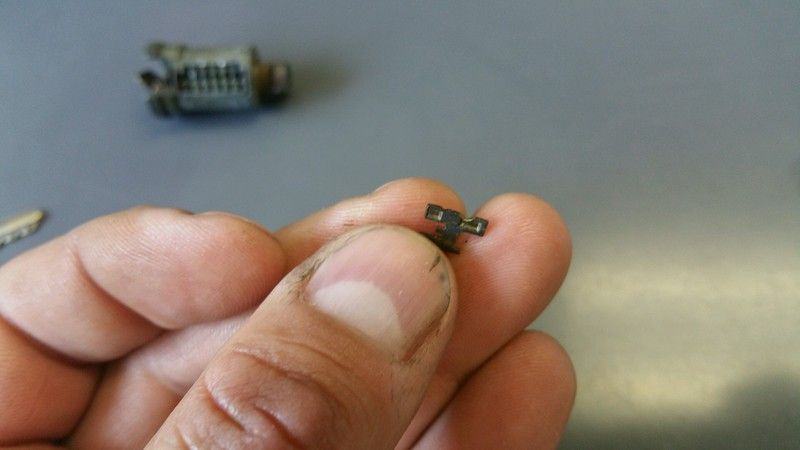
And there is the roadblock. Rats. That last pin does not have the height to match the key.
But it is the only one. I suppose at this point we could simply leave that pin out. The lock would still lock and unlock fine without it.
That would be the easy way out though. Soldiering onwards.
Maybe it will help someone here......as long as they are patient and like messing with tiny tedious pieces.
The '56 I recently acquired came without keys. I lucked out and discovered the original key to my '67 C10 truck fit the ignition. Awesome.
Turns out the car has '55 doors on it, and they apparently did not switch the locksets. Boo.
Not all is lost though. I've filed key blanks before to fit locks in old Volkswagen Beetles (my first and lasting passion), so I set off to see what I could do with the '67 key and the door lock cylinders.
First pull the locks out by sliding the clip near the latch and weatherstripping towards the rear of the car. My door panels were already off which makes it easier to see what is going on, but it can be done with the panels still in place.
This is what we will be working with.
CAREFULLY straighten the 4 ears for the stainless cover so the cover can be removed. Don't go overboard here, just move them barely enough so the cover will come off. Too much deforms the cover and makes it look bad later when reinstalled. Easy does it.
Under the cover is the disc with the key slot in it. There are two tiny springs behind this disc - DO NOT LOSE THEM. Use lots of caution as the disc is peened in, it pops off easily but those little springs might decide to go for an adventure. Be ready.
At this point I highly recommend taking a picture of how the lock looks assembled correctly. The U-shaped piece can go on two different ways, and you want to know which is correct when we reassemble this. A sharpie marker line on the whole thing will help with realignment as well.
Now turn to the back of the lock. The roughly U-shaped piece is held on with a very hard to remove clip. One lock I was able to tap this clip out and grab it with small vise-grips.
The second one would not budge by tapping, luckily there was enough to grab with the vise-grips. Holding the lock with a rag in one hand and vise-grips in the other (and a lot of theatrics, probably looked like a goat rodeo) it finally moved. 10 more minutes of this and the clip came off. Persistance and patience are key here.
By the way, that U-shaped piece is the only place I found any numbers. I assume this is the key code. With this you could simply have a locksmith make a new key and skip the rest of this nonsense.
But that would make sense. I carried onwards.
At this point, the tumbler will slide out of the lock body.
(Full disclosure - I liberally soaked these locks with PB Blaster for several hours before messing with them. Its messy but doing that and running the key in and out many times lets all the little bits loosen up. Very important for the next few steps.)
See that rusty metal strip? The six pins and six even more tiny springs are underneath it. Yeah, more springs. These won't fly out like the last ones, but they are very fragile. That cover pushes into the tumbler body on each end, what we need to do is GENTLY GENTLY slip a small screwdriver under the edge NEXT TO THE ENDS and pry up slightly.
Be super careful here. If you go gung-ho and shove the screwdriver all the way in you WILL bend the springs severely.
I got around this by just starting the pry job and stopping. Then use the gap created to fish the six springs out. Once they are out of the way go back with the screwdriver and pop the cover the rest of the way off.
And then spend a few minutes with a pair of pliers straightening the cover back to its original shape. Get as close as you can as it can stick up causing clearance issues later when reinstalling. More patience and persistance.
Here is a layout of everything I used. The little mint tin was a nice place to corral all those little pieces that like to escape during work like this.
Next remove the flat pins from the tumbler.
I bought a key blank uncut before I started this. Its a handy tool to help push those pins up and to work the PB Blaster in for soaking. Use a variety of techniques to get those pins to pop up enough to remove them. Some will fall right out, some will slide easily but not come without some careful persuasion.
The two different size paperclips with a small hook bent in one end are quite useful here. Just keep at it, they will eventually all cooperate.
This is what the pins look like. NOTICE the different tiny notches cut into the upper righthand tang in the one I am holding? THOSE notches are the code. They are in different "heights" in each pin.
Match them up. I had 3 of one height, 2 of another height, and one loner that was very close to the 2.
Now take a fresh sharpie marker and lay the key with the last notch against the tumbler body as it would be if the key were inserted. Make a mark on the key for EACH notch where the pins go.
Now get ready to think spatially. On the tumbler at 90 degrees to the pin slots is a brass bar that sticks out and is spring loaded. With the pins OUT the spring loading can be felt, with the pins in AND PUSHED DOWNWARDS TO THE BOTTOM OF THEIR BORES this bar is locked out. This is what keeps the tumbler from rotating in the lock body. Play with it a bit to get familiar with how it all works.
Apparently this bar has a ridge running lengthwise along the inner part of it. This long ridge accepts the notch cut into the pins, and when the pins are all at the correct height (from the different key bumps) the notches cut into the pins line up allowing the bar to recess by its spring force.
Yes, more springs. But we don't have to worry about these. No need to go there.
I can't take a picture of this part......its all in your mind. Take the pins with the cut notch closest to the middle of the pin and align them with the tallest bumps on the key. Drop them in the corresponding pin holes in the tumbler.
I worked my way pin by pin. In my case, the first and last pin matched, and there was one near the middle that matched as well. Those got the 3 pins that matched in my case.
This is a good time to check things. Put the key in and put the tumbler in the body. It should turn easily. Take the tumbler, key, and body back apart.
Then I took the two pins that matched, and found that of the 3 bumps left on the key 2 of them were the same hieght. Those two pins went there.
Good time to check things again with the key and body. All good, okay. One pin to go.
And there is the roadblock. Rats. That last pin does not have the height to match the key.
But it is the only one. I suppose at this point we could simply leave that pin out. The lock would still lock and unlock fine without it.
That would be the easy way out though. Soldiering onwards.
Comment