 Tweet
Tweet
That's where the windshield leaks end up.
-
BS'er formally known as Rebeldryver
Resident Instigator
sigpic -
I got a before test on the handling of the Impala today. On the way back from Morro Bay on CC's Anti Tour, I followed McGann's P71 Crown Vic off Hwy 101 and into the canyons between the Valley and Malibu. McG's CV has gotten lowered on custom springs and shocks, and sits on widened 17 cop car wheels and 40 series rubber. My car still runs Energy Suspension poly bushings, old KYB shocks, stock springs, and old, hard BFG's. Decker Rd, aka state route 23 got real noisy.
At first I thought the quiet John would take it easy, WRONG!. He hammered it and I had to play catch up. It didn't take long, but I did catch up. Then I stayed on his ass. The BFG's were howling, brakes were heating, and engine revving. The trunk had 200 lbs of tools and shit, the cooler sliding around behind the front passenger seat and my heavy backpack riding happily in the passenger side Scat Procar bucket. Those did great to keep me planted, the hydroboost did great.
The long grade down to the PCH really worked the brakes and I had little left when got to the stop sign at the PCH. They were definitely hot, smelly and not happy.BS'er formally known as Rebeldryver
Resident Instigator
sigpicComment
-
Sounds like a great time !Comment
-
Control arms are in, finally. YAY!! I will be ripping into the suspension as soon as the Caprice is up and running again.BS'er formally known as Rebeldryver
Resident Instigator
sigpicComment
-
Sweet!There's always something new to learn.Comment
-
I've been putting this off for some time. I had some repairs to do on my other car and lack of time. Although, I had planned to upgrade the suspension at Sire Custom Performance because I was planning on some fabricating. But, Yannick has been busy and I wasn't going to have my take up space that could be used for paying customers. So, I decided to the majority of the work right in my own driveway.
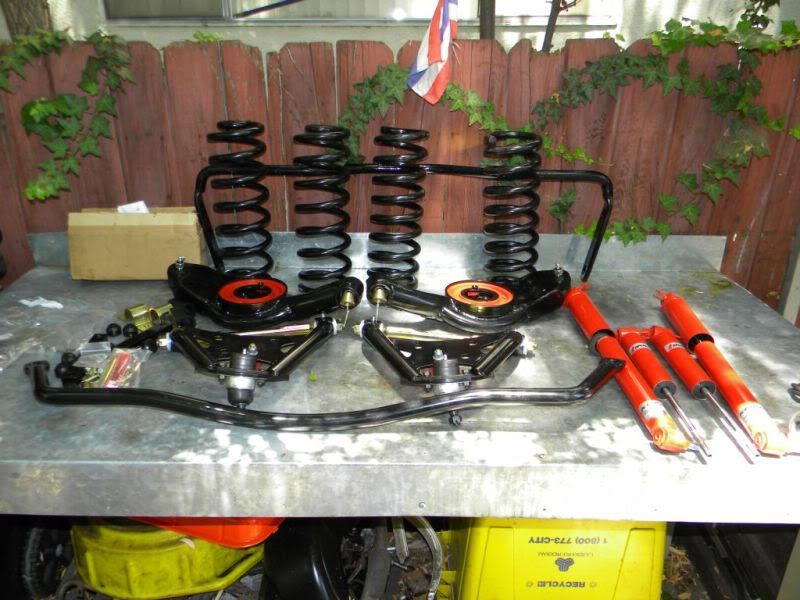
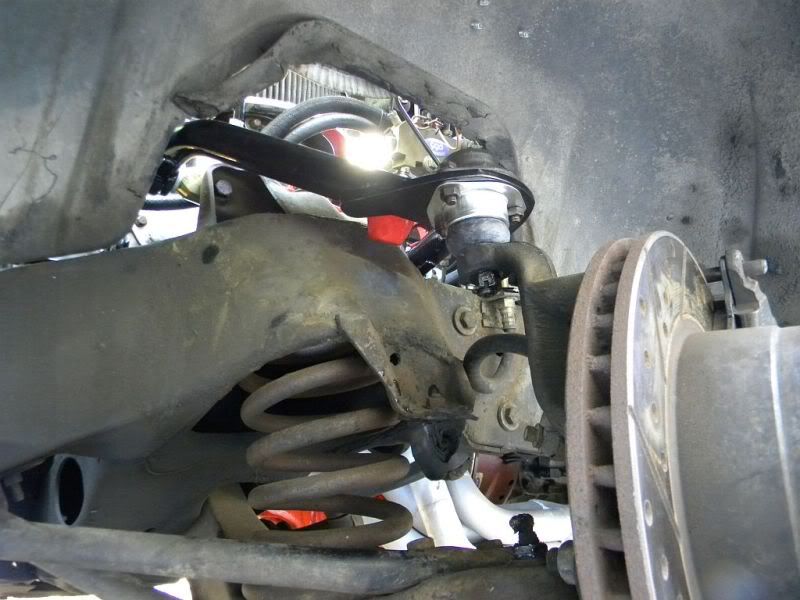
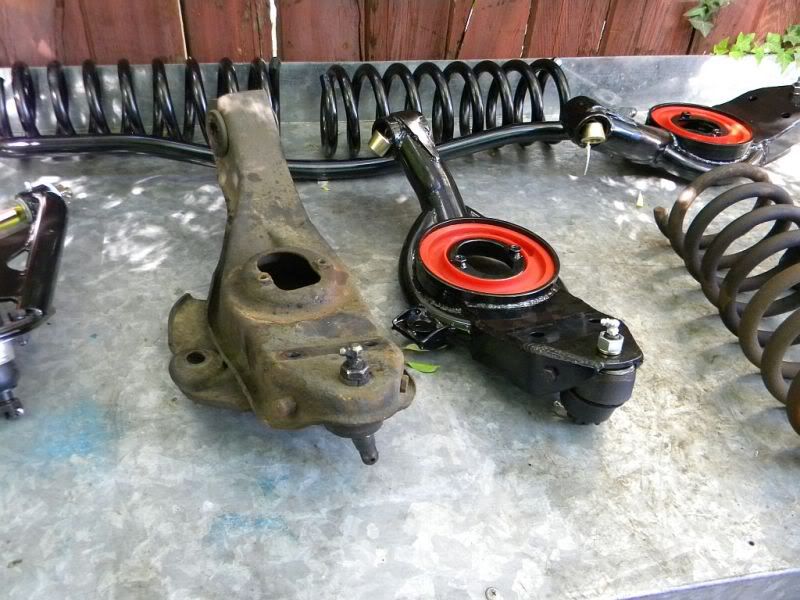
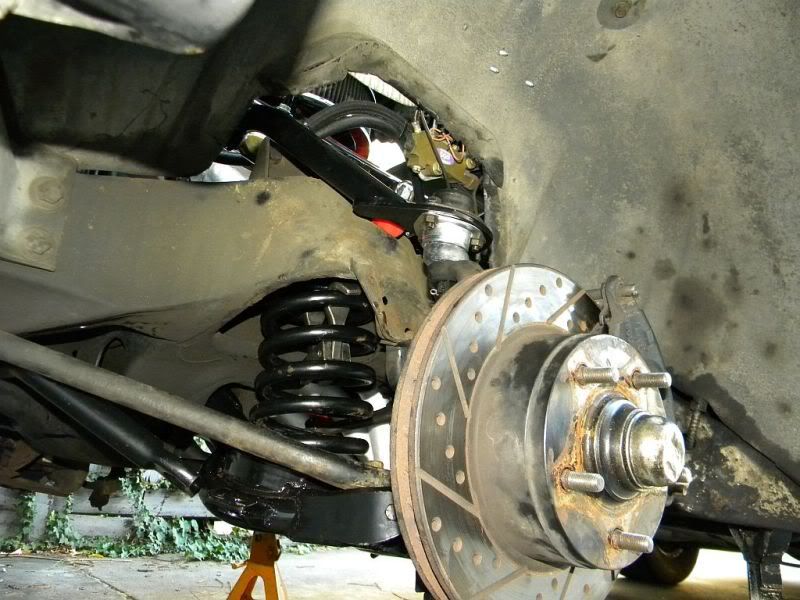
I always loved and was envious of those magazine articles where they take a picture of the car with all the goodies they are about install. Since my car is filthy from sitting untouched for six weeks, I decided just to take a pic of the goodies. The A arms came from Classic Performance Products, the coils from Performance Online, the front sway bar is from POL as well, the rear sway bar is from UMI, and the shocks are Koni adjustables. They were the most expensive.
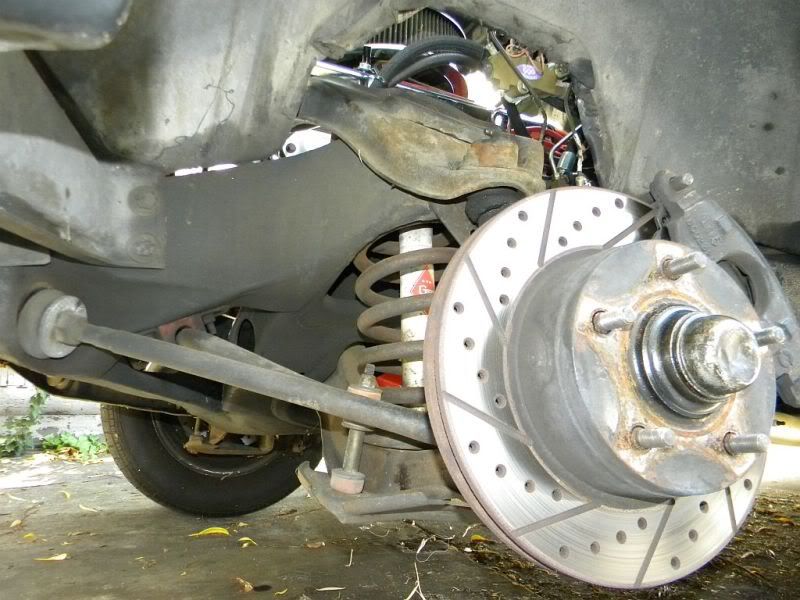
This is what I've been driving since Febuary '99. Energy Suspension poly bushings in the A arms and strut rods; and KYB Gas-A-Just shocks on what is otherwise stock suspension. I did cut 1 1/2 coils out of the original front springs and added CPP disc brakes up front.
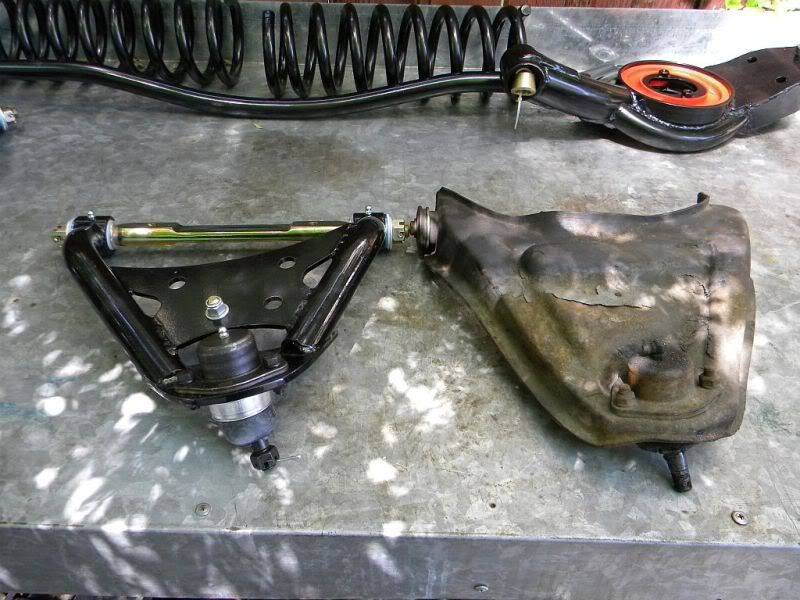
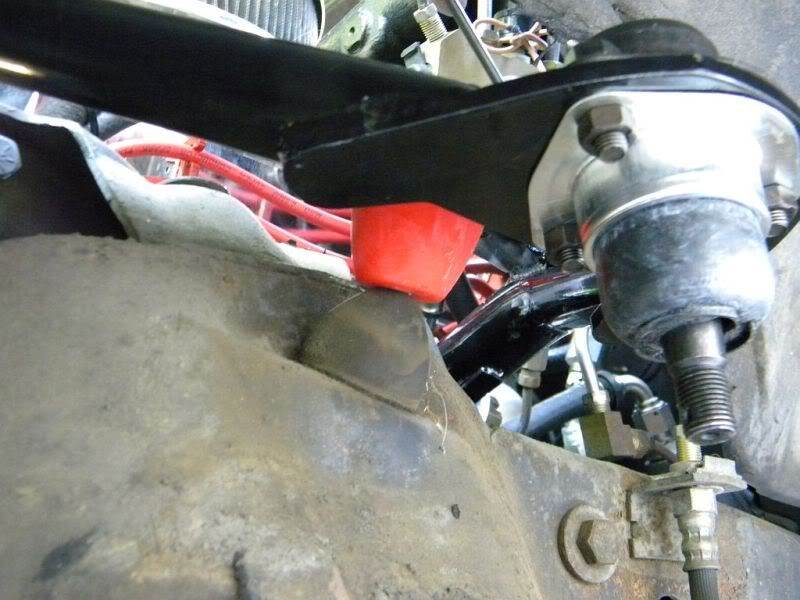
The first thing to do is unbolt the sway bar end links; then I decided to hang the upper A arm first. That way I wouldn't have the spindle/brake dangling there. It worked pretty good. Compare the old and the new. These are so stupidily cheap these days that modifying the originals wasn't worth the time. CPP adds Del-a-lum bushings and a new ball joint.
After getting the A arm hung I noticed that new A arm came with a snubber to keep it from bottoming out on the frame. The old snubber got yanked and tossed.
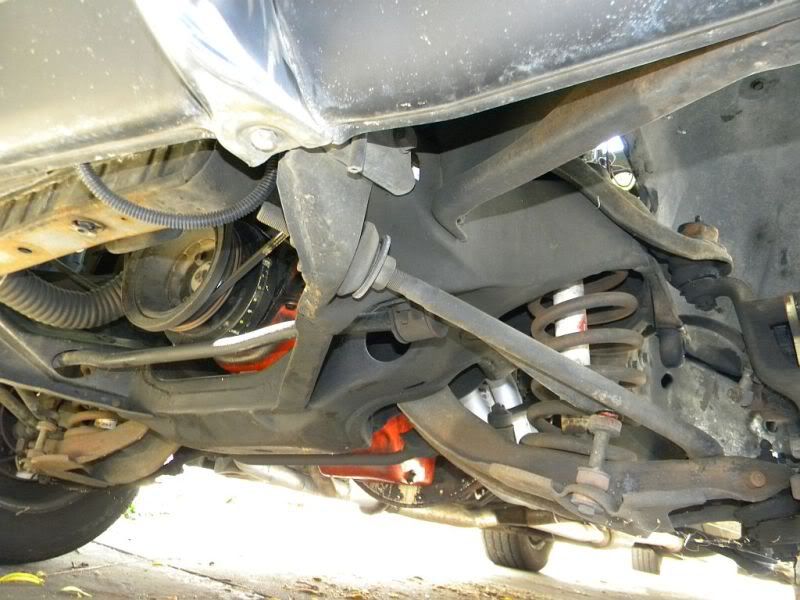
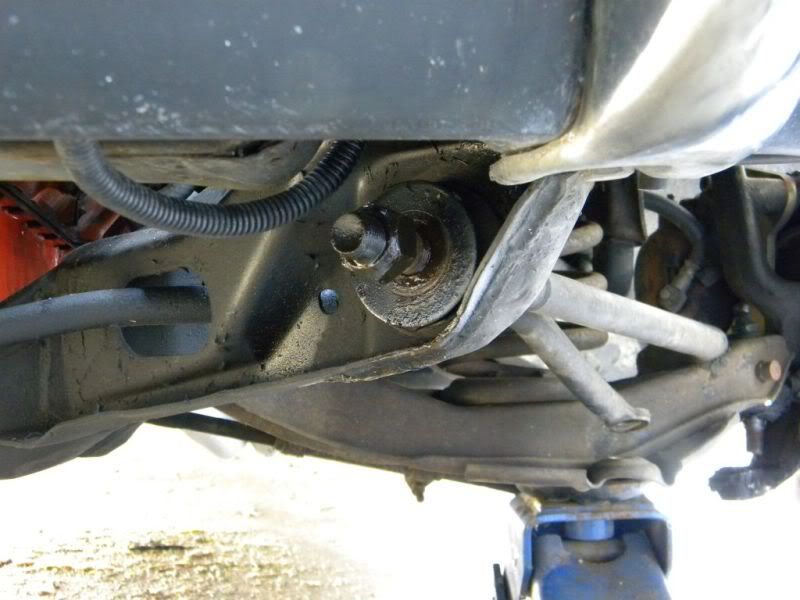
Before yanking the lower arm, I loosened the big nut on the end of the strut rod first. Then I unbolted it's other end from the lower A arm.
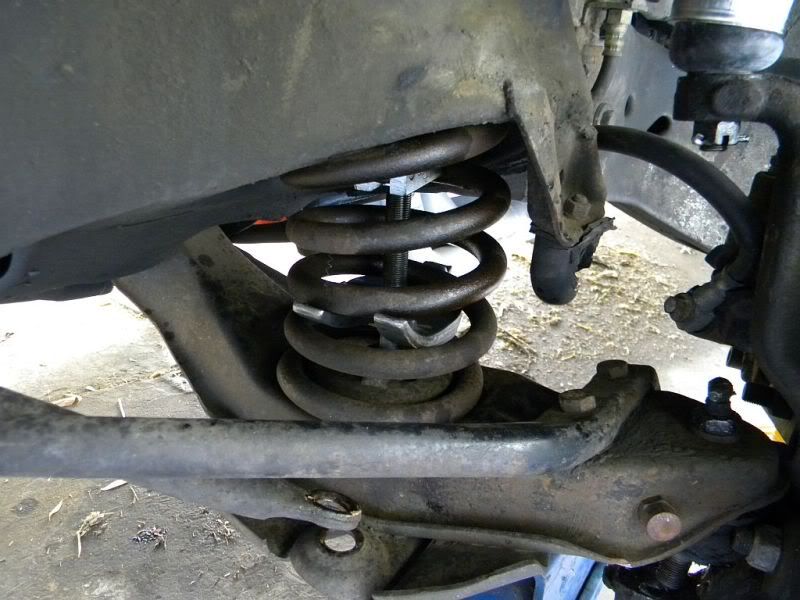
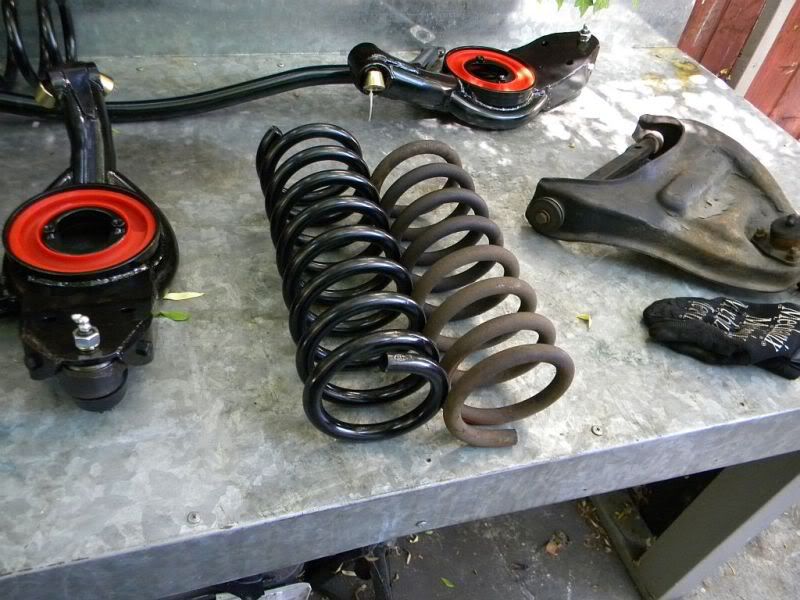
I rented a coil spring compressor from Autozone. I have to say I've never had an issue with their rental tools. Once I knocked the lower ball joint loose the coil just fell out.
Compare the stock lower arm with the new one. Talk about beefy. The new one also weighs twice as much. These have solid type bushings, new ball joints, and a spring pad.
The POL coils are 1 1/2" dropped and much thicker than the stockers.
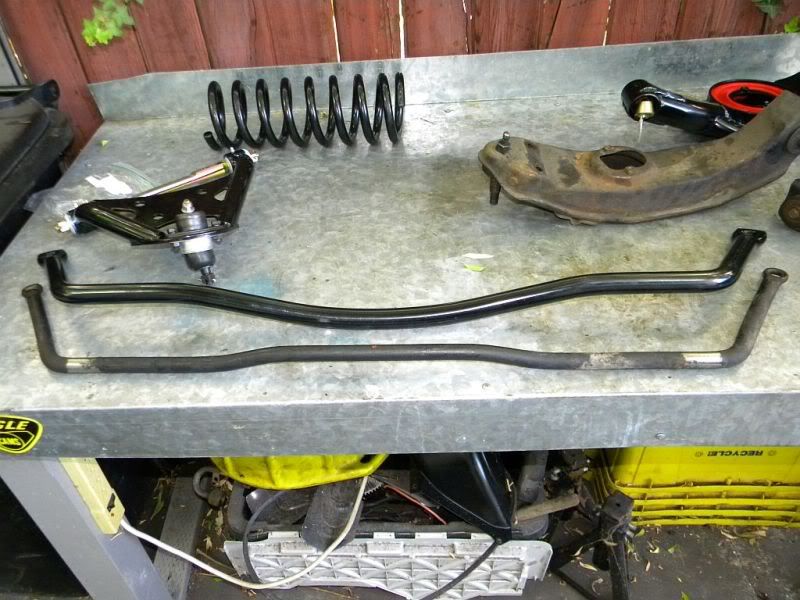
Compare the new front sway bar to the old one and the old looks like a #2 pencil. When it comes to front sway bars, the solid ones are the best. There are thicker ones out there but they all hollow tube. This damn thing weighs 30 lbs. Should help keep the nose flat in the turns.
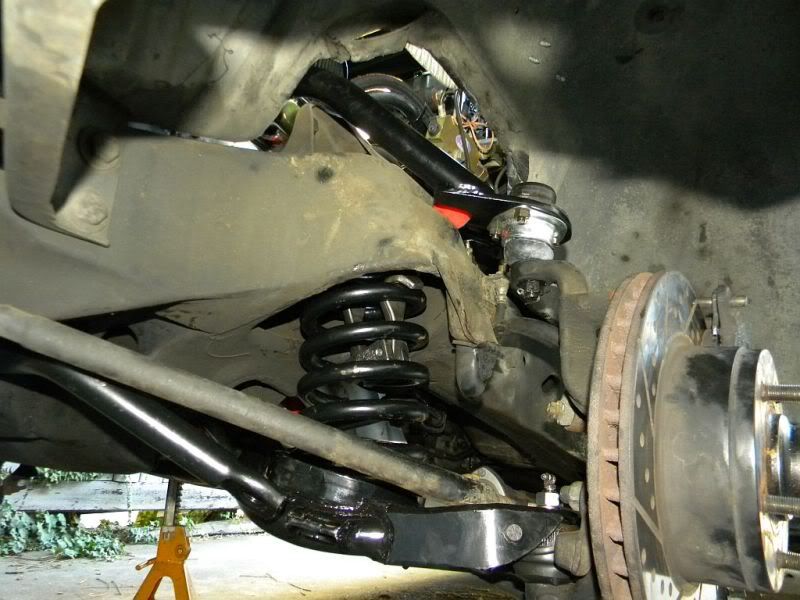
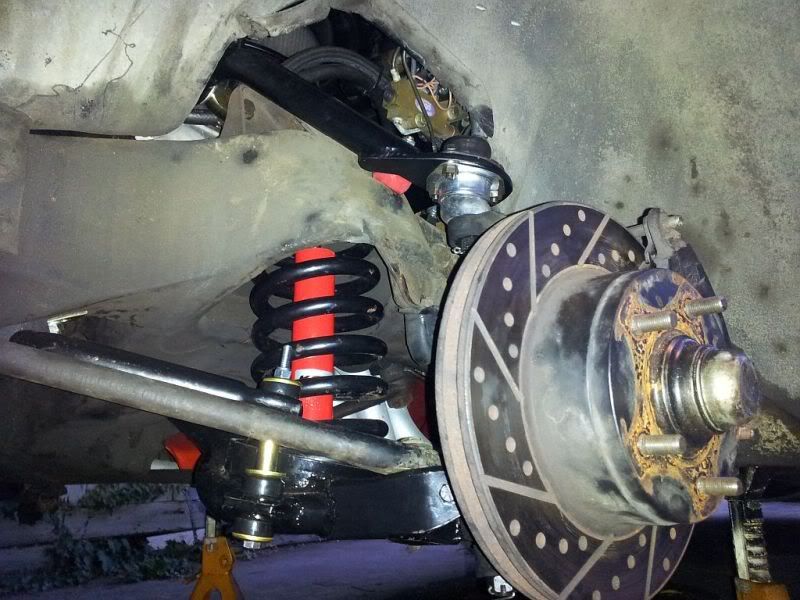
This is where I stopped tonight. Just the left side done.....well...almost done. Look closely and you'll see part of the spring compressor tool still in the coil. That's because the hole in the lower A arm is too small. I will have to do some grinding to get it out. So much for the powder coating.
More to come.....Last edited by Scott Liggett; July 1, 2012, 08:13 PM.BS'er formally known as Rebeldryver
Resident Instigator
sigpicComment
-
Nearly got everything up front finished today. Just have to grease the fittings and put the tires back on. I'm also going to fix the rubber brake line on side. It's a bit twisted. I set the Koni's on back breaker to start. Hell, this is a heavy car.
 Last edited by Scott Liggett; July 2, 2012, 11:57 PM.BS'er formally known as Rebeldryver
Resident Instigator
sigpicComment
-
If they are anything like the adjustable KYB's I put on my '99 Camaro you'll be softening them up big time...... I have 8 positions I figured I'd start at 7, ended up at 4 and even that seems a bit stiff, but I'm good with it there.....Originally posted by Scott Liggett View Post
And looks good!!!!!!!Last edited by TC; July 3, 2012, 12:24 AM.Comment
-
We'll see. I won't put up with an annoying ride. It's not a big deal to remove and adjust them if I have to for track days.BS'er formally known as Rebeldryver
Resident Instigator
sigpicComment
-
track days in an Impala, that's just so awesomeDoing it all wrong since 1966Comment
-
There has got to be something beside Camaro's out there.Originally posted by SuperBuickGuy View PostBS'er formally known as Rebeldryver
Resident Instigator
sigpicComment
-
that's what makes it so awesome Doing it all wrong since 1966
Comment
-
You are doing a major upgrade here..looks good ScottOriginally posted by Scott Liggett View Post.I have always adjusted the front shocks to nearly full throttle,and the rear ones in the middle.
Comment
-
I got the car back on it's tires tonight. The stance with the new stuff went from raked to......um.....gasser. Yep, it's nose is sky high right now even though the front tires are four sizes smaller than the rears. These were supposed to be 1 1/2" lowered, but they look stock height. Oh yeah, the right front spring is seated in the pocket at the top.
We'll see how it looks after I do the rear stuff.BS'er formally known as Rebeldryver
Resident Instigator
sigpicComment
-
It took 5" of drop to get my front down to where it is on the SkylarkDoing it all wrong since 1966Comment
Comment