 Tweet
Tweet
Re: Rebel(Dryver)'s Machines
Through my research I discovered I had something backwards on my A833 trans. It was the reverse linkage. On the shifter, I had to go left and back to get it into reverse. Now, this is correct for those old pick up SM465 iron, granny first trannys, but not for this one. I also had to do some mods to the linkage in order to get it to work with the Hurst Indy shifter I'm using. The GM version of this uses a specific shifter and linkage. So, I decided to try to remedy this situation even though everything was functioning just fine. That's perfect gear head thinking, right?
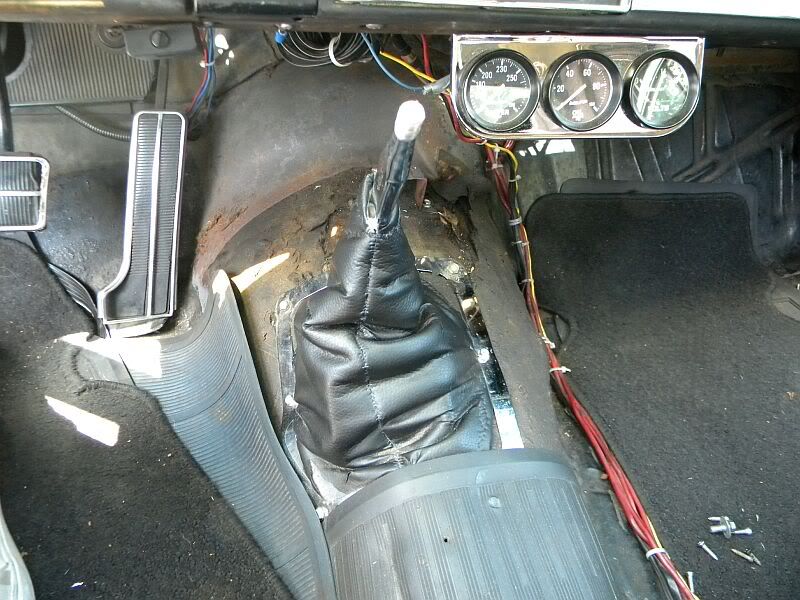
The first thing to do to fix what isn't broke is to remove the console to get to the shifter.

Another thing I was going to fix was my home made shifter boot. My first design created a round base, but the hole in the floor is square. It was like shoving a round peg into a square hole. This boot will find the circular file.
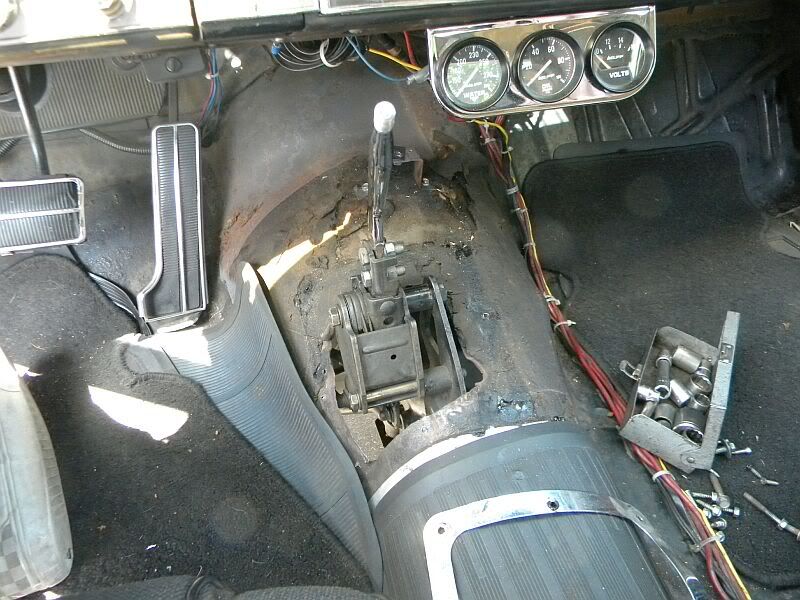
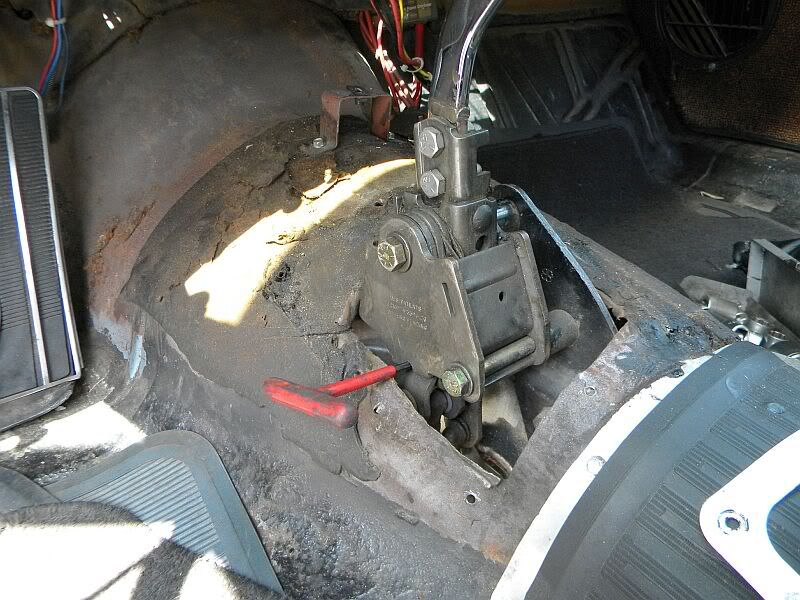
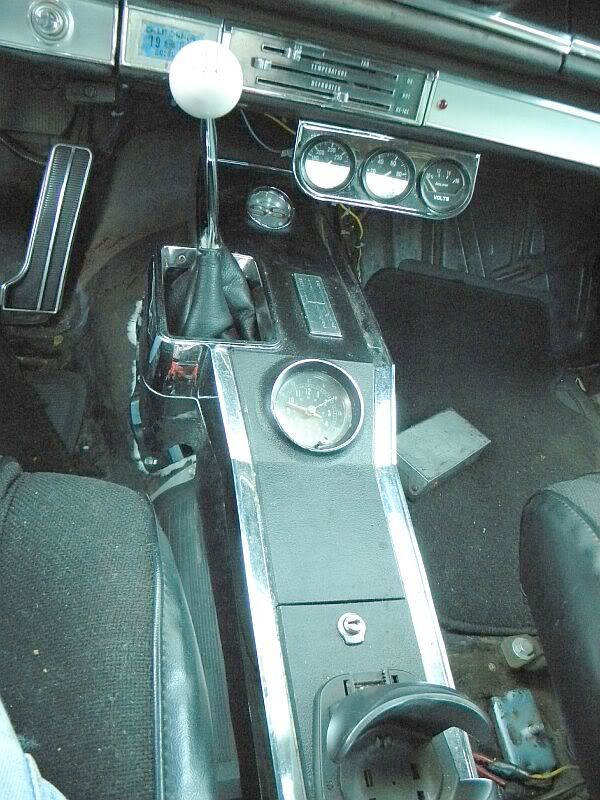
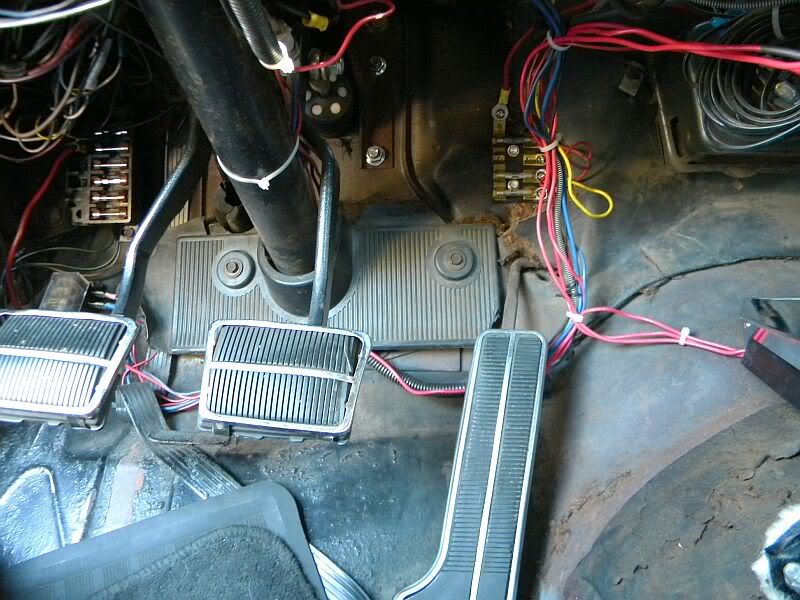
You can see how much this truck tranny's shifter is above the floorboard in my car. Also, seen in this pic is the one inch spacers I made to make room for the linkage rods below.
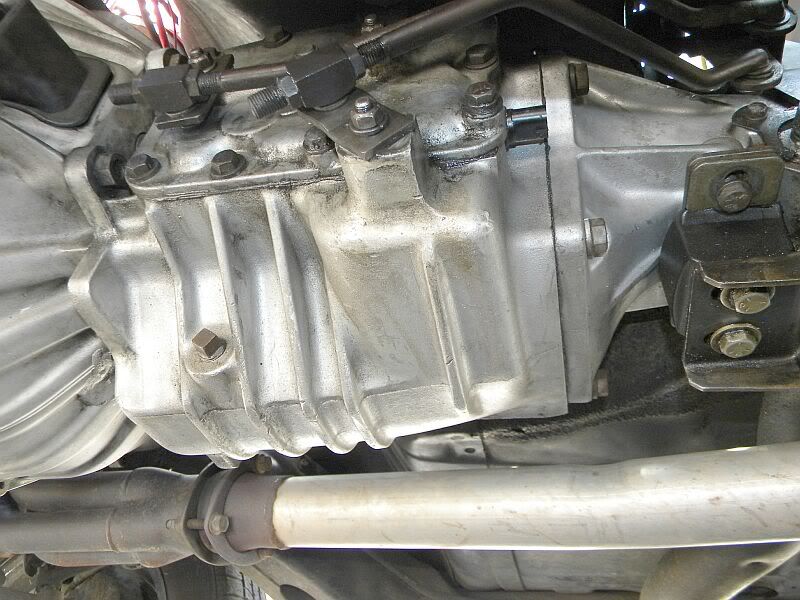
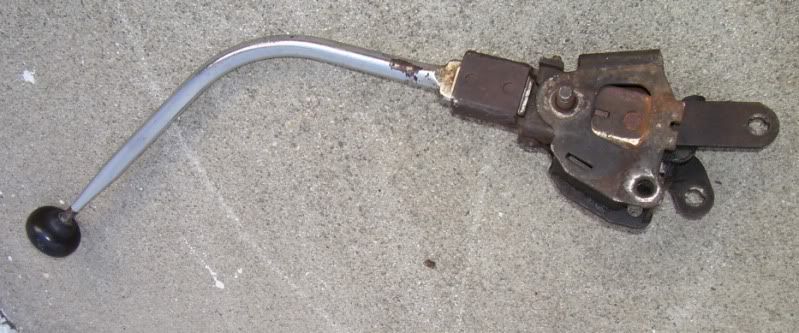
You can see that the rear gear lever is facing down. It' supposed to be facing up. Some of the experienced Mopar guys might also catch the 3-4 lever is upside down too. On the OD versions of the A833OD, they are reversed inside. 3rd gear is 1:1 where fourth is 1:1 on the other trans.
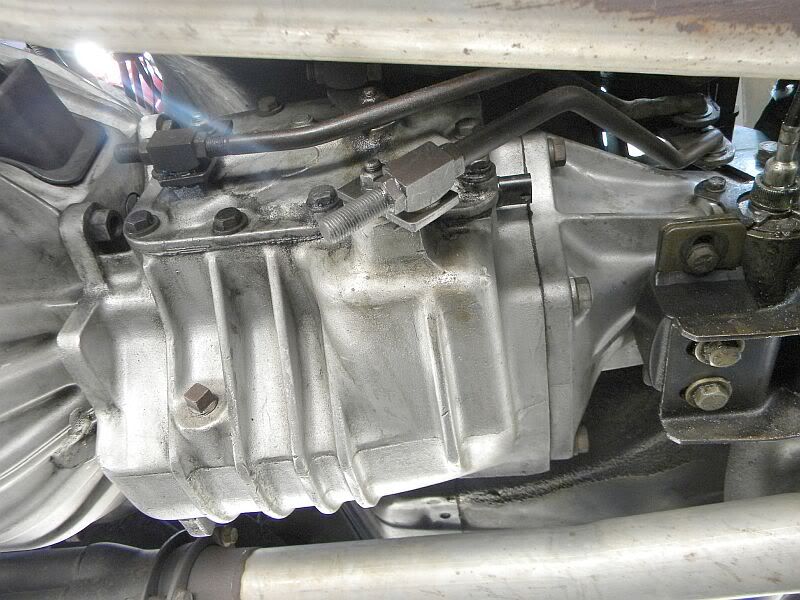
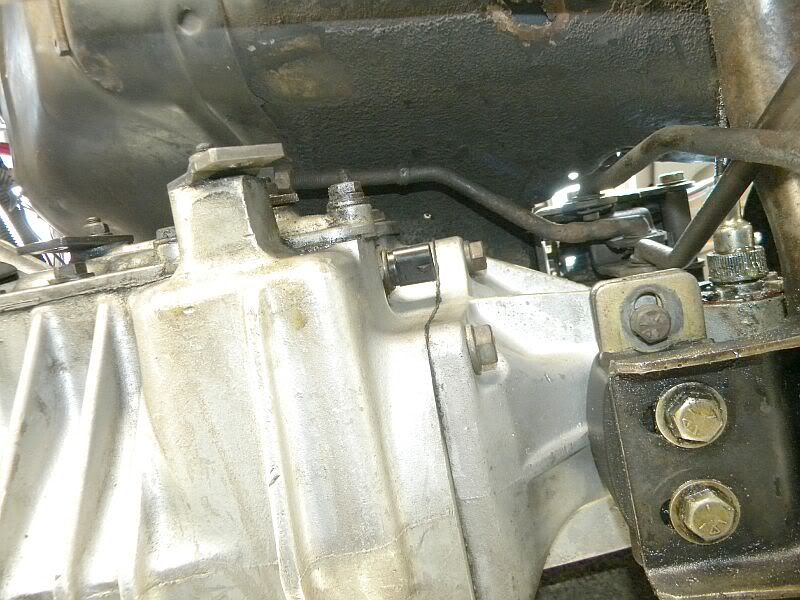
Look closely at the 1-2 linkage rod and you will see where I had it modified. I moved the Z portion back in order for it to clear the trans case.
After disconnected the linkage rods from the levers on the trans, you have to line up the levers on the shifter. There is a hole that goes through all of them that you run a rod through; or in my case, I used a T type allen wrench.
After making sure all the lever rods are in nuetral on the trans, you then connect and adjust the lengths of the linkage rods. It's very easy until you try to reinstall those damned spring clips. They go flying everywhere.
After taking the car for a spin to see if I got it right this time, which I did, I moved on the more girly type of work. Sewing. Oh yeah, the car is insanely loud inside with no boot over the shifter hole. Windy too.
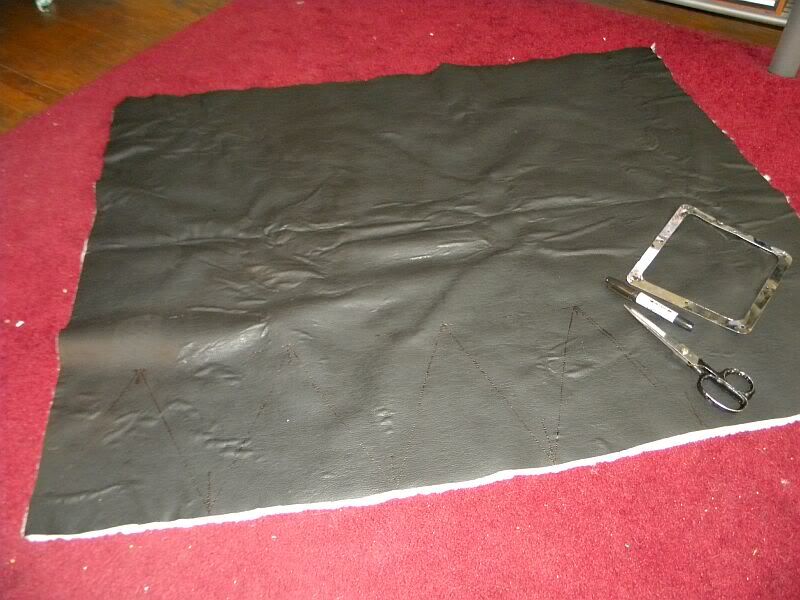
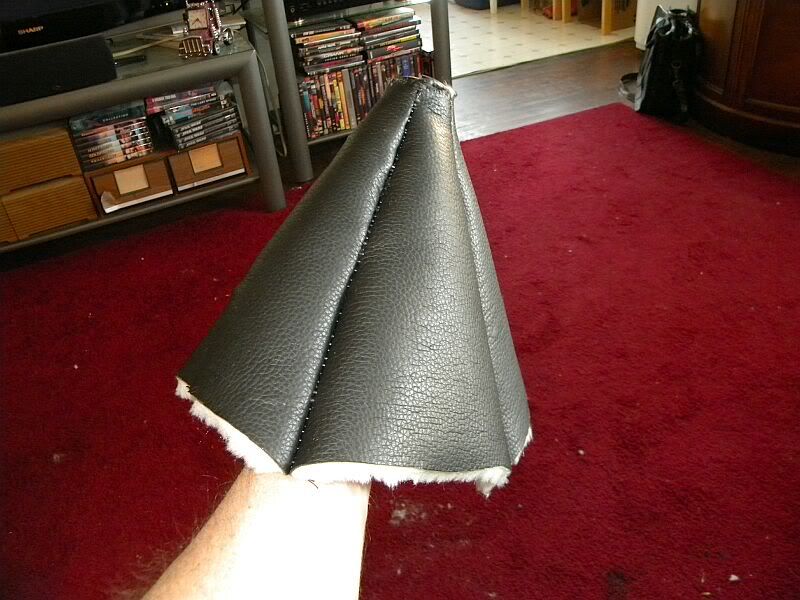
I had plenty of the material left over from making my first boot . I laid it out on the floor and using the boot trim plate as a template I drew out four triangular portions for a four sided boot. The back of this vinyl is covered in an acrylic that's like cheap, fuzzy version of sheep's skin wool, but it will keep the heat and noise out of the interior of the car.
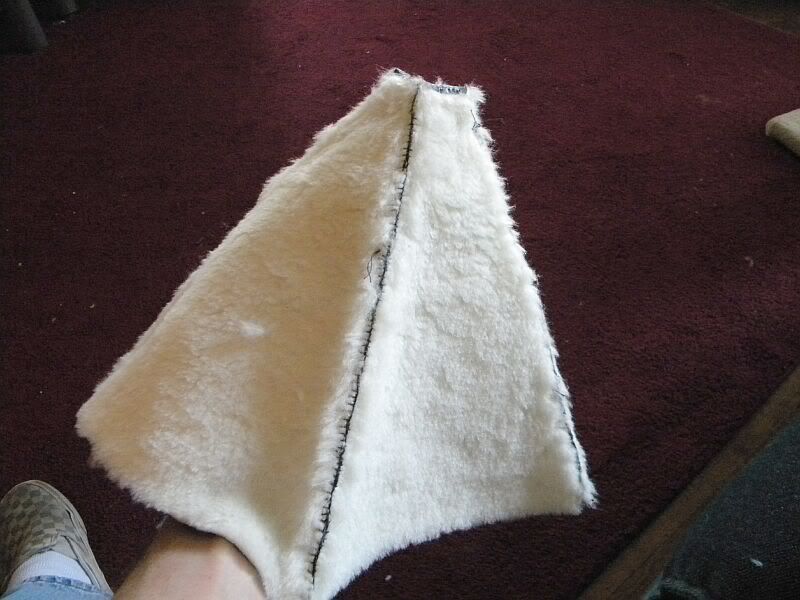
Yes, I can sew by hand. In 7th grade they made us take 6 weeks of different elective classes that also included woodshop, metal shop, cooking, and choir; as well as home economics which included sewing a pillow. I only learned two types of stitches, but the one I used here is nice and strong. It's pretty quick going once you get the hang of it. I finished this in just over 2 hours.
I used a leather punch to knock out holes for the screws to go through. That way it won't pull out from under the trim plate. Here it is installed.
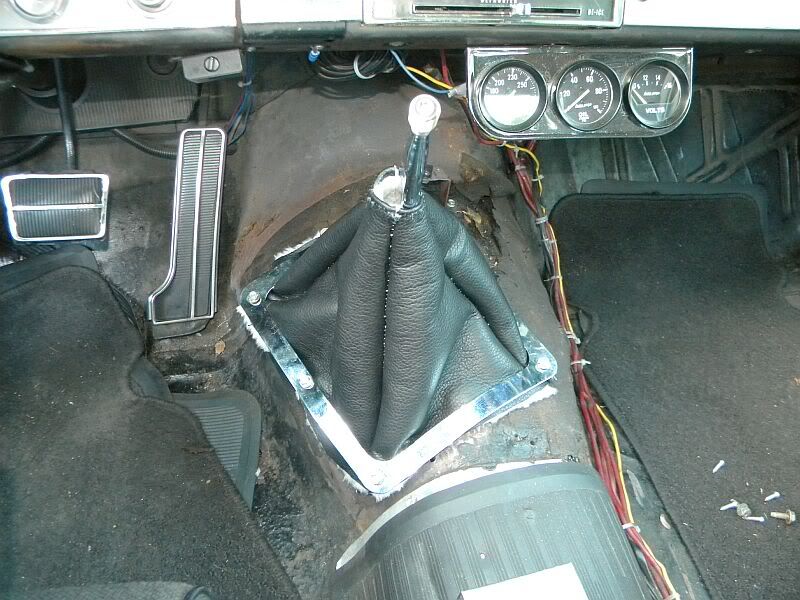
And, finally, reinstalling the console over it. Now, I need a new shifter ball as mine now has the incorrect shifter pattern. More money, more money.......
Through my research I discovered I had something backwards on my A833 trans. It was the reverse linkage. On the shifter, I had to go left and back to get it into reverse. Now, this is correct for those old pick up SM465 iron, granny first trannys, but not for this one. I also had to do some mods to the linkage in order to get it to work with the Hurst Indy shifter I'm using. The GM version of this uses a specific shifter and linkage. So, I decided to try to remedy this situation even though everything was functioning just fine. That's perfect gear head thinking, right?
The first thing to do to fix what isn't broke is to remove the console to get to the shifter.
Another thing I was going to fix was my home made shifter boot. My first design created a round base, but the hole in the floor is square. It was like shoving a round peg into a square hole. This boot will find the circular file.
You can see how much this truck tranny's shifter is above the floorboard in my car. Also, seen in this pic is the one inch spacers I made to make room for the linkage rods below.
You can see that the rear gear lever is facing down. It' supposed to be facing up. Some of the experienced Mopar guys might also catch the 3-4 lever is upside down too. On the OD versions of the A833OD, they are reversed inside. 3rd gear is 1:1 where fourth is 1:1 on the other trans.
Look closely at the 1-2 linkage rod and you will see where I had it modified. I moved the Z portion back in order for it to clear the trans case.
After disconnected the linkage rods from the levers on the trans, you have to line up the levers on the shifter. There is a hole that goes through all of them that you run a rod through; or in my case, I used a T type allen wrench.
After making sure all the lever rods are in nuetral on the trans, you then connect and adjust the lengths of the linkage rods. It's very easy until you try to reinstall those damned spring clips. They go flying everywhere.
After taking the car for a spin to see if I got it right this time, which I did, I moved on the more girly type of work. Sewing. Oh yeah, the car is insanely loud inside with no boot over the shifter hole. Windy too.
I had plenty of the material left over from making my first boot . I laid it out on the floor and using the boot trim plate as a template I drew out four triangular portions for a four sided boot. The back of this vinyl is covered in an acrylic that's like cheap, fuzzy version of sheep's skin wool, but it will keep the heat and noise out of the interior of the car.
Yes, I can sew by hand. In 7th grade they made us take 6 weeks of different elective classes that also included woodshop, metal shop, cooking, and choir; as well as home economics which included sewing a pillow. I only learned two types of stitches, but the one I used here is nice and strong. It's pretty quick going once you get the hang of it. I finished this in just over 2 hours.
I used a leather punch to knock out holes for the screws to go through. That way it won't pull out from under the trim plate. Here it is installed.
And, finally, reinstalling the console over it. Now, I need a new shifter ball as mine now has the incorrect shifter pattern. More money, more money.......


Comment