 Tweet
Tweet
and it bends metal and whistles Doug and Bob MacKenzie tunes while doing it
-
Doing it all wrong since 1966 -
so you put rats in a beer bottle with it?Flying south, with a flock of bird dogs.Comment
-
I thought that was Laverne and ShirleyOriginally posted by Beagle View PostDoing it all wrong since 1966Comment
-
. .
Flying south, with a flock of bird dogs.
.
Flying south, with a flock of bird dogs.Comment
-
I could use it to put rats in beer bottles....
I can't believe how giddy I was when I got this thing going.... it was a lot of workDoing it all wrong since 1966Comment
-
Am I the only one that is a complete nerd and thinks this is one of the best threads on our forum?"A cross thread is better than a lock washer." Earl Lanning...My GrandpaComment
-
for fathers day got the craftsman impact set with the lithium batteries 19.2 volt....... This thing is so sweetThat steely eyed look I had behind the wheel was me trying see..........Comment
-
Originally posted by SuperBuickGuy View Post
this is coming back to the forefront... as Loren well knows, dies are the expensive part of any press brake. I found some, hopefully we can make a deal, but the seller is becoming an irritant....
Doing it all wrong since 1966Comment
-
the best tools are free tools
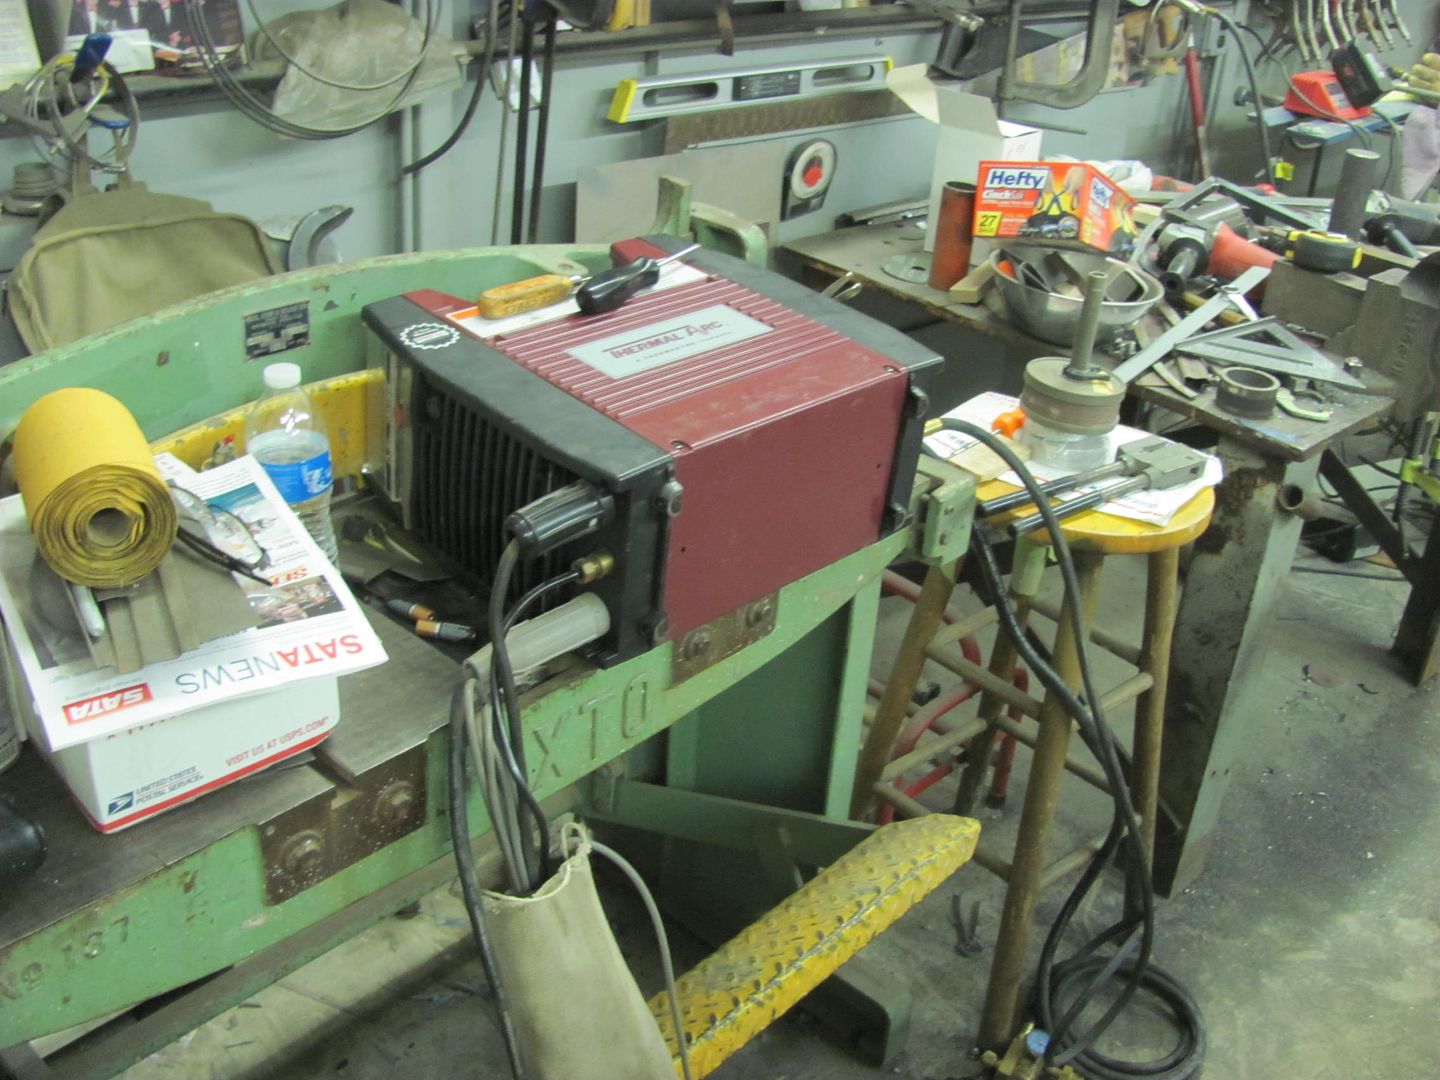
Laser welder

failure press

cooling machine

yes, a frickin laser... I have absolutely no idea what I'm going to do with the laser, but the press has strain gauge sensors in them for up to 30 tons - and I've always wanted a vehicle weighing system....
the cooler goes back to the idea I have about air conditioning the dog space. This machine produces -30 degree temps while only draining 6 amps at 115v or 2 amps at 230v.... I'm thinking of literally freezing the pad under the dog's space and using that resulting large block of ice to keep her cool.Doing it all wrong since 1966Comment
-
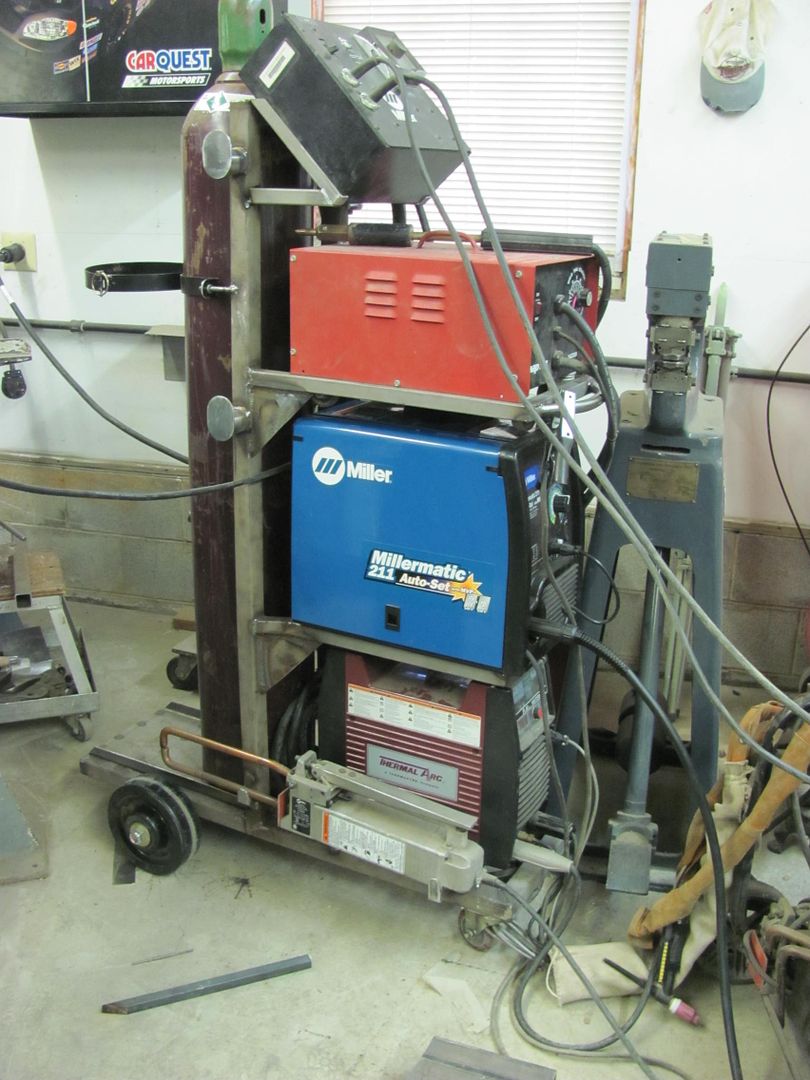
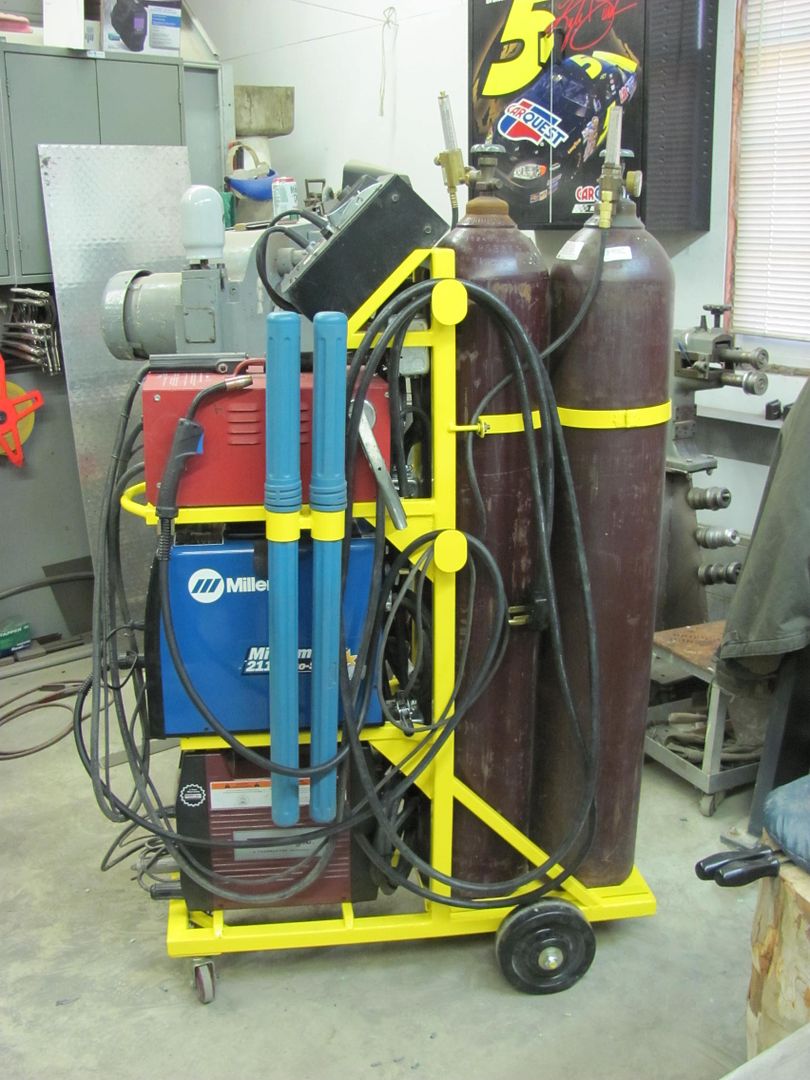
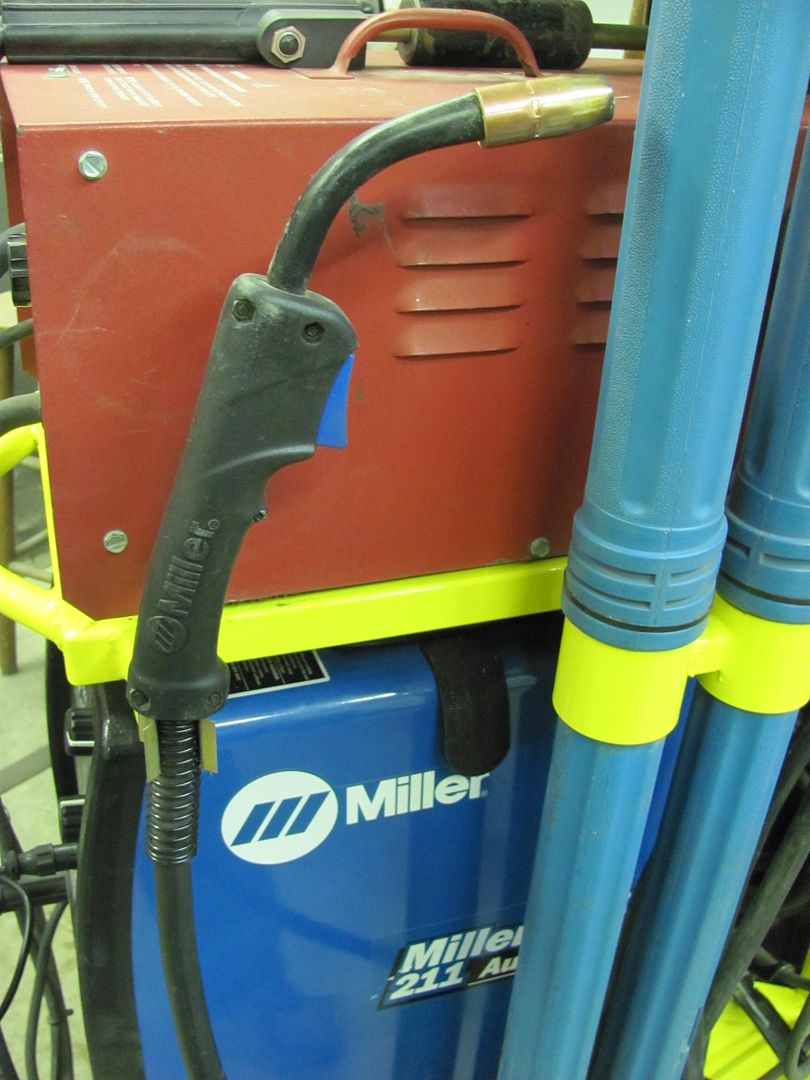
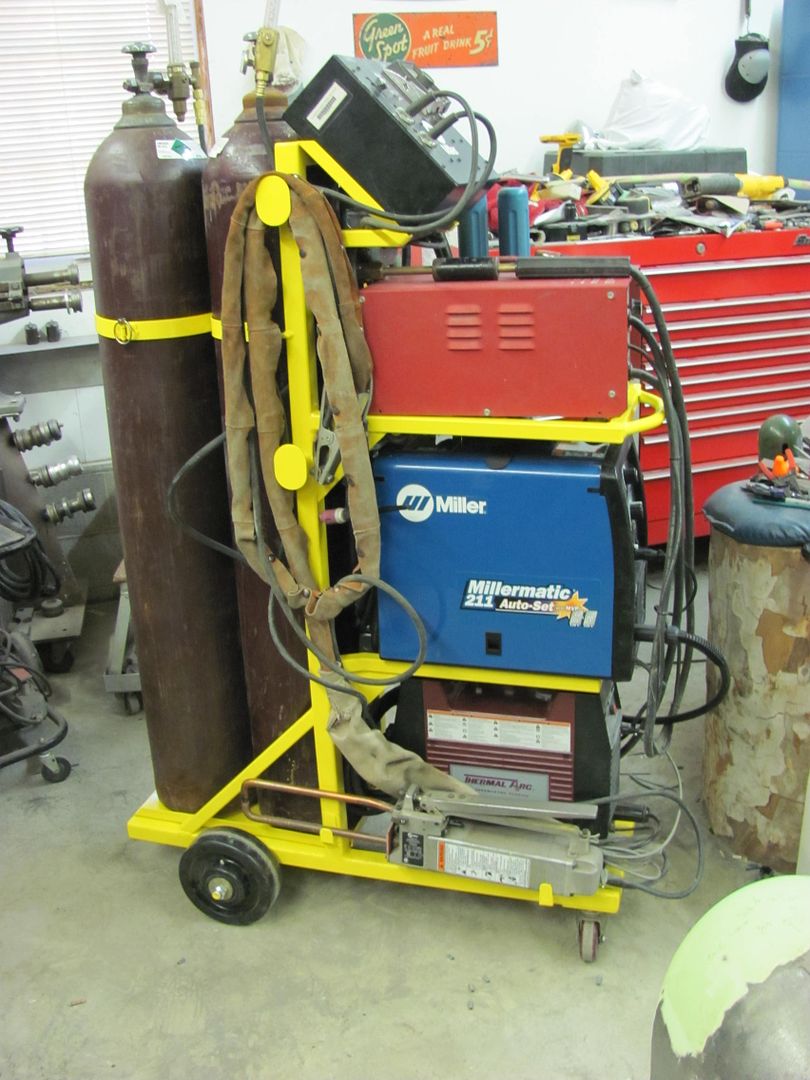
I recently sold my Dinosaur Mig, after owning since '91 I thought it was time for a new one..
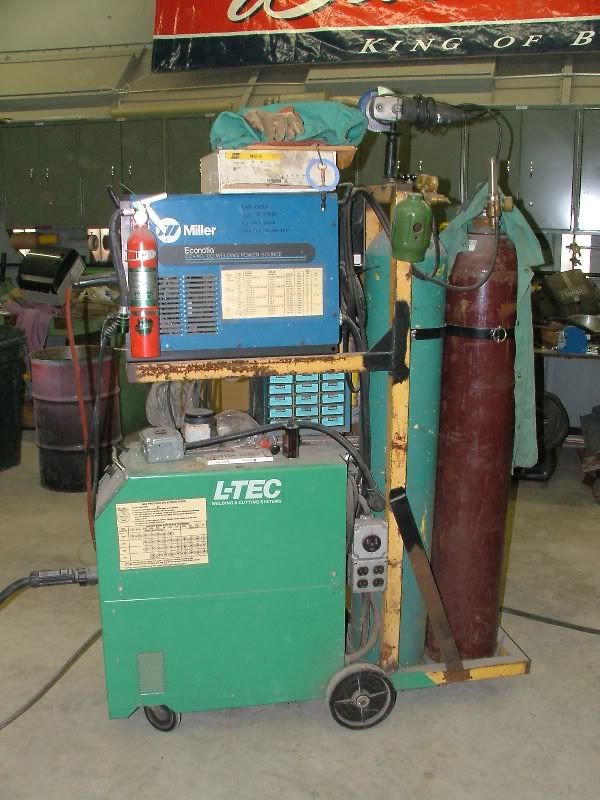
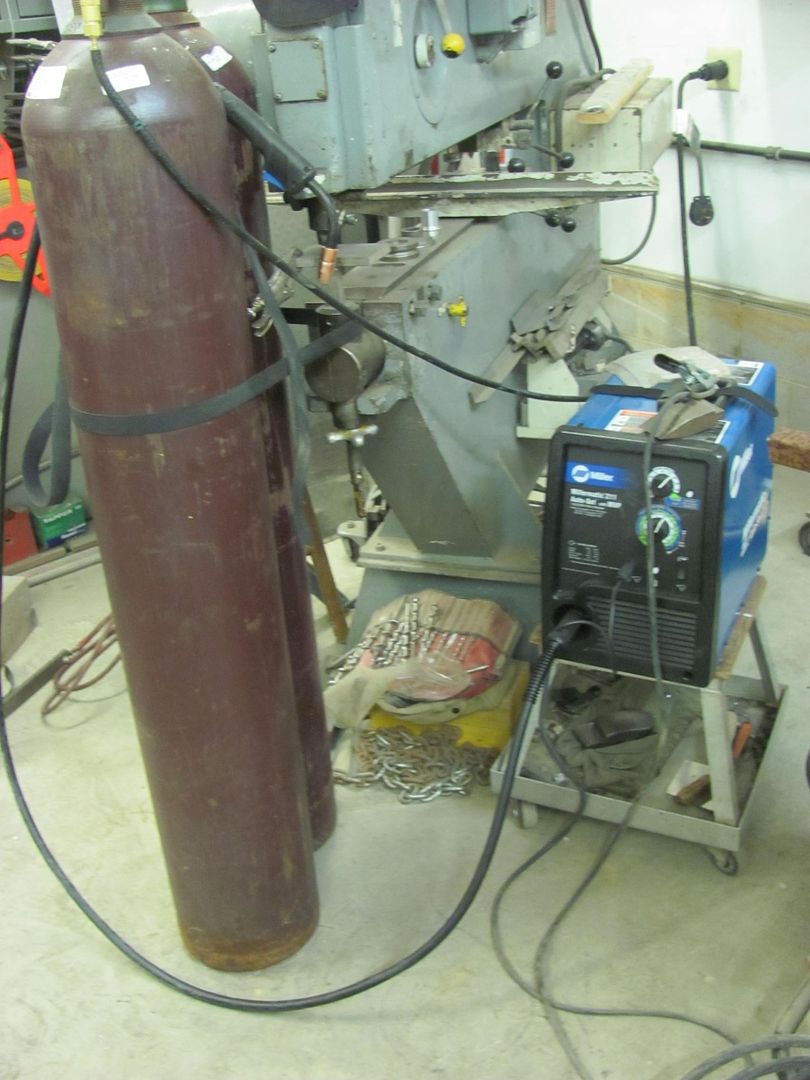
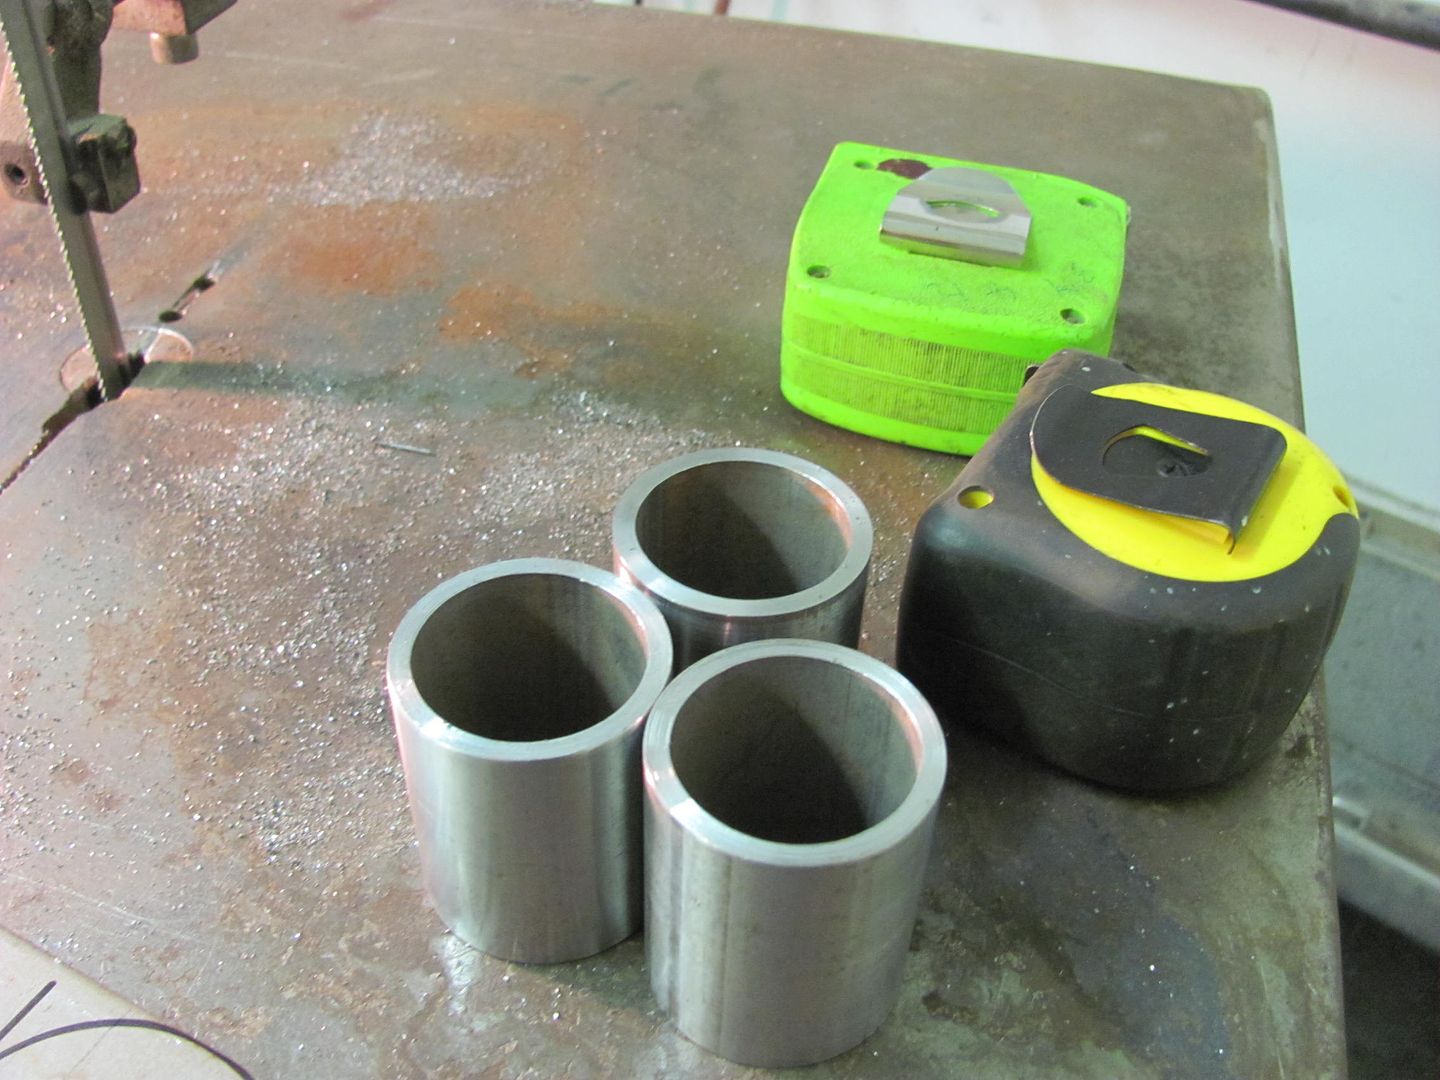
Sold it on CL, time now to consolidate. My shop space is limited, and I need to incorporate the Miller 211, the Hypertherm Tig, and the Snap On dent puller, and two bottles:
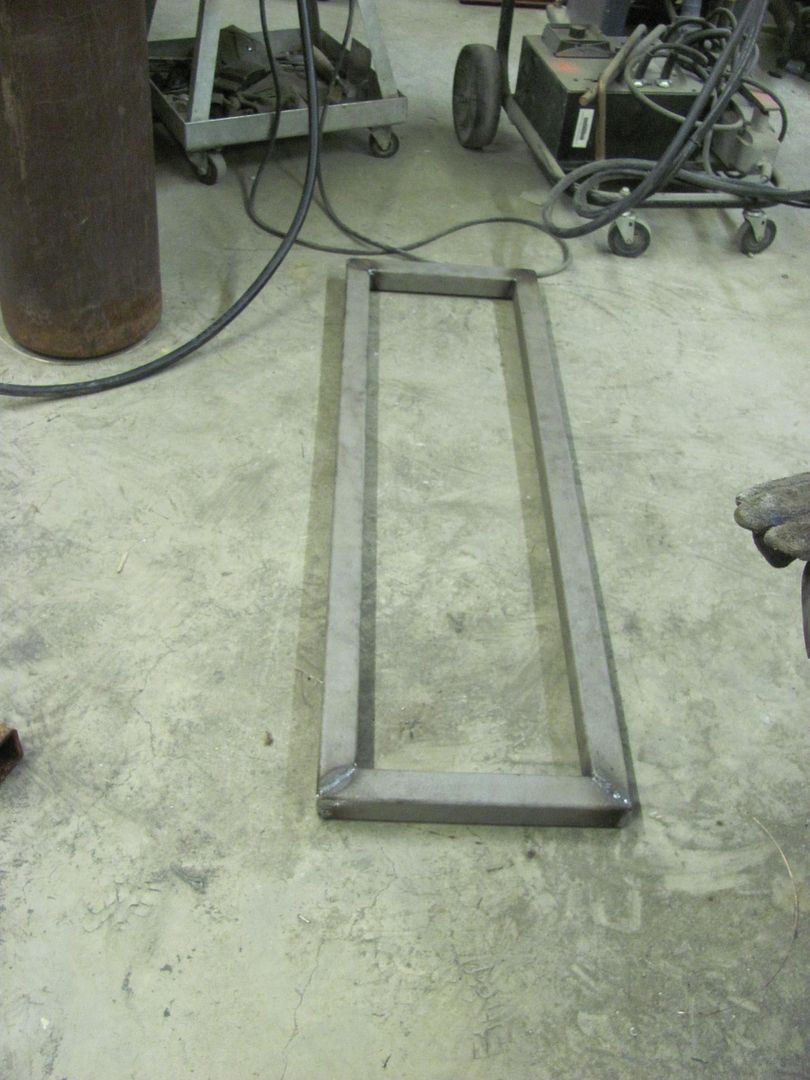
Starting with the base, some 1-1/2 square tubing makes up the frame. This stuff was free, and as with most free stuff, it isn't. Kyle spent quite a bit of time media blasting rusty square tubing that has been sitting outdoors for a number of years.
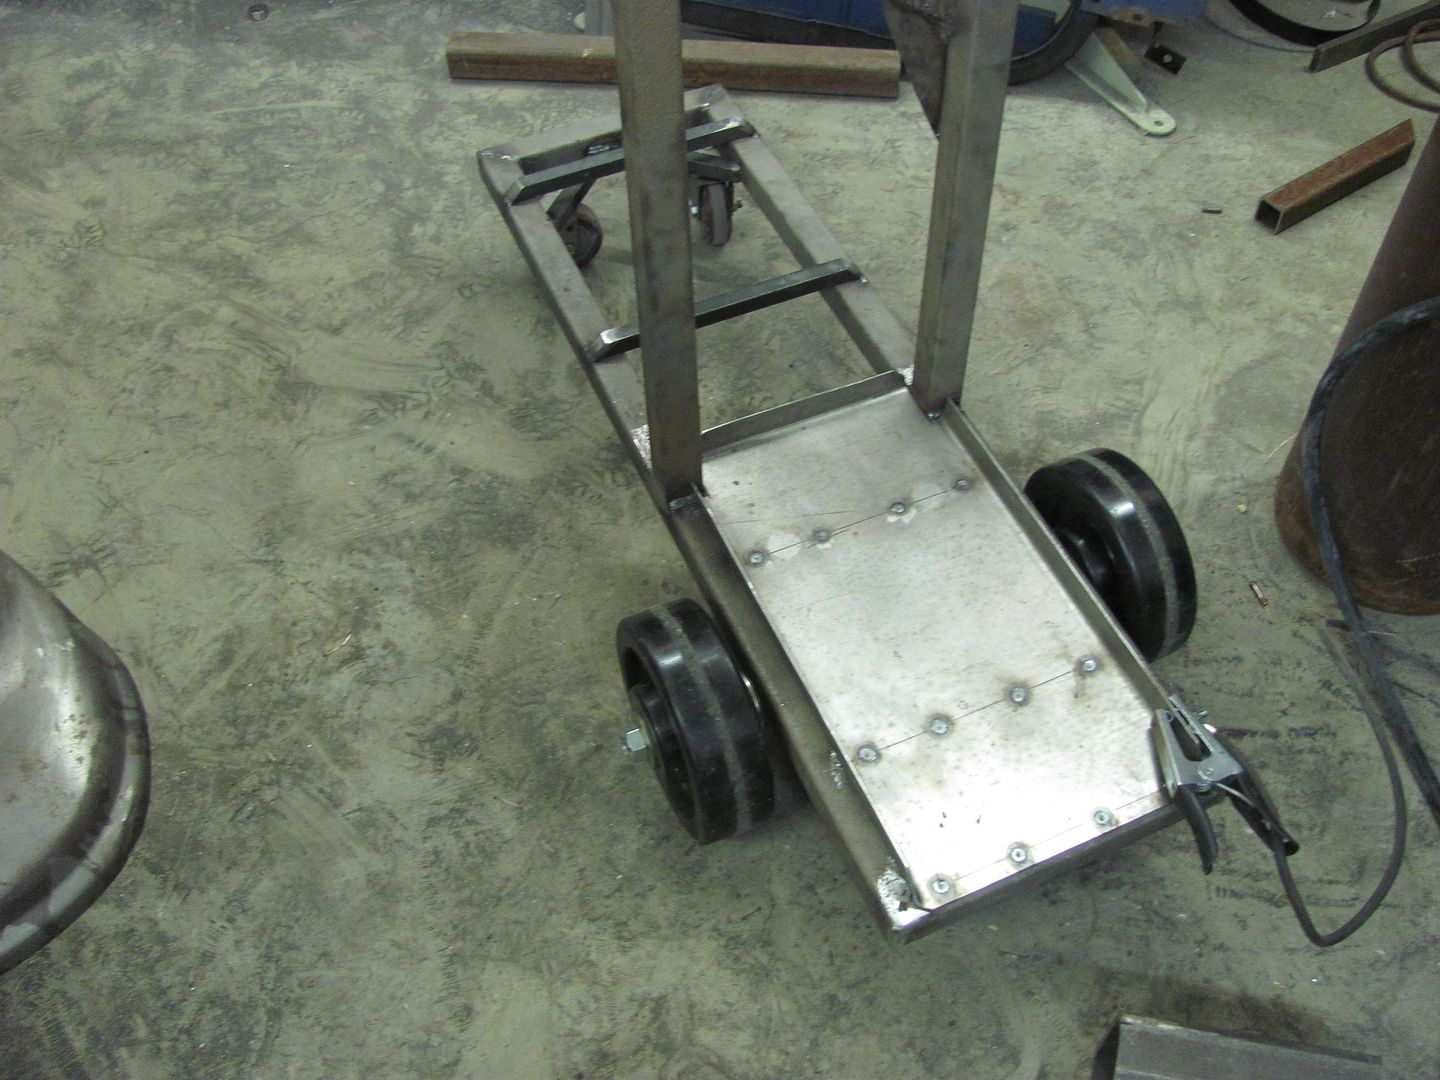
The Tig will go on the bottom, and it has some mounting holes on the bottom side...

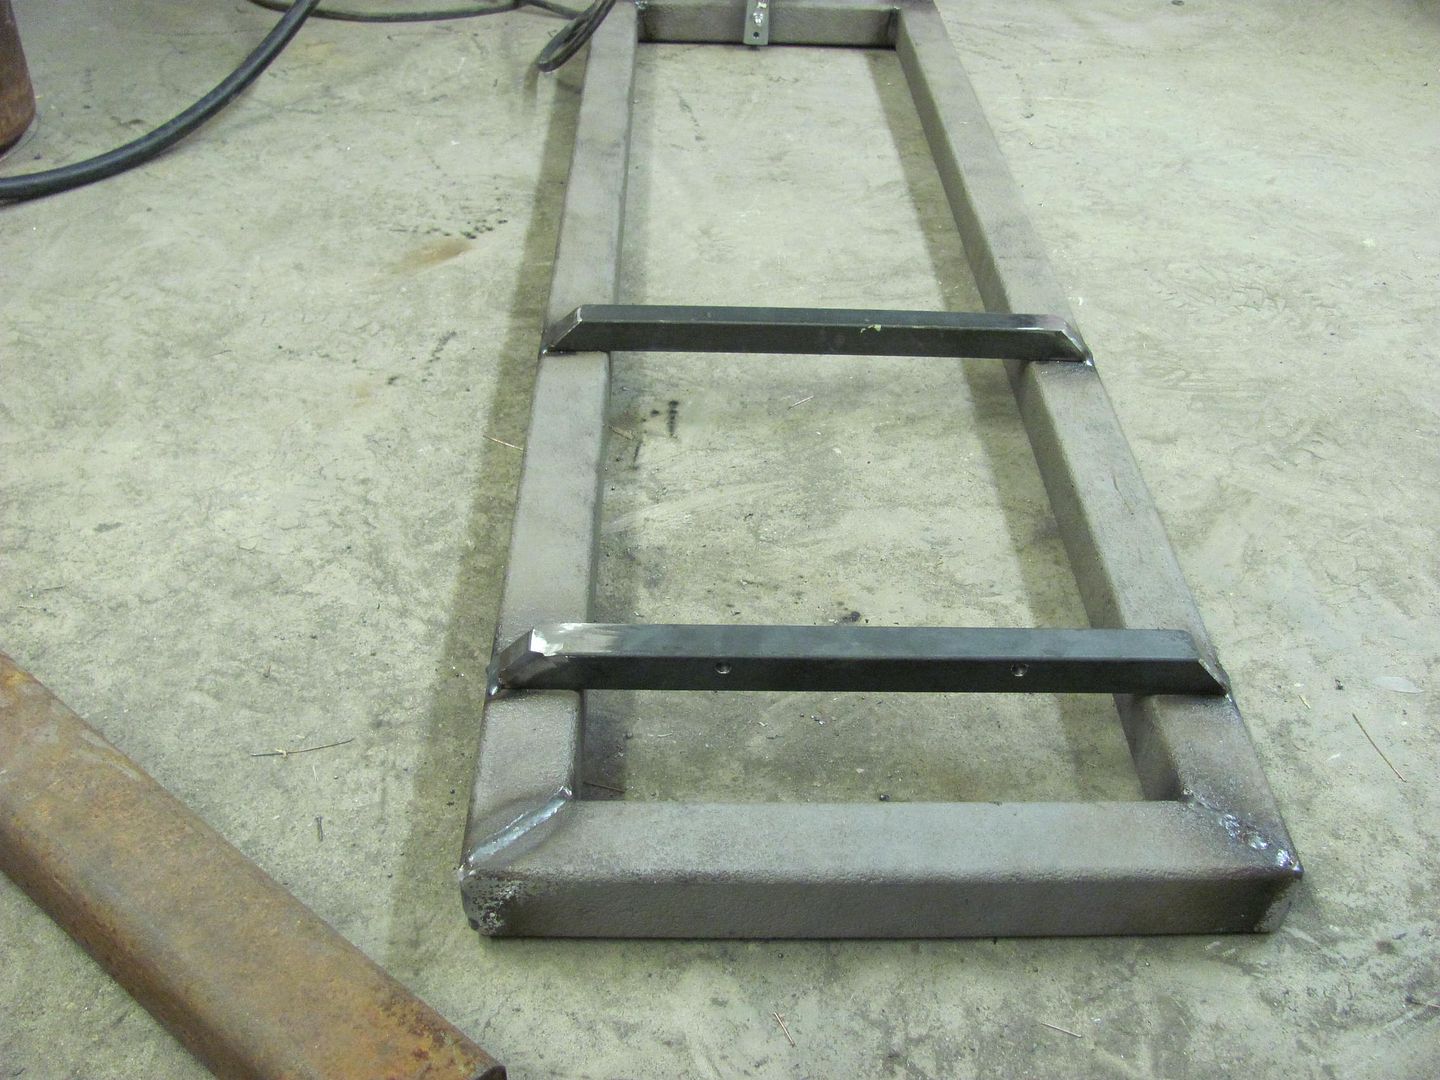
So some 3/4 square stock was used to make some rails for the Tig, along with some holes to tie in the front end..
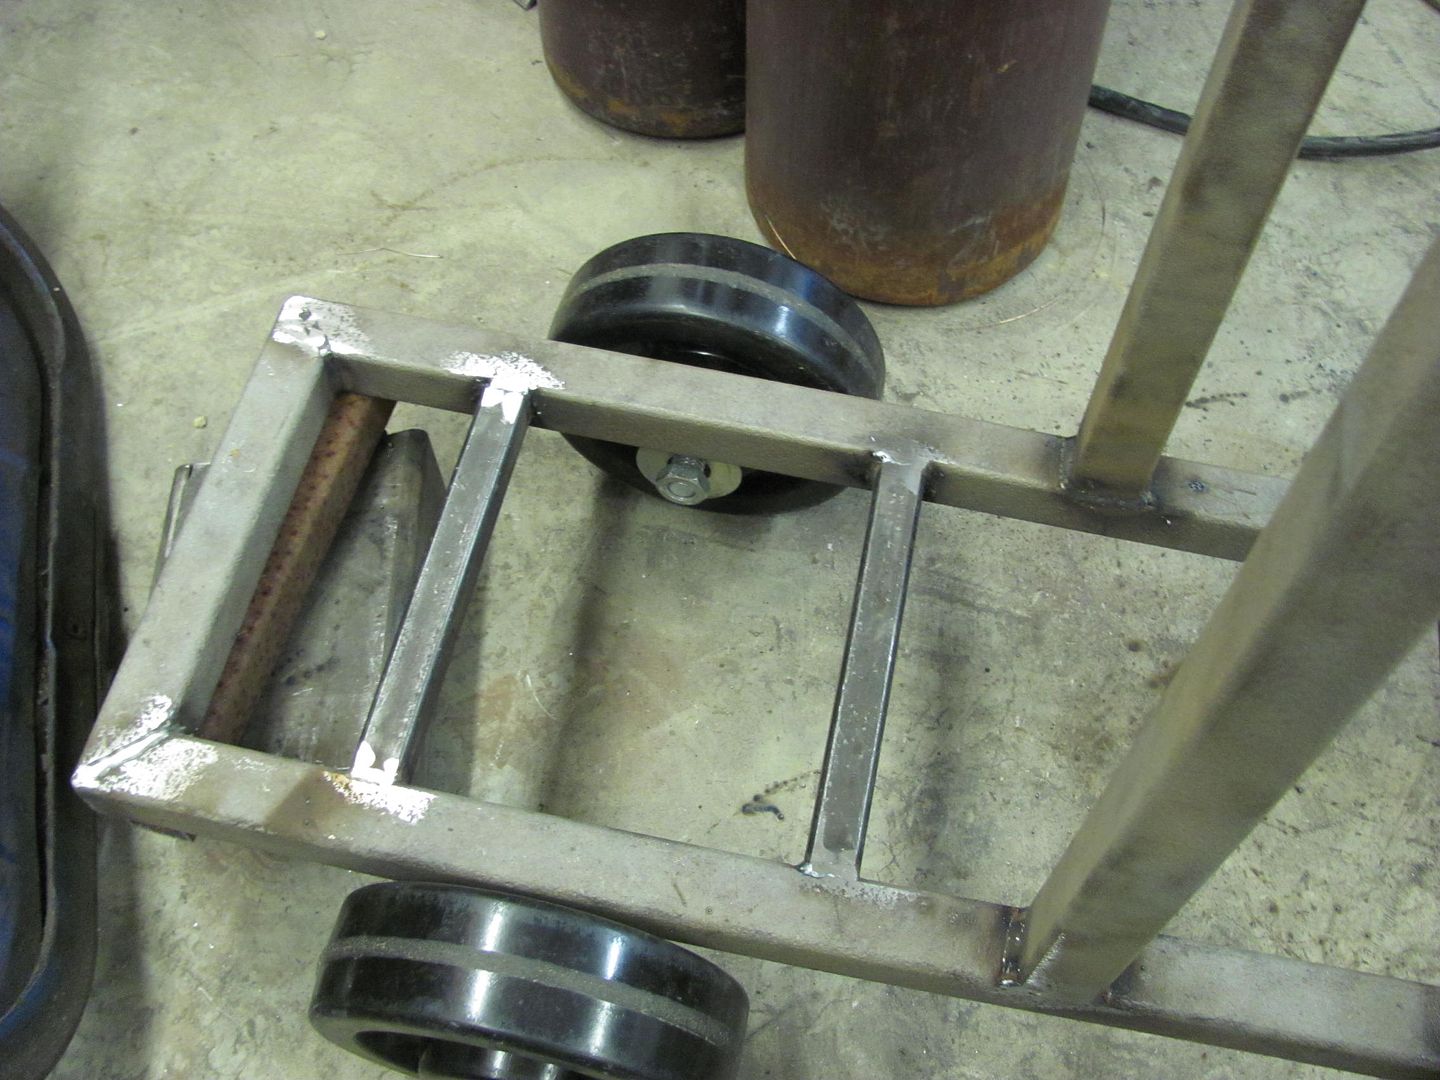
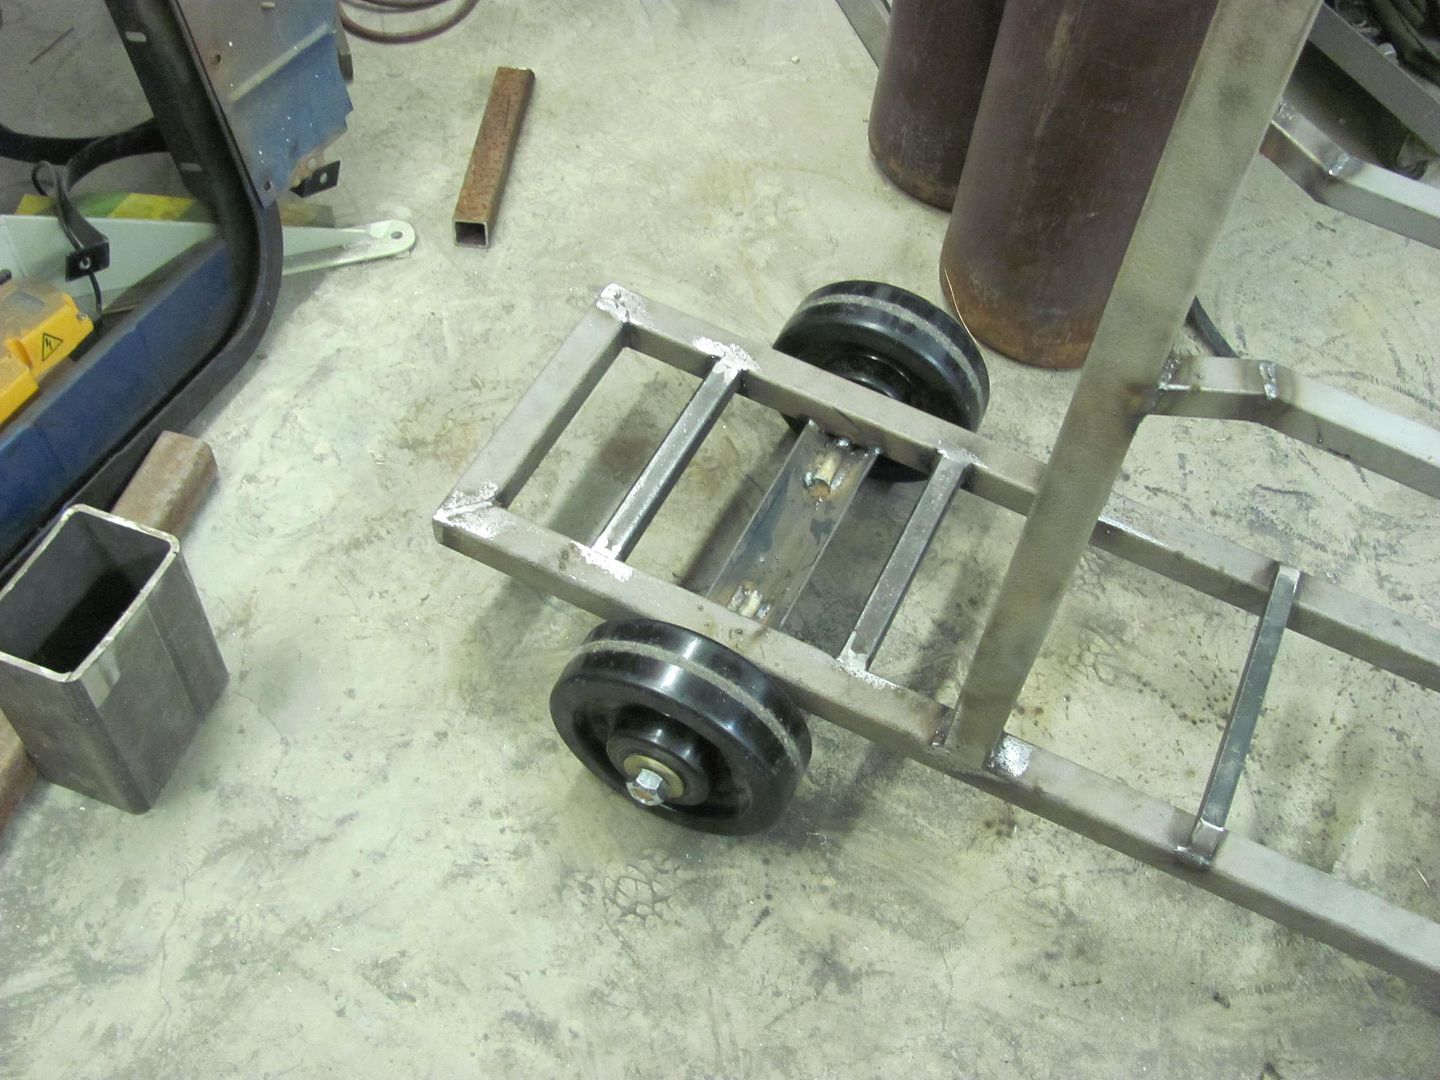
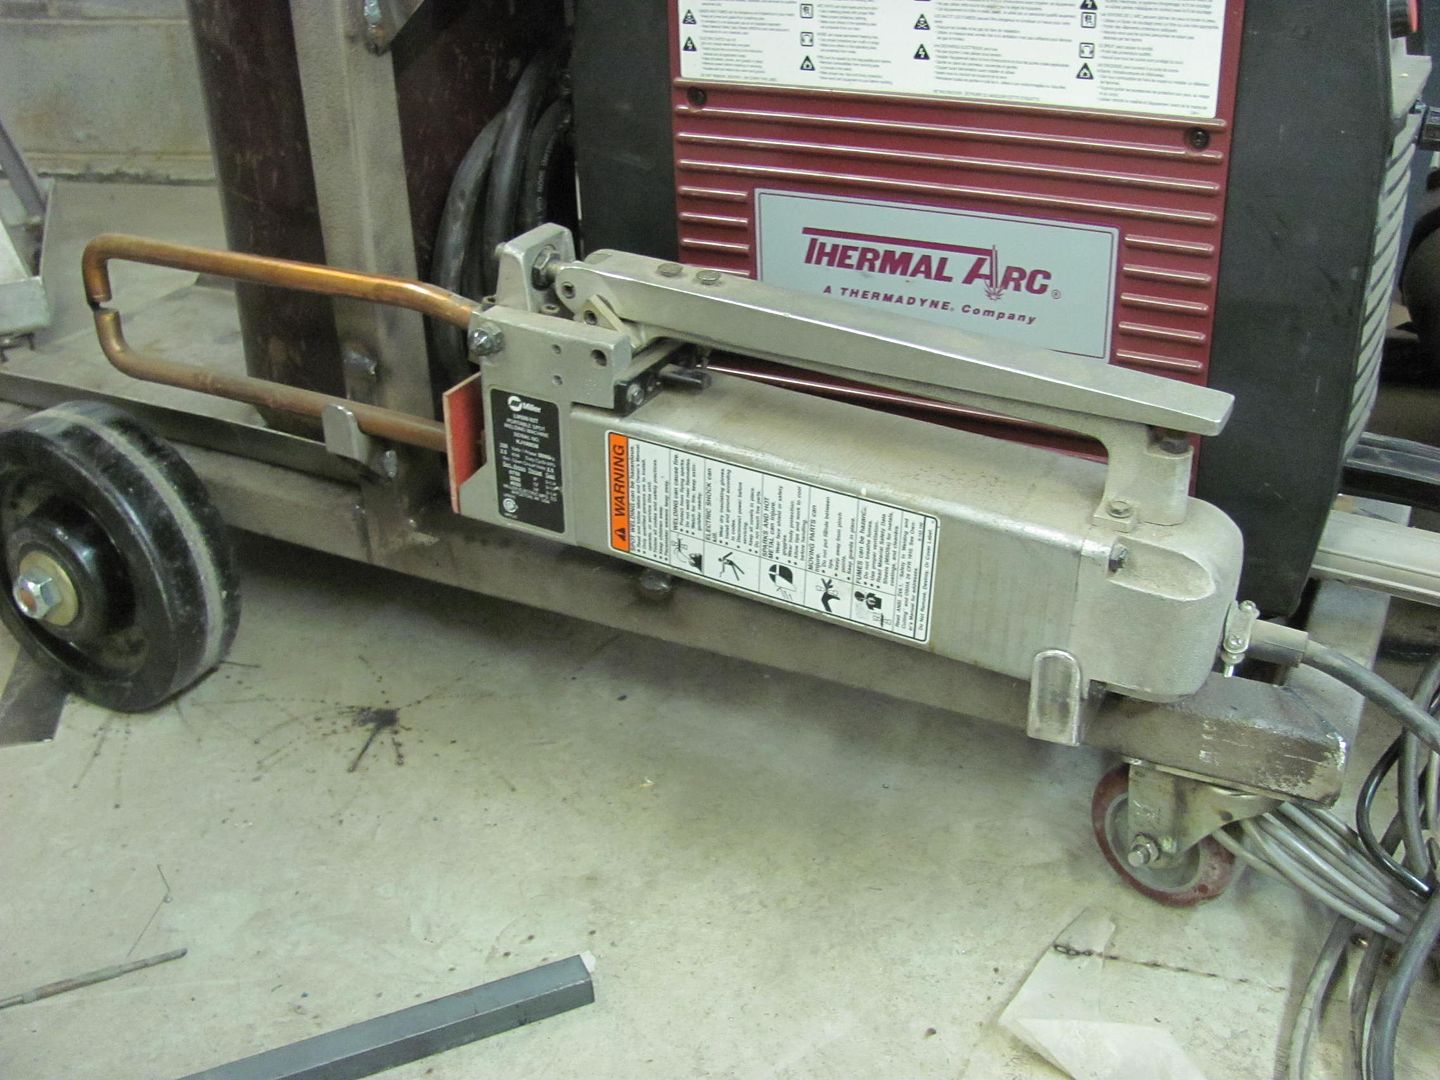
adding the front casters.....

A cross brace was added under the center line of the 2 bottles...
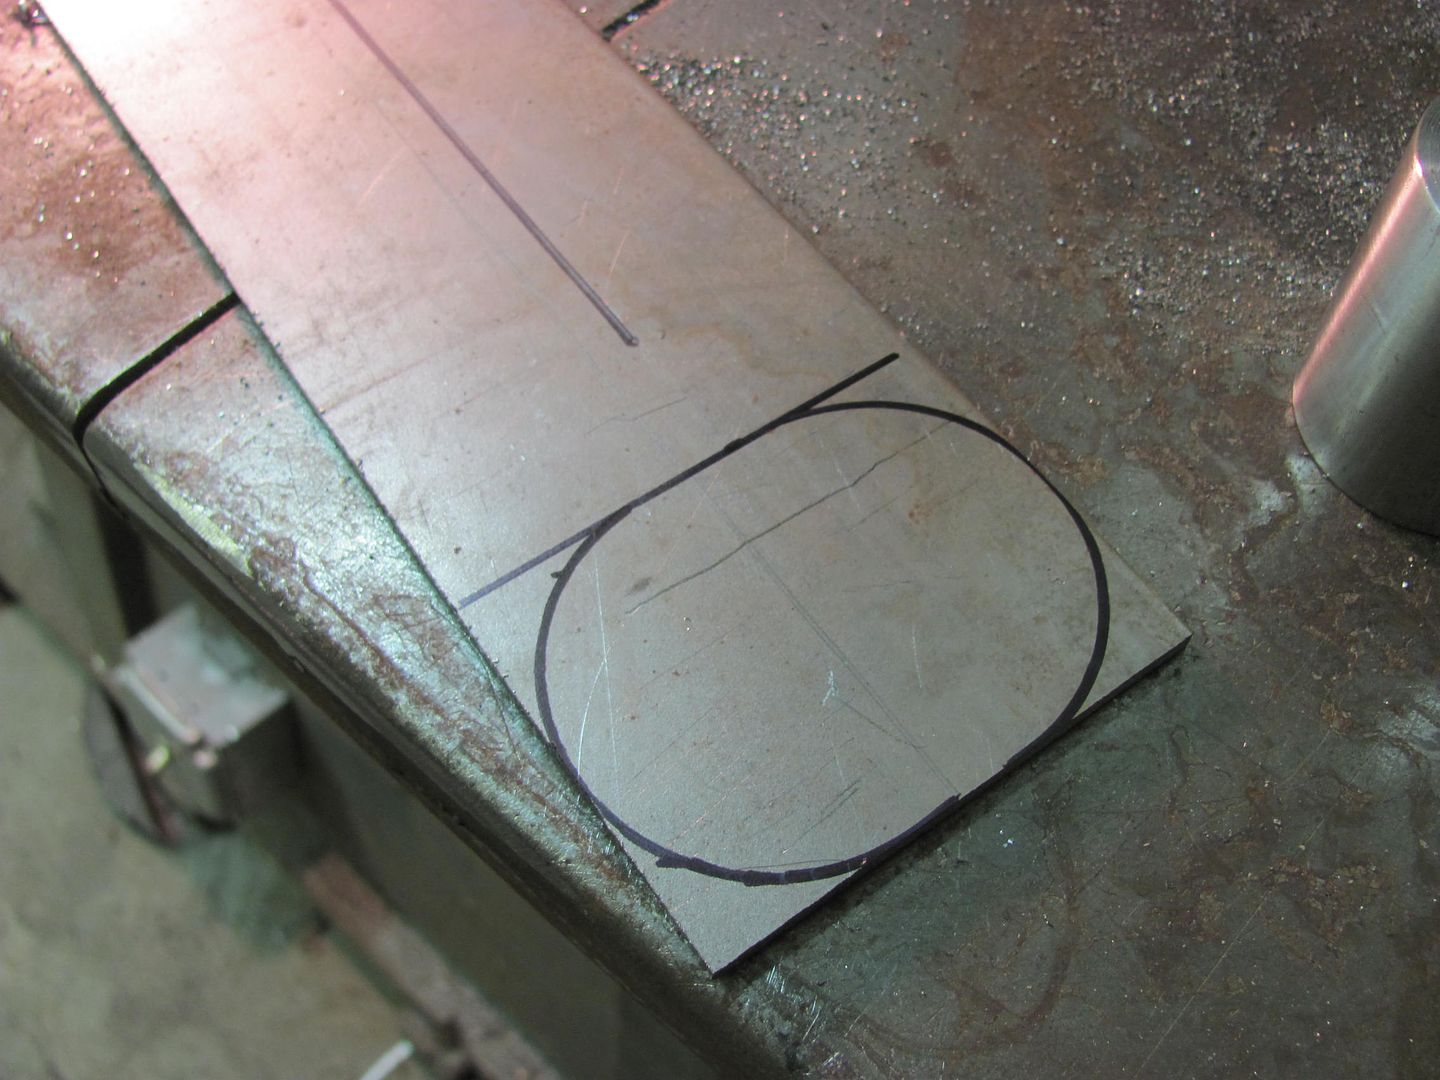
12 gauge will be used to form a tray under the bottles...

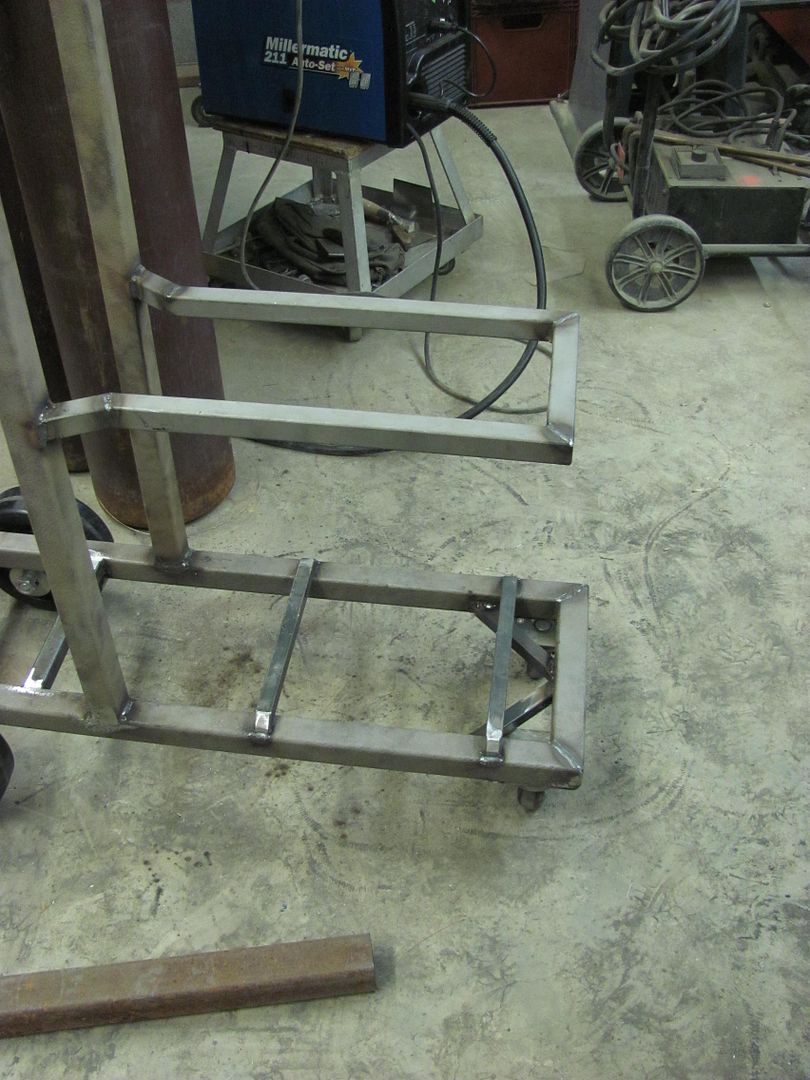
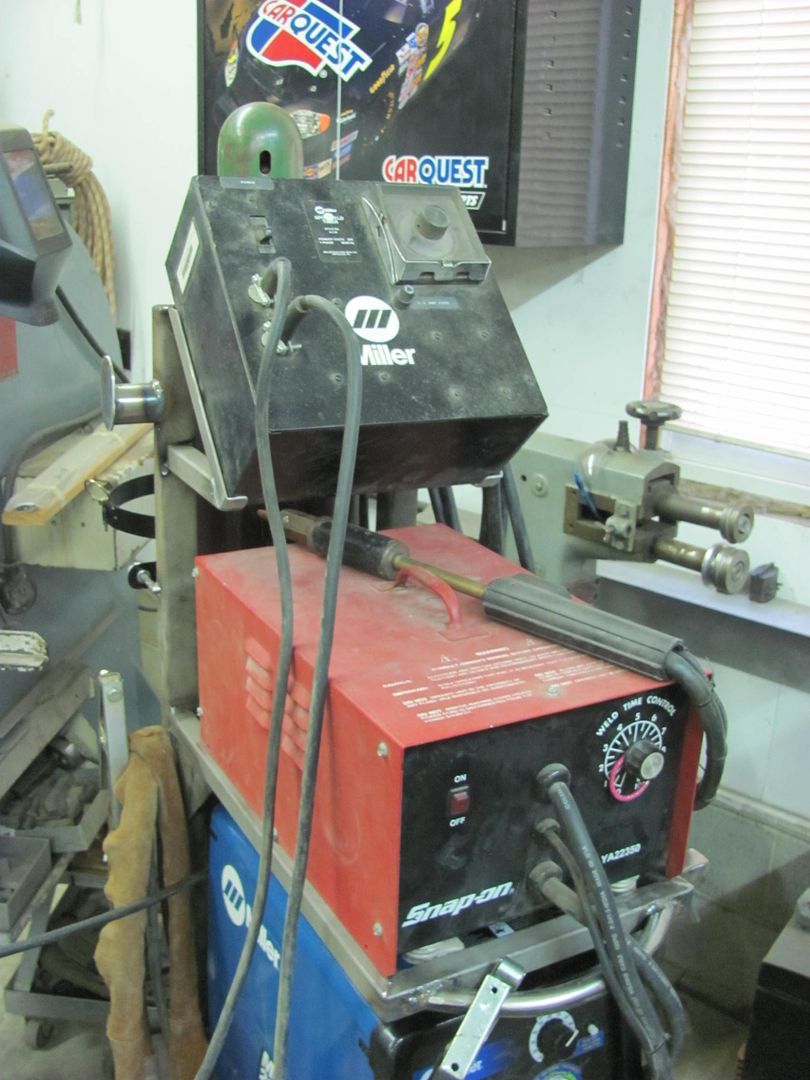
Support bracket added for Mig welder:
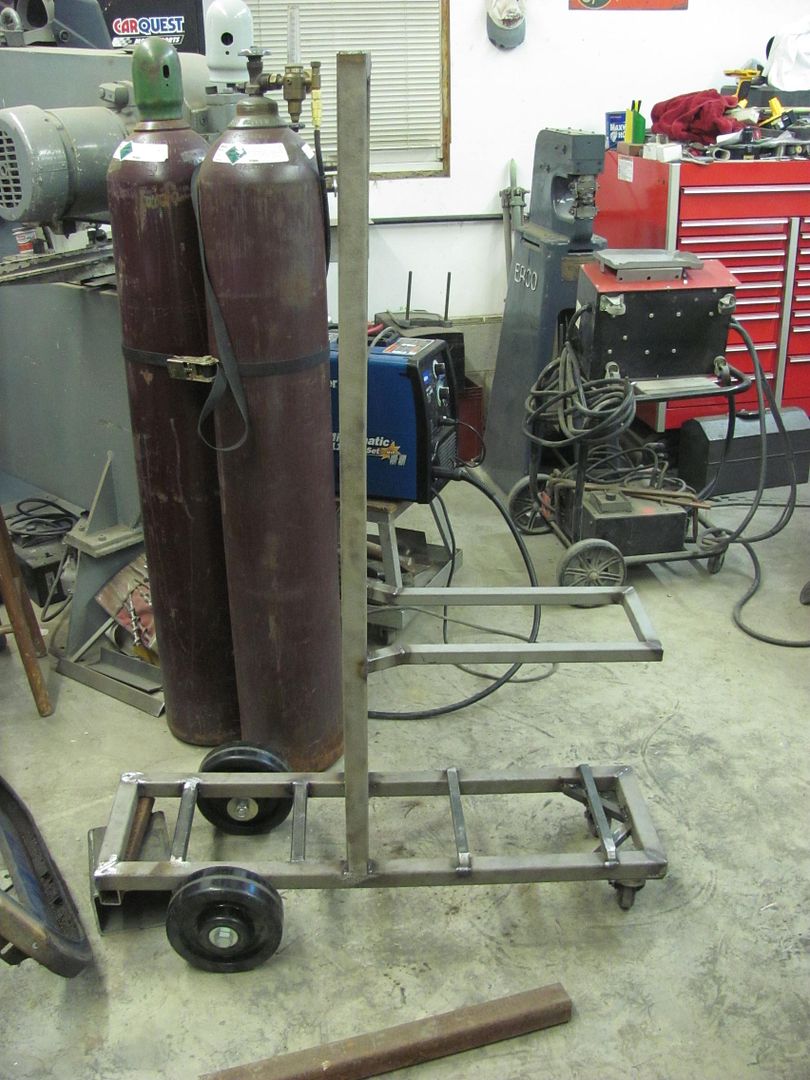
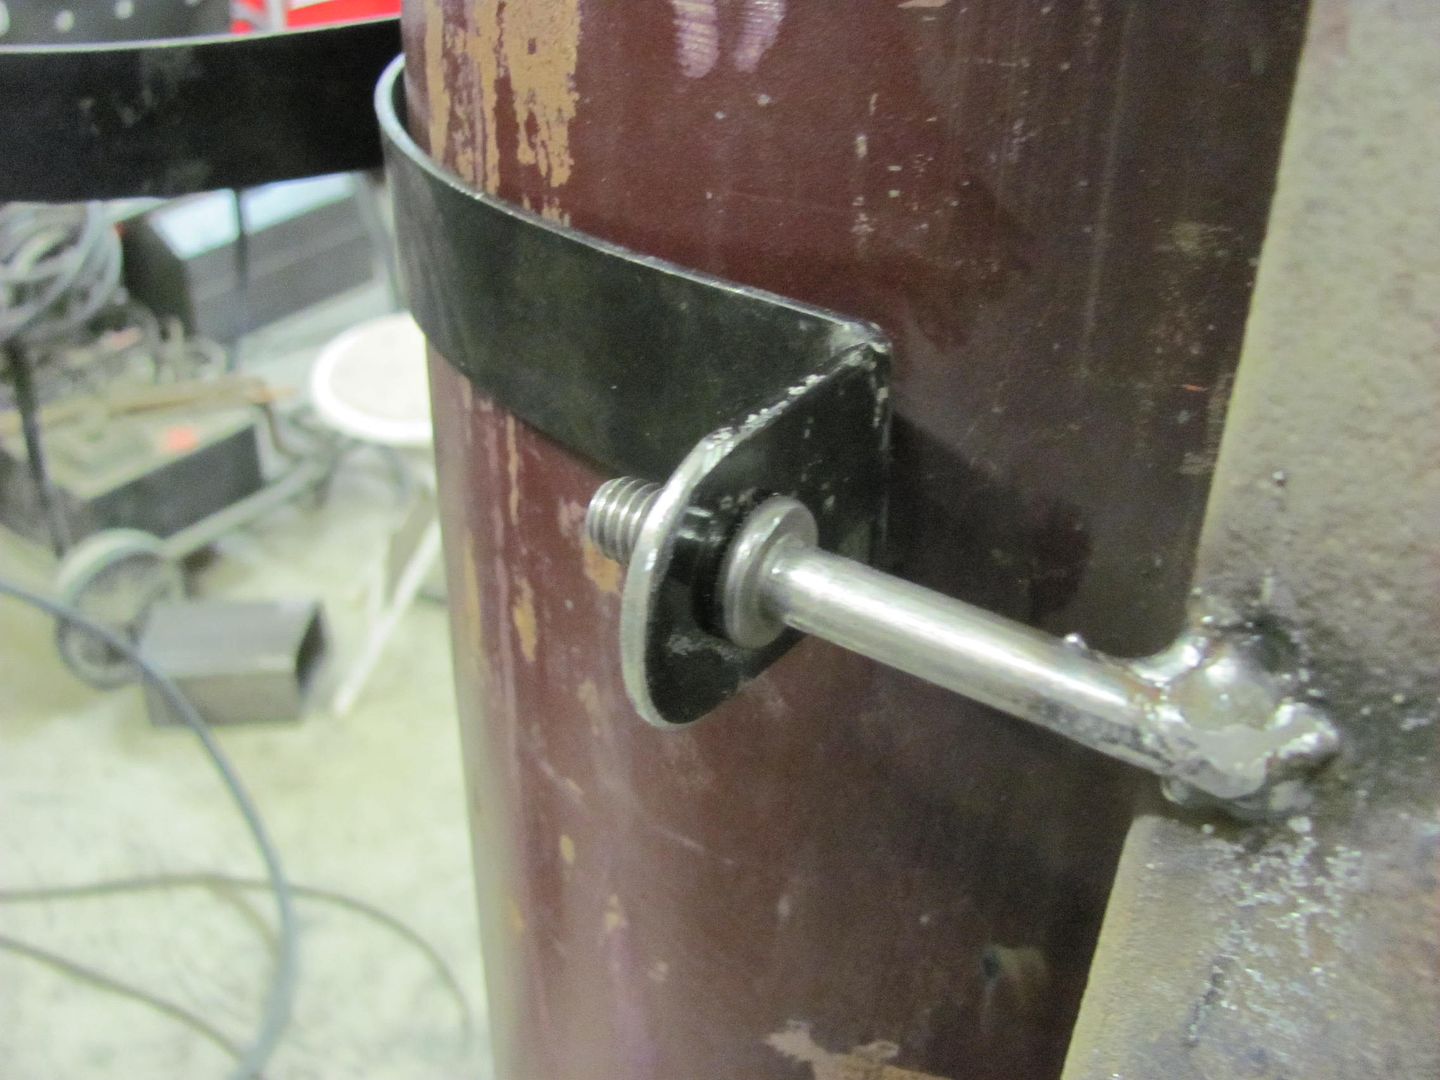
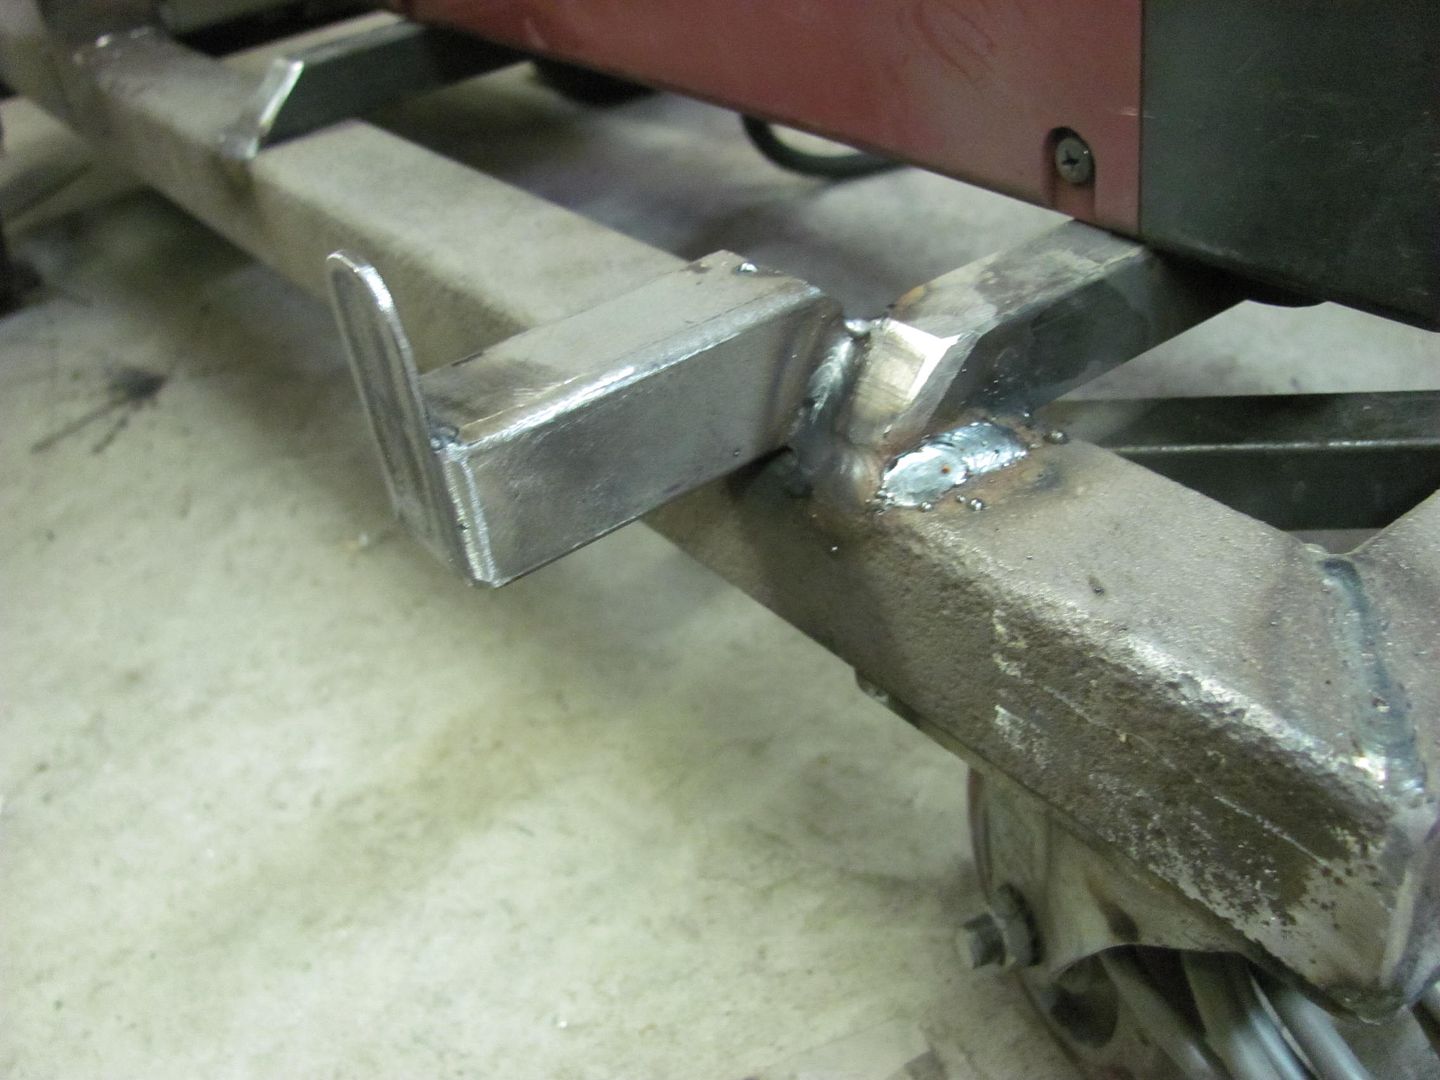
the rear axle was made from a piece of angle and two 3/4-10 bolts..
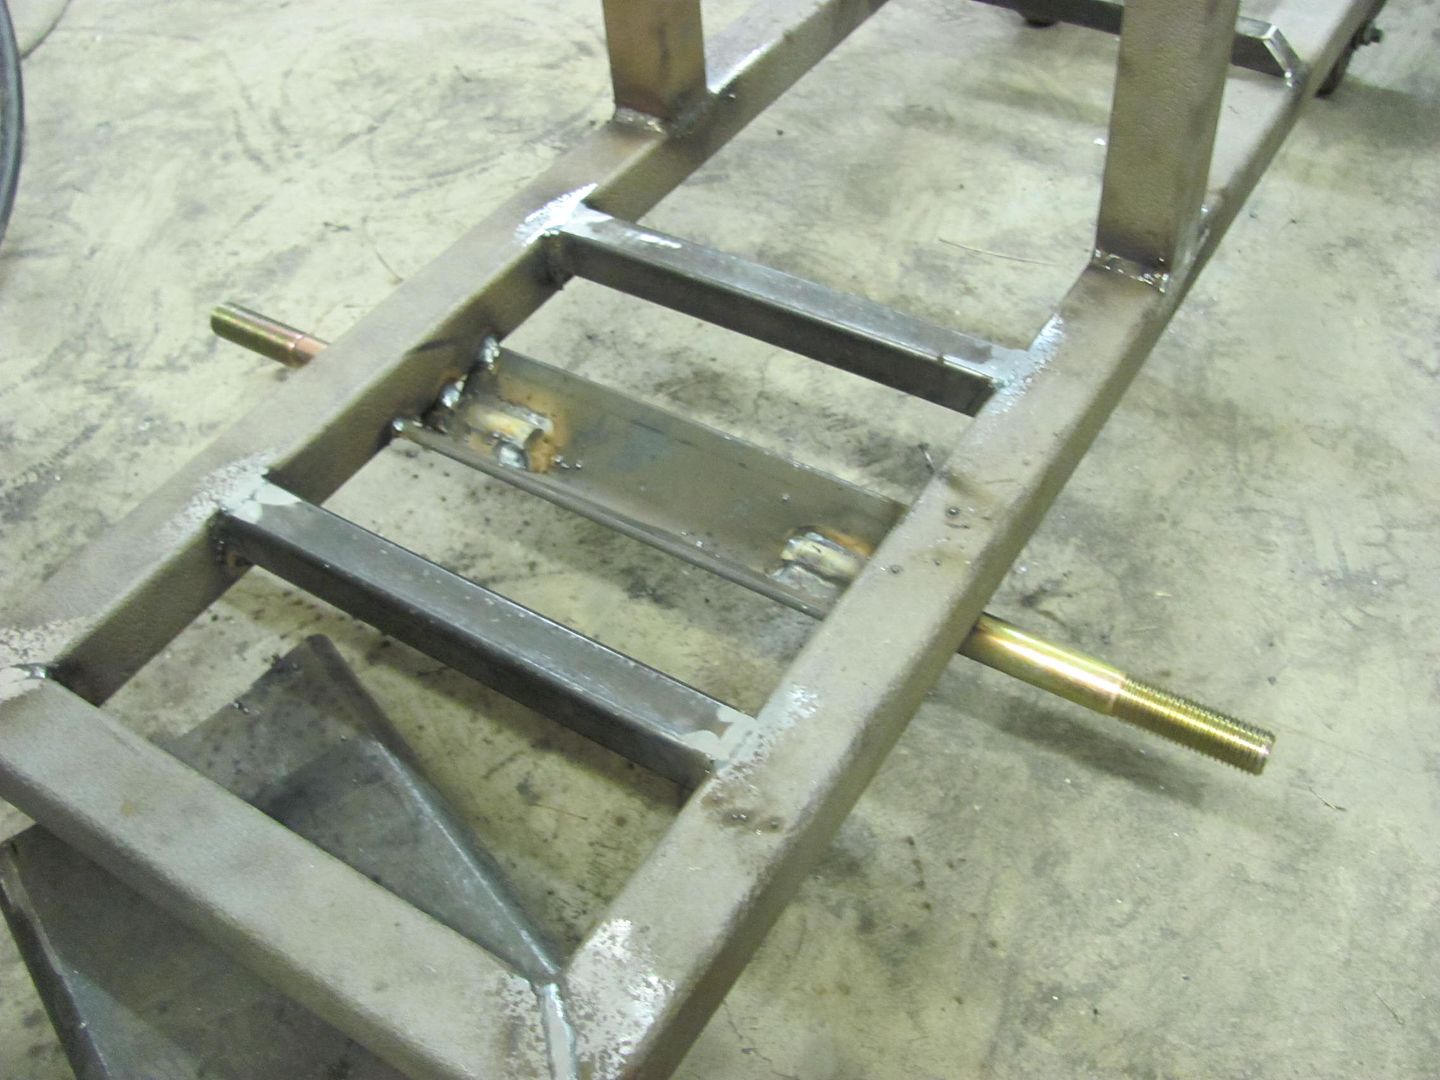
Rear bottle tray made from some 12 gauge, and welded on using about 3/8 diameter plug welds..
Top shelf added along with some gussets made of 12 gauge..
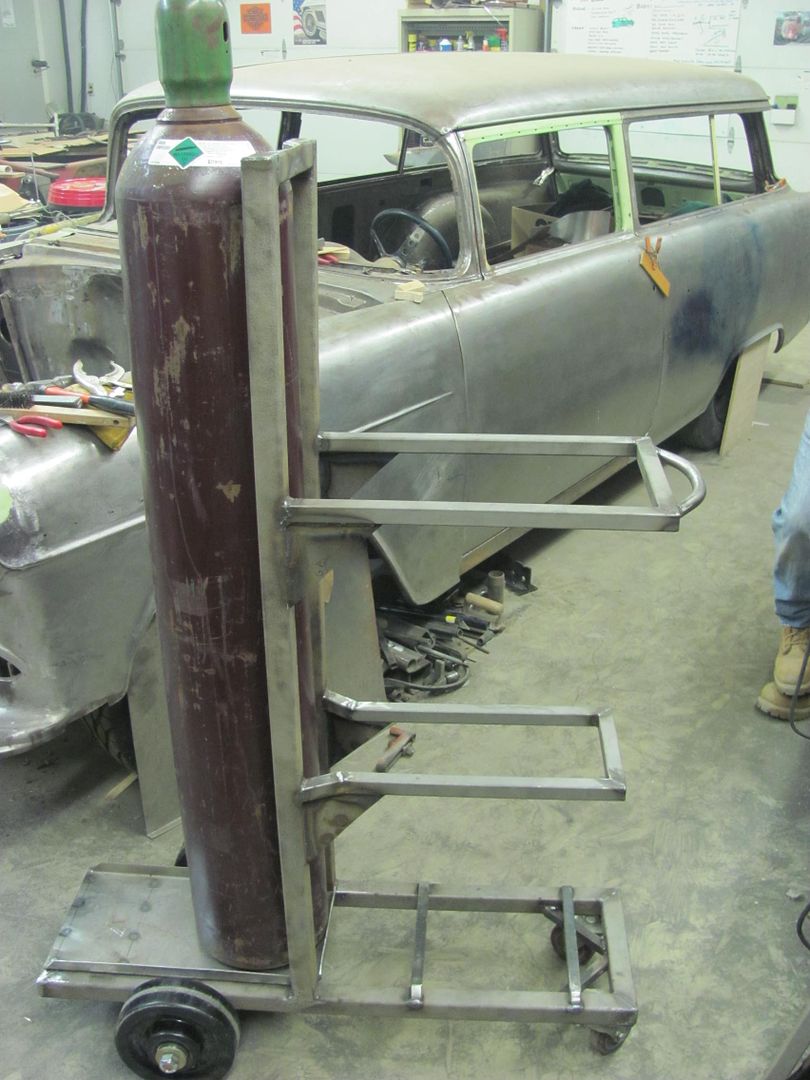
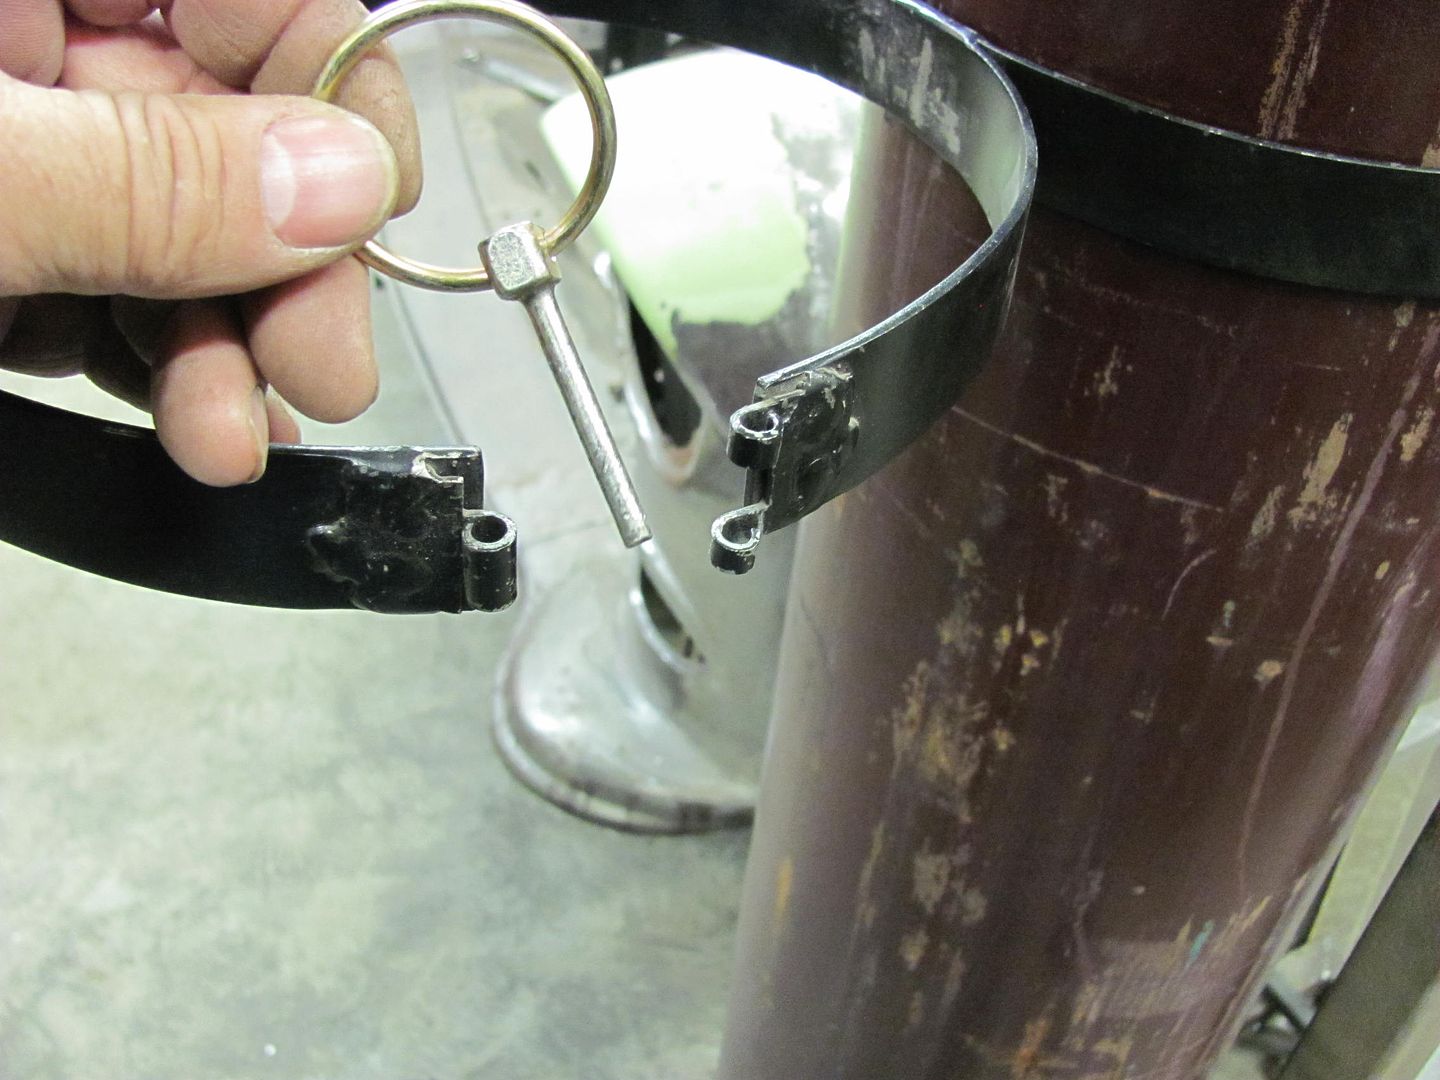
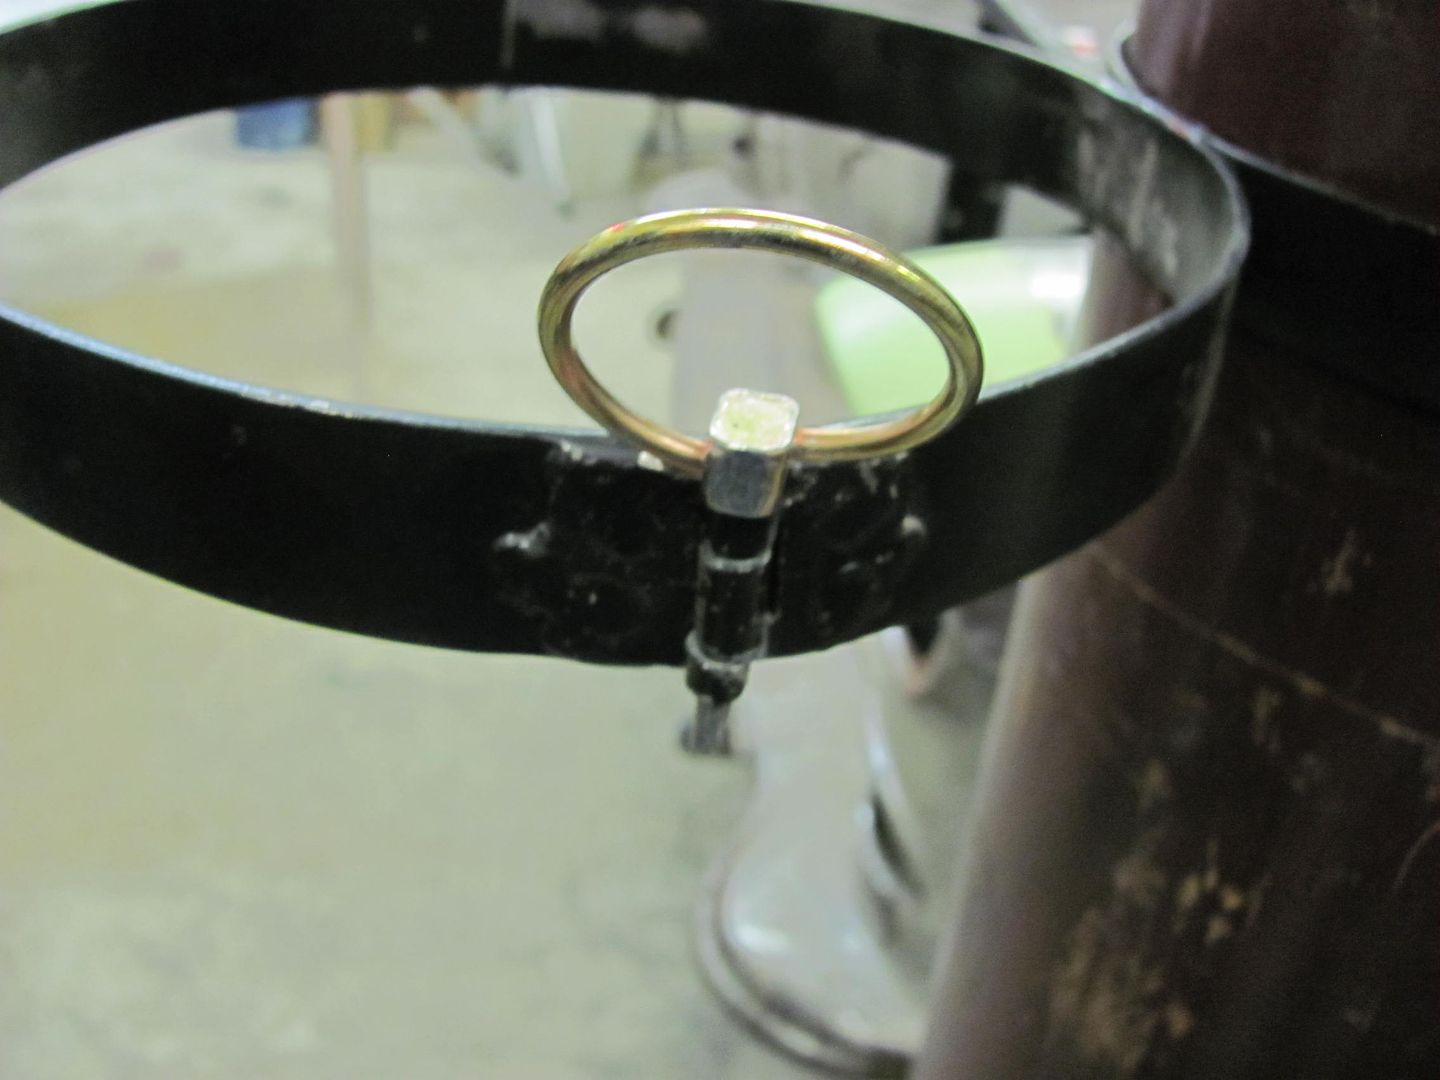
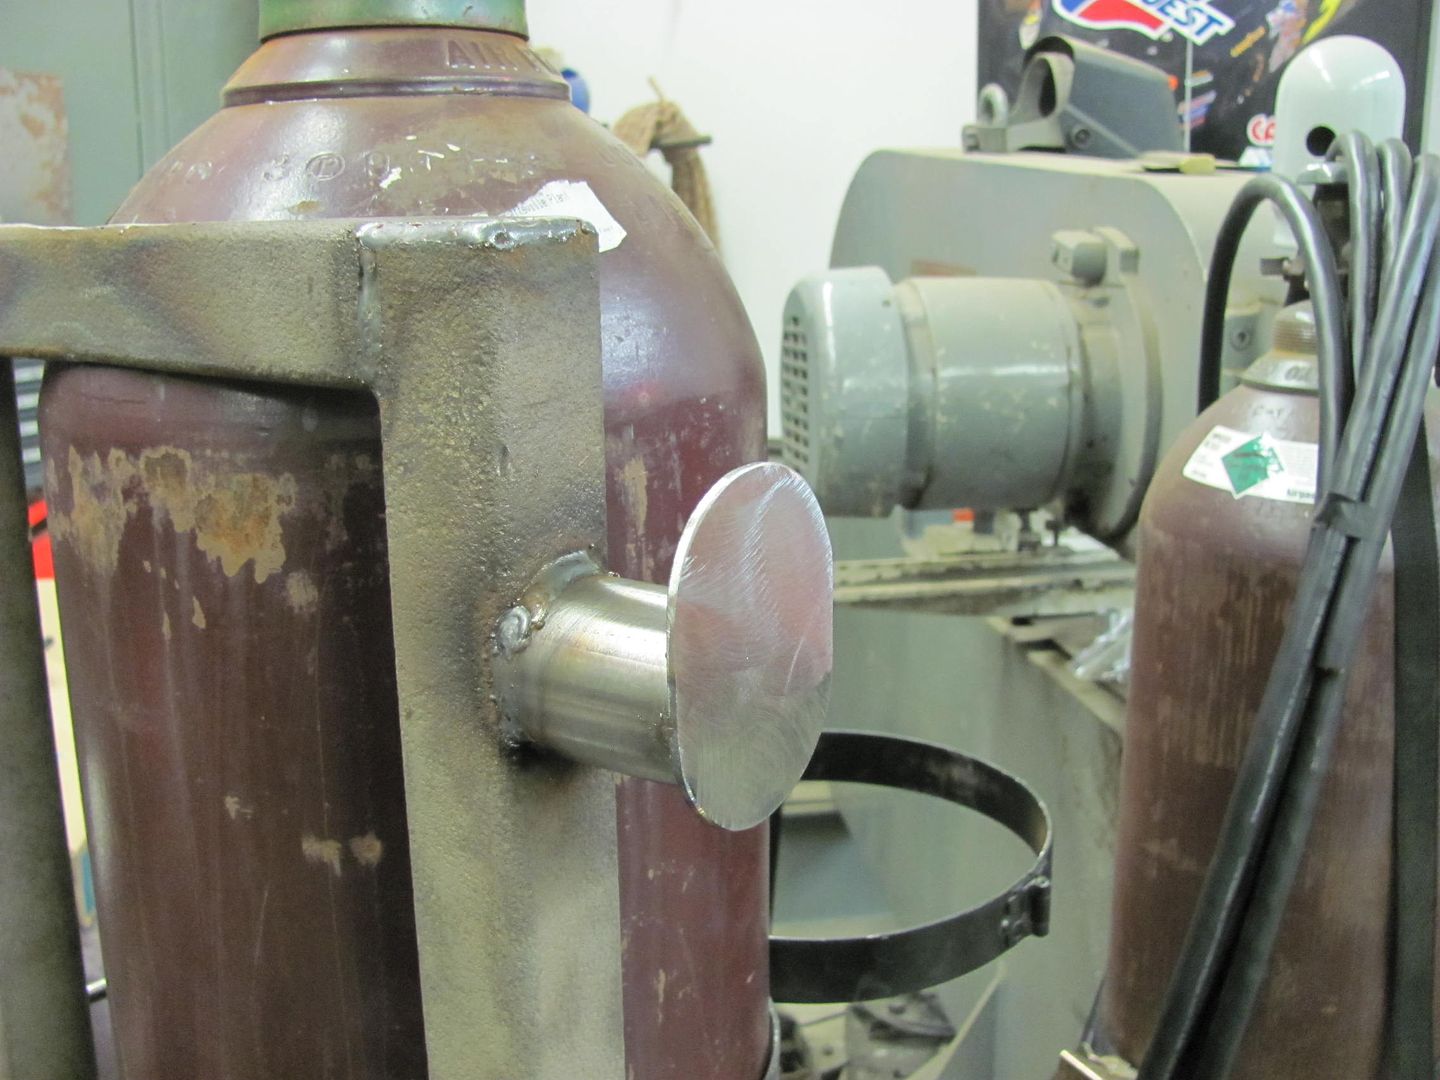
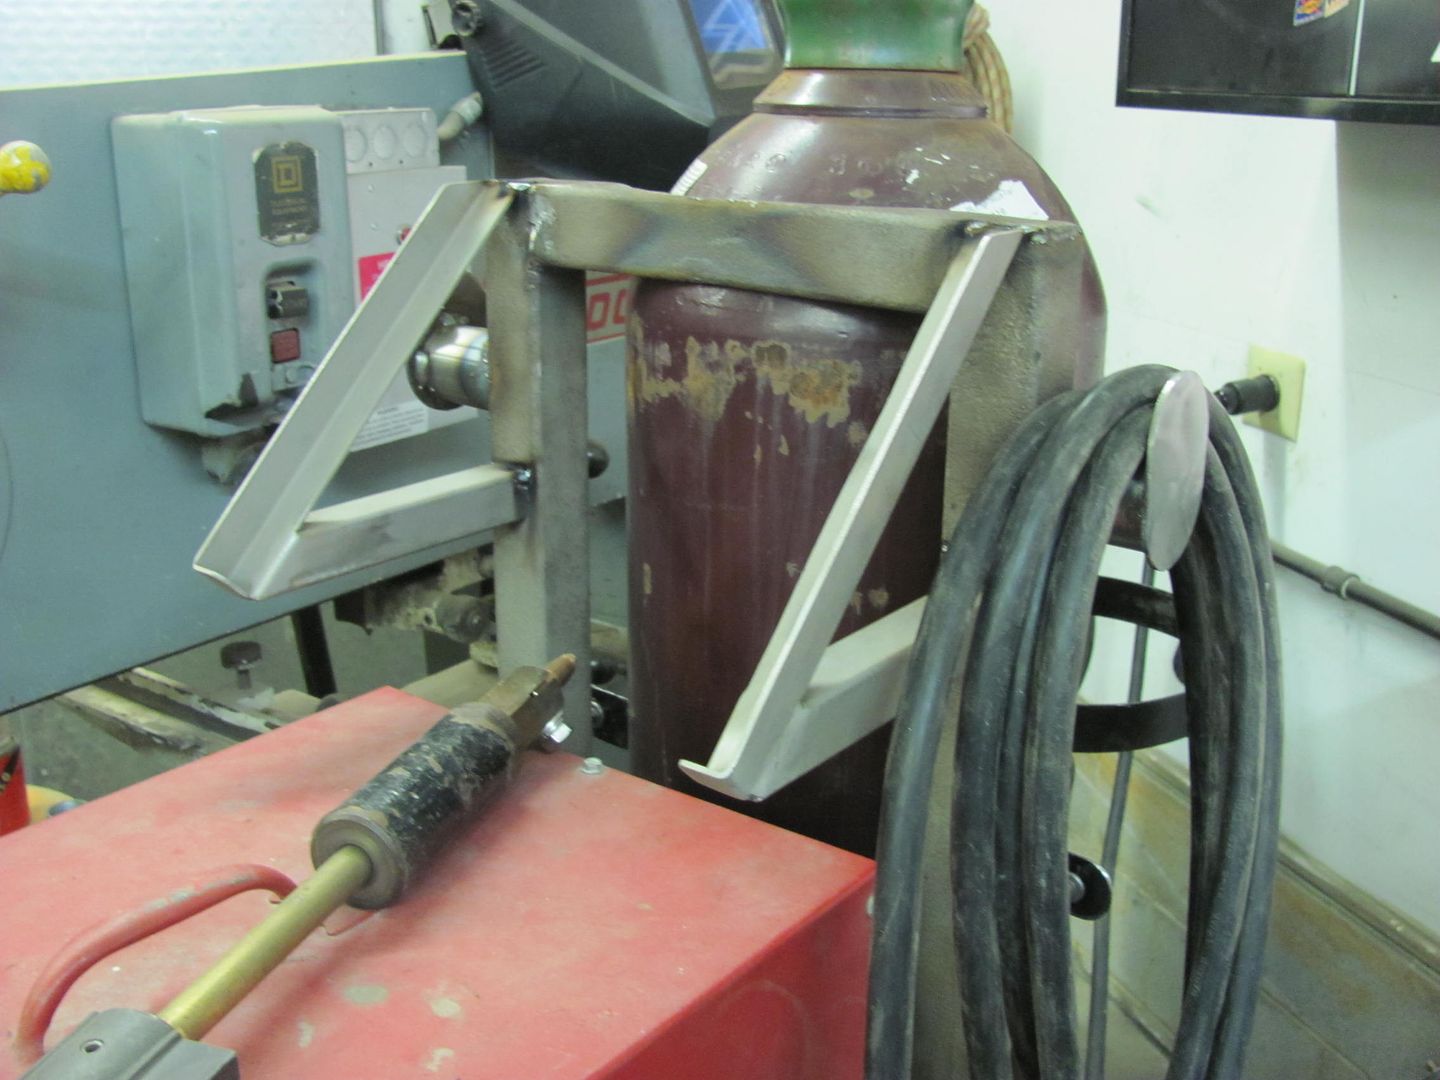
Bottle relief and pull handle added....
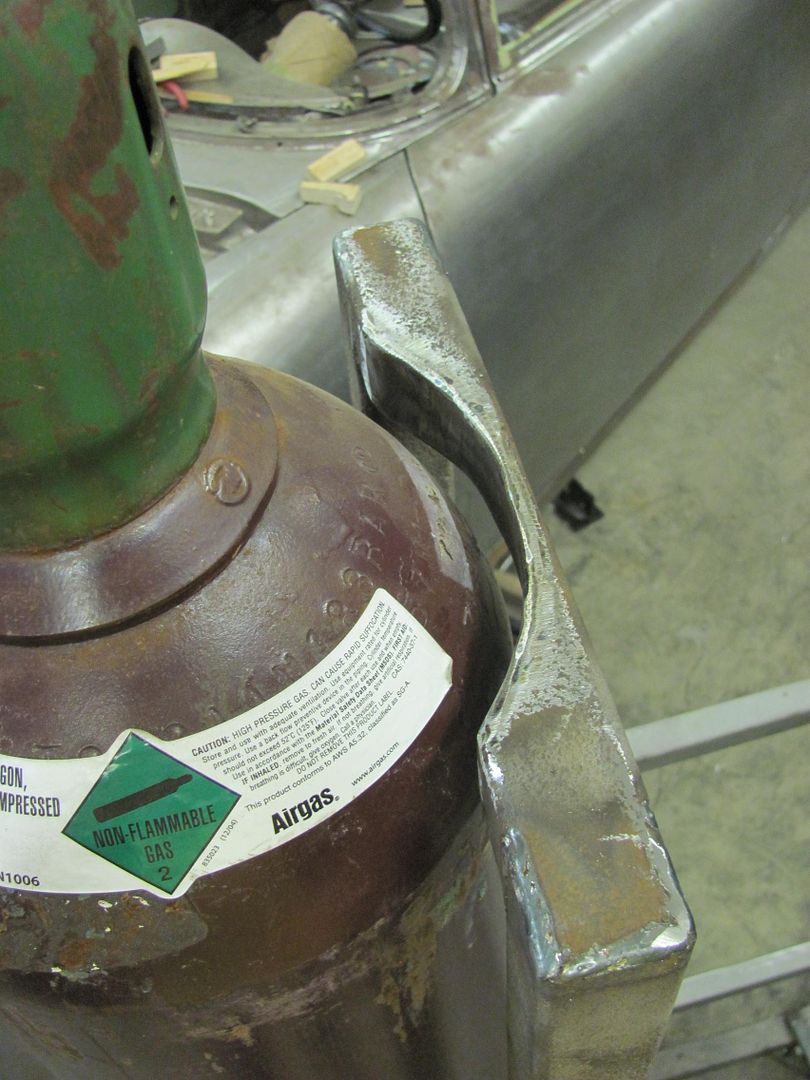

these studs are added to make use of the bottle bracket that came off the old welder. My brother in law had borrowed it at one time, and it came back with the fancy bracket. He retired the ratchet strap I had around the two bottles. This worked pretty well, so rather than reinvent the wheel.... Reminds me, I have some other things needing finishing I should lend him...
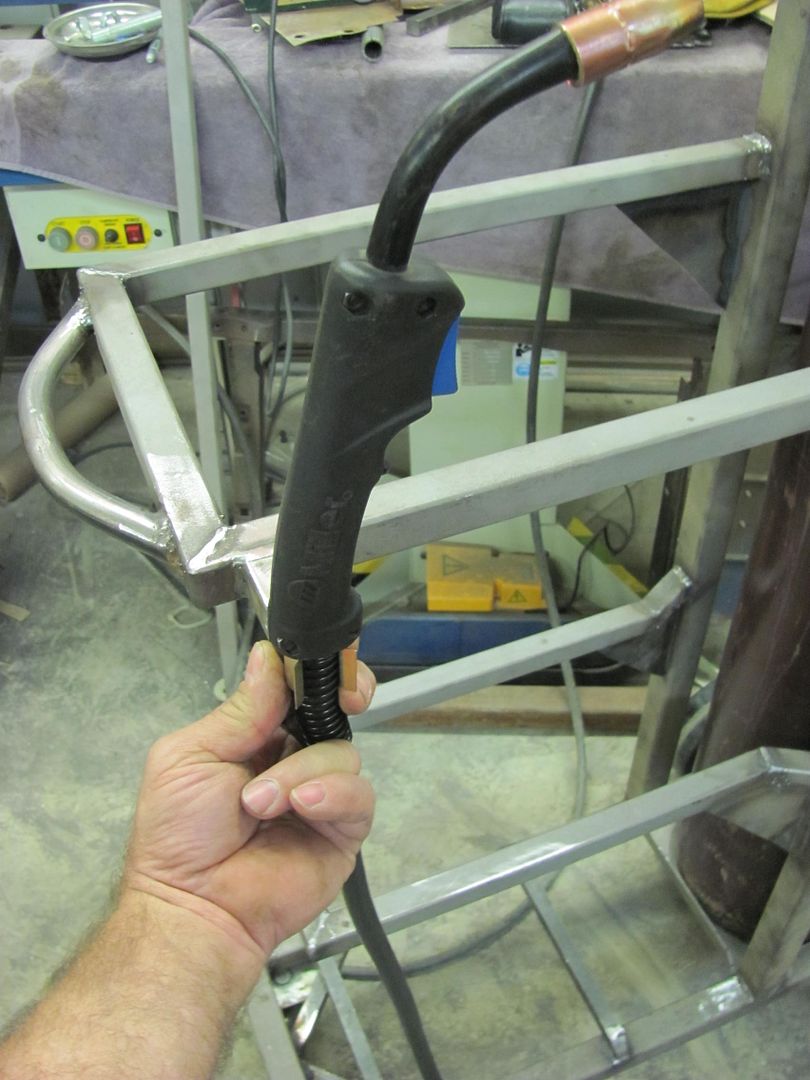
Then a bracket for the clip is added to hold the Mig torch..


Holders for the various cables....

.....and a test fit before we throw some paint on it...
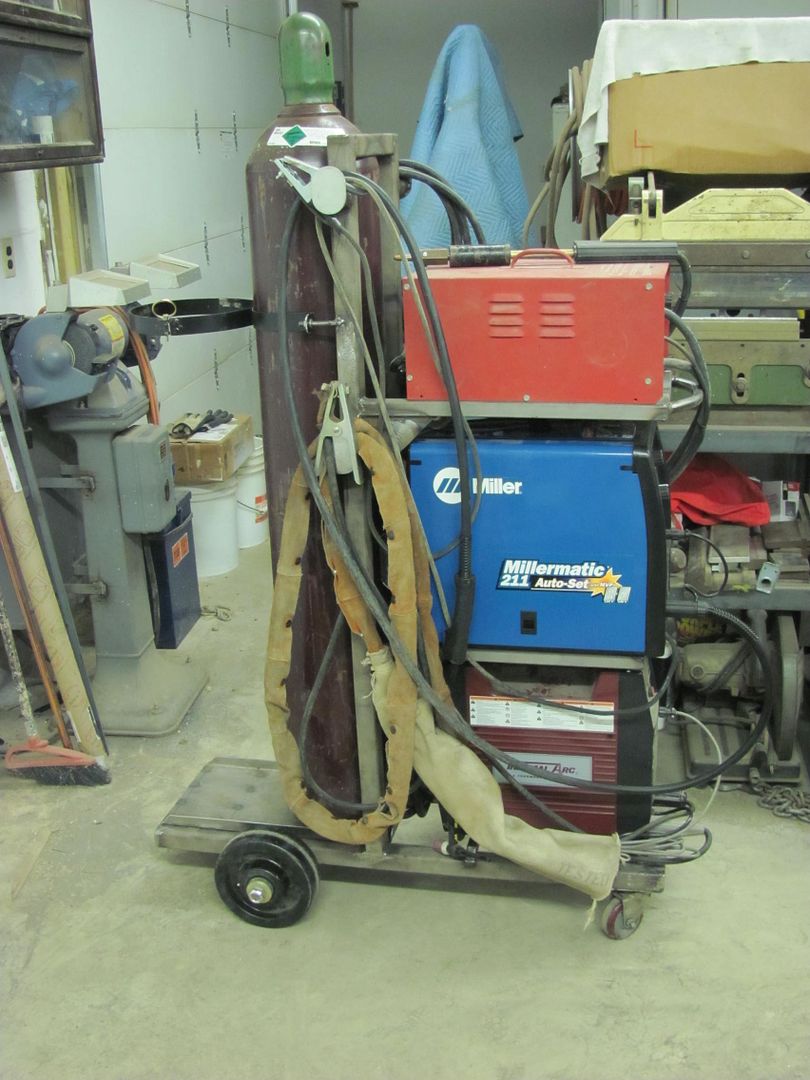
Looks like I have some room left, may have to add one more....

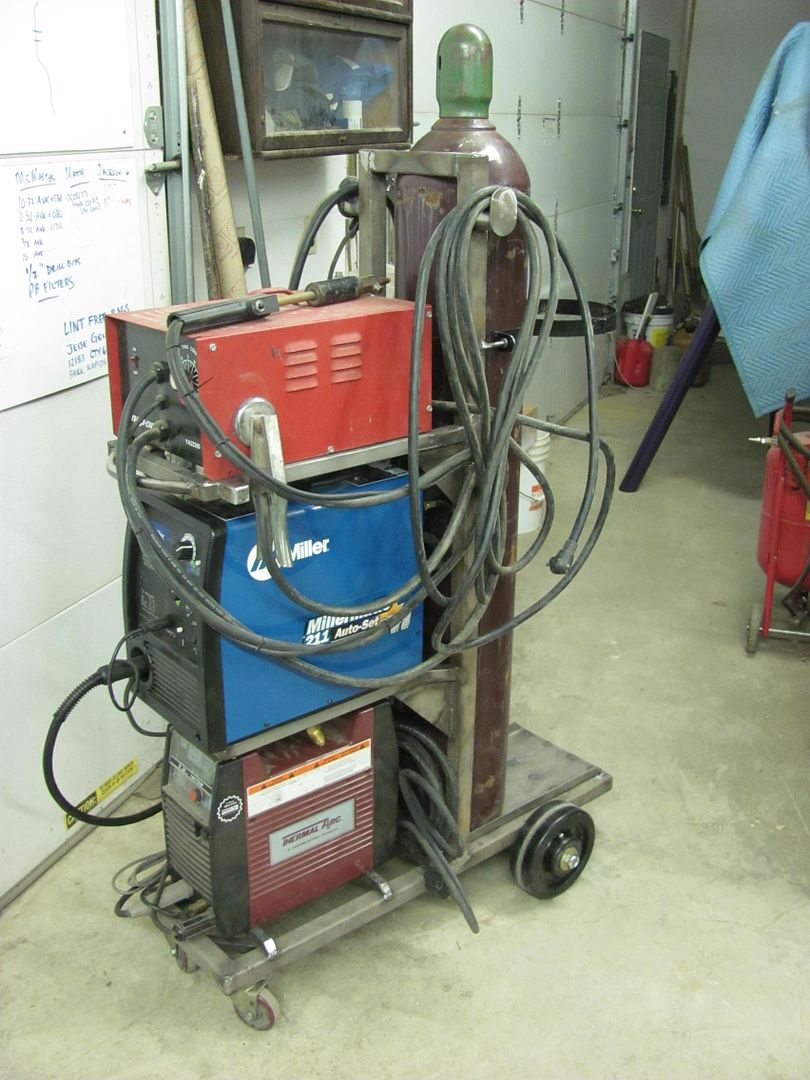
Now to disassemble and paint it... It was a toss up between some bright red (HD color) which was acrylic lacquer, or a bright yellow (H/K Lemon Yellow basecoat). As I didn't have any lacquer thinner in stock for the red, yellow it is...followed by clearcoat
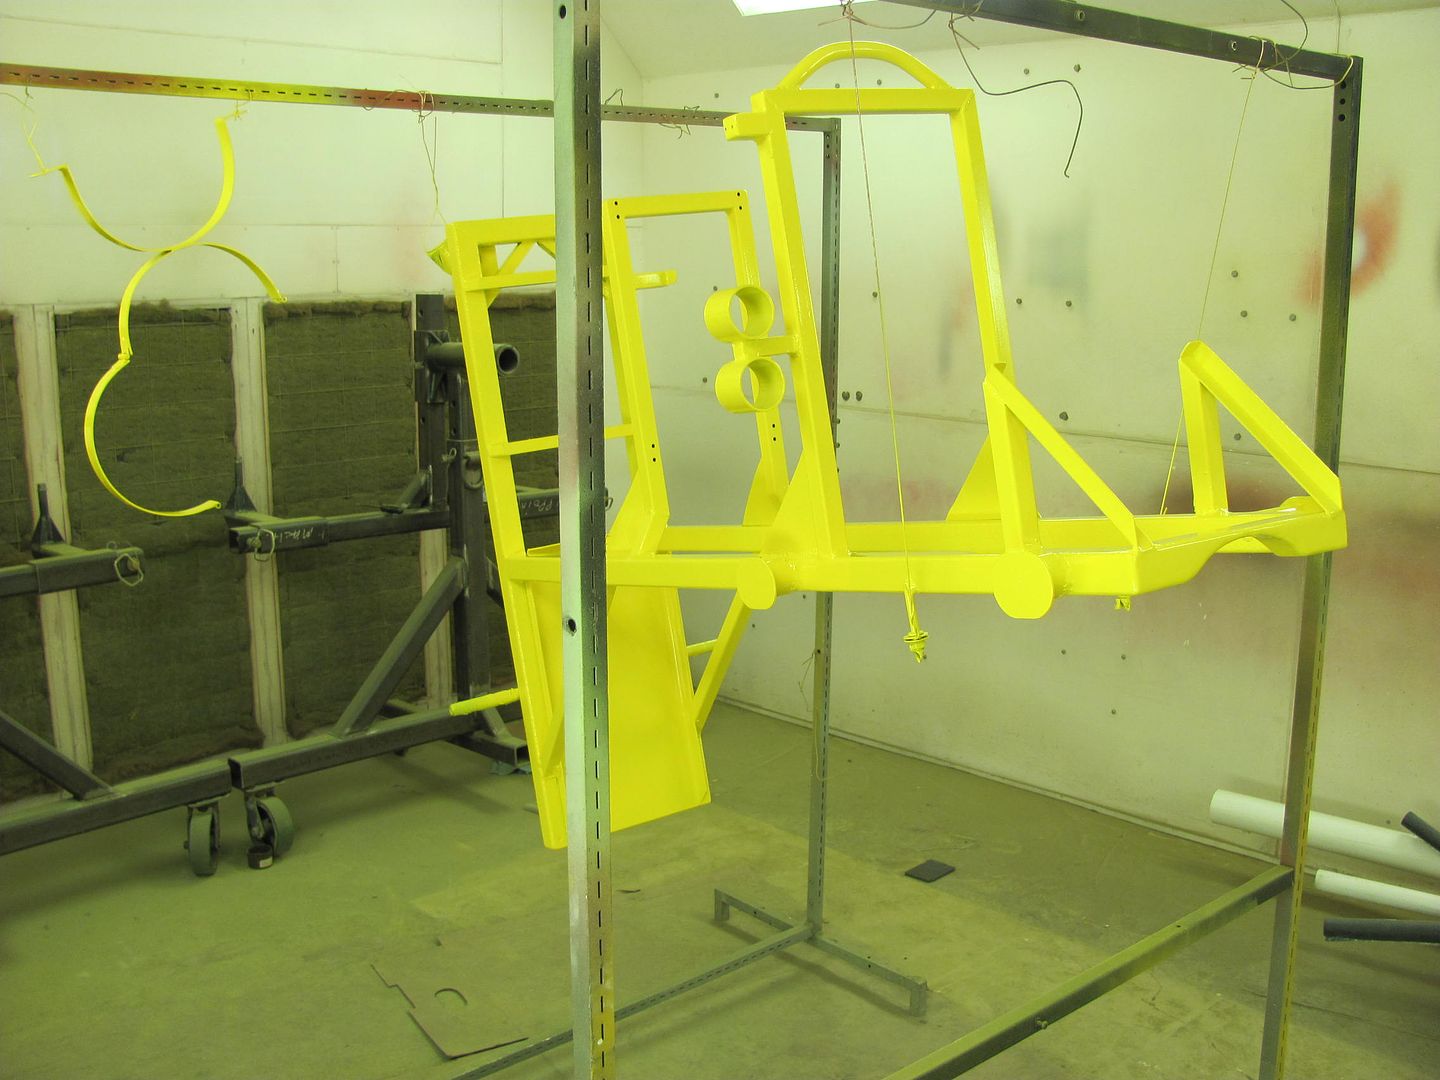
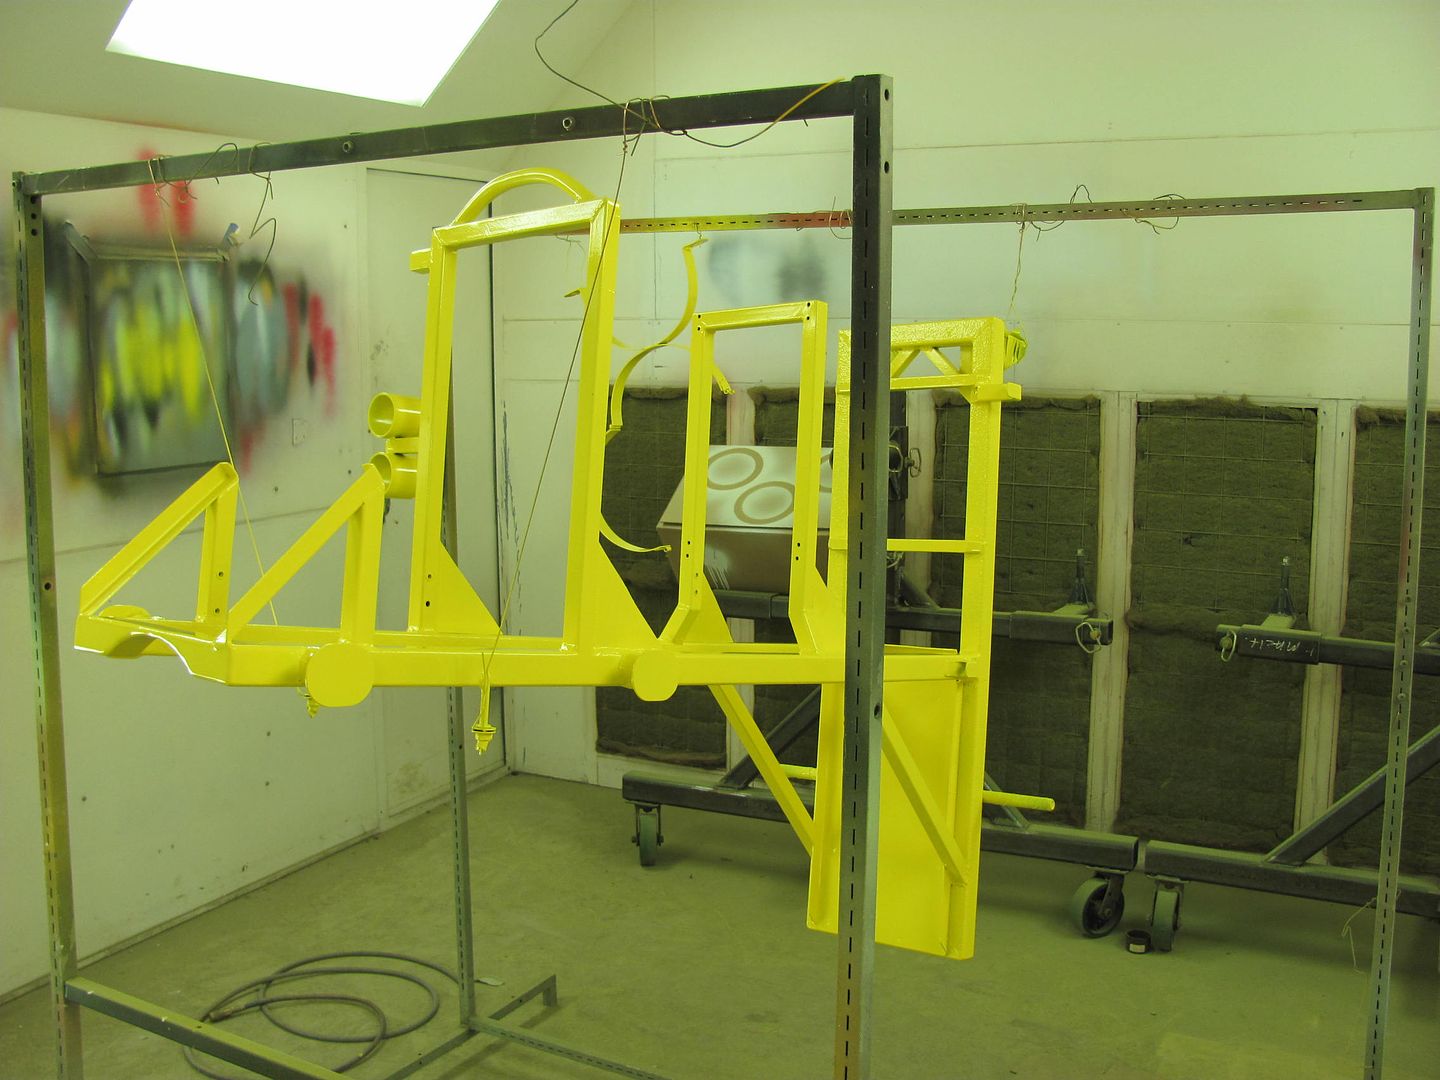
This should help to brighten up the shop!
Comment
-
So.Much.Awesome.Escaped on a technicality.Comment
-
Supercool cart. Nice.Of all the paths you take in life - make sure a few of them are dirt.Comment
-
Do You Ever Sleep!?!?
Inspiring project!Patrick & Tammy
- Long Haulin' 2008, 2009, 2010, 2011, 2012, 2014...Addicting isn't it...??Comment
-
This is where I'd normally say "There's plenty of time to sleep when you're dead" but now days that might cause a conflict of interest within myself and awaken the Locke-Less monster.
You see, I used to live on Locke Dr. & naturally it was lakefront property.Comment
-
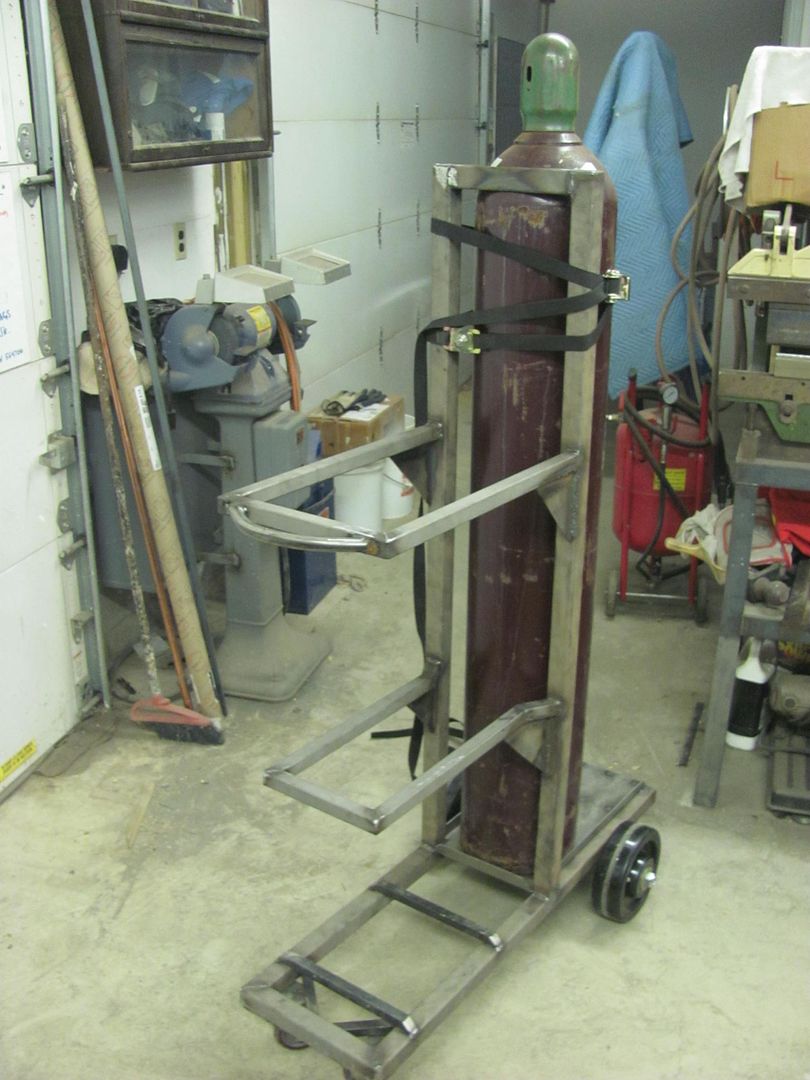
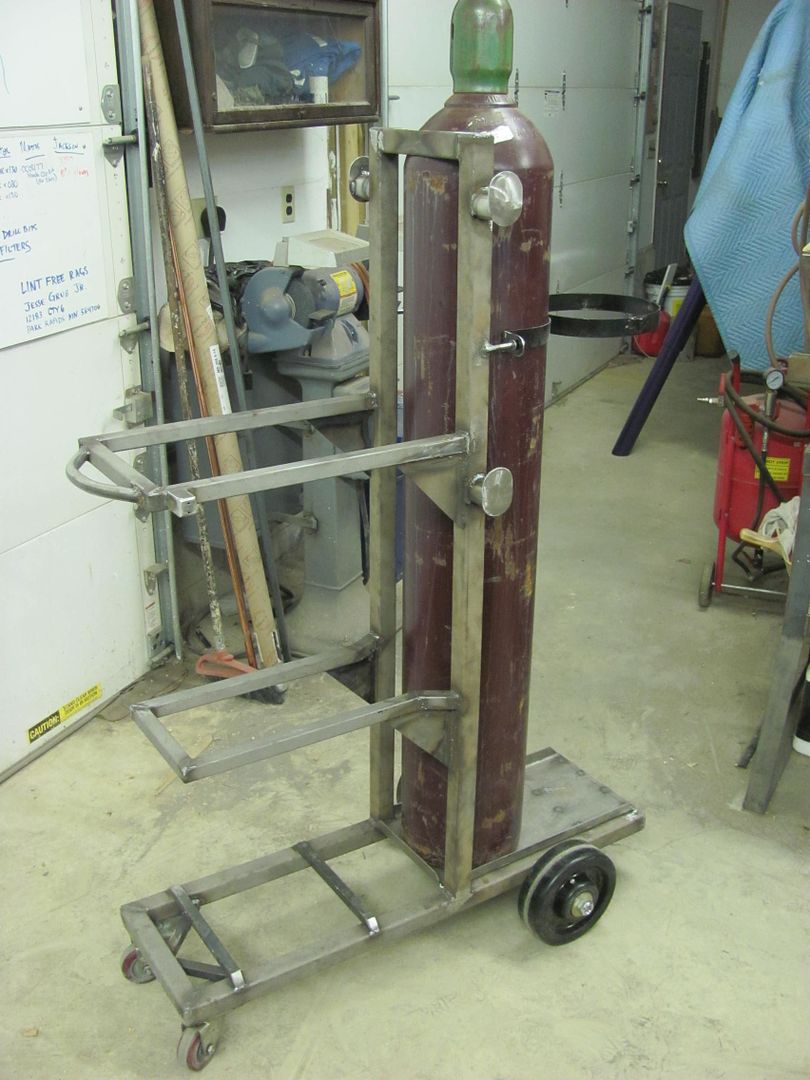
Okay, got things together today. Here's the total conglomeration...
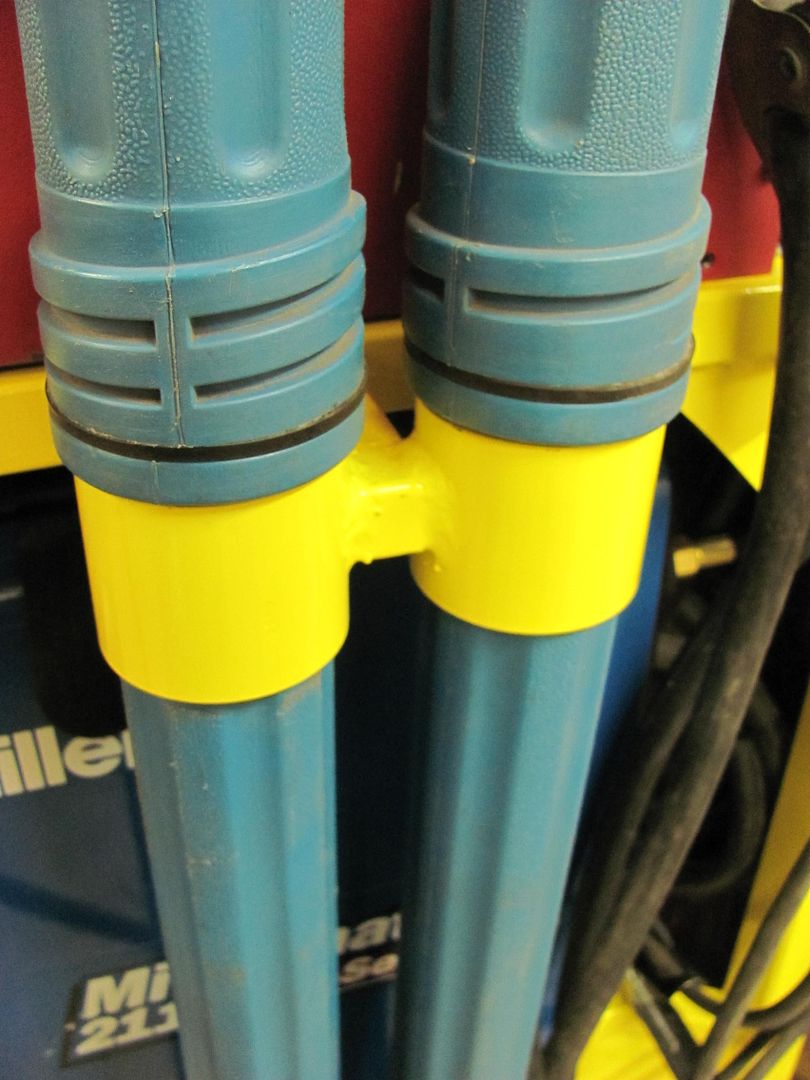
Welded rings to hold the Tig rod tubes......
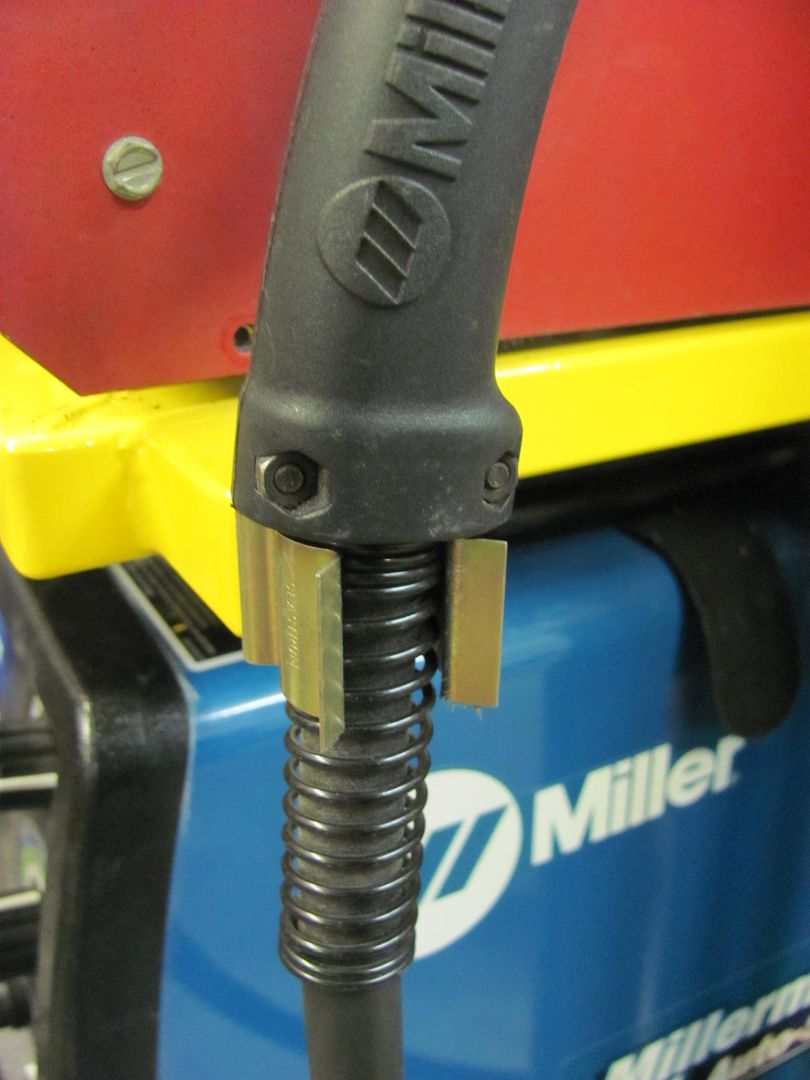
Retaining clip so the Mig torch doesn't have to lay on the floor...
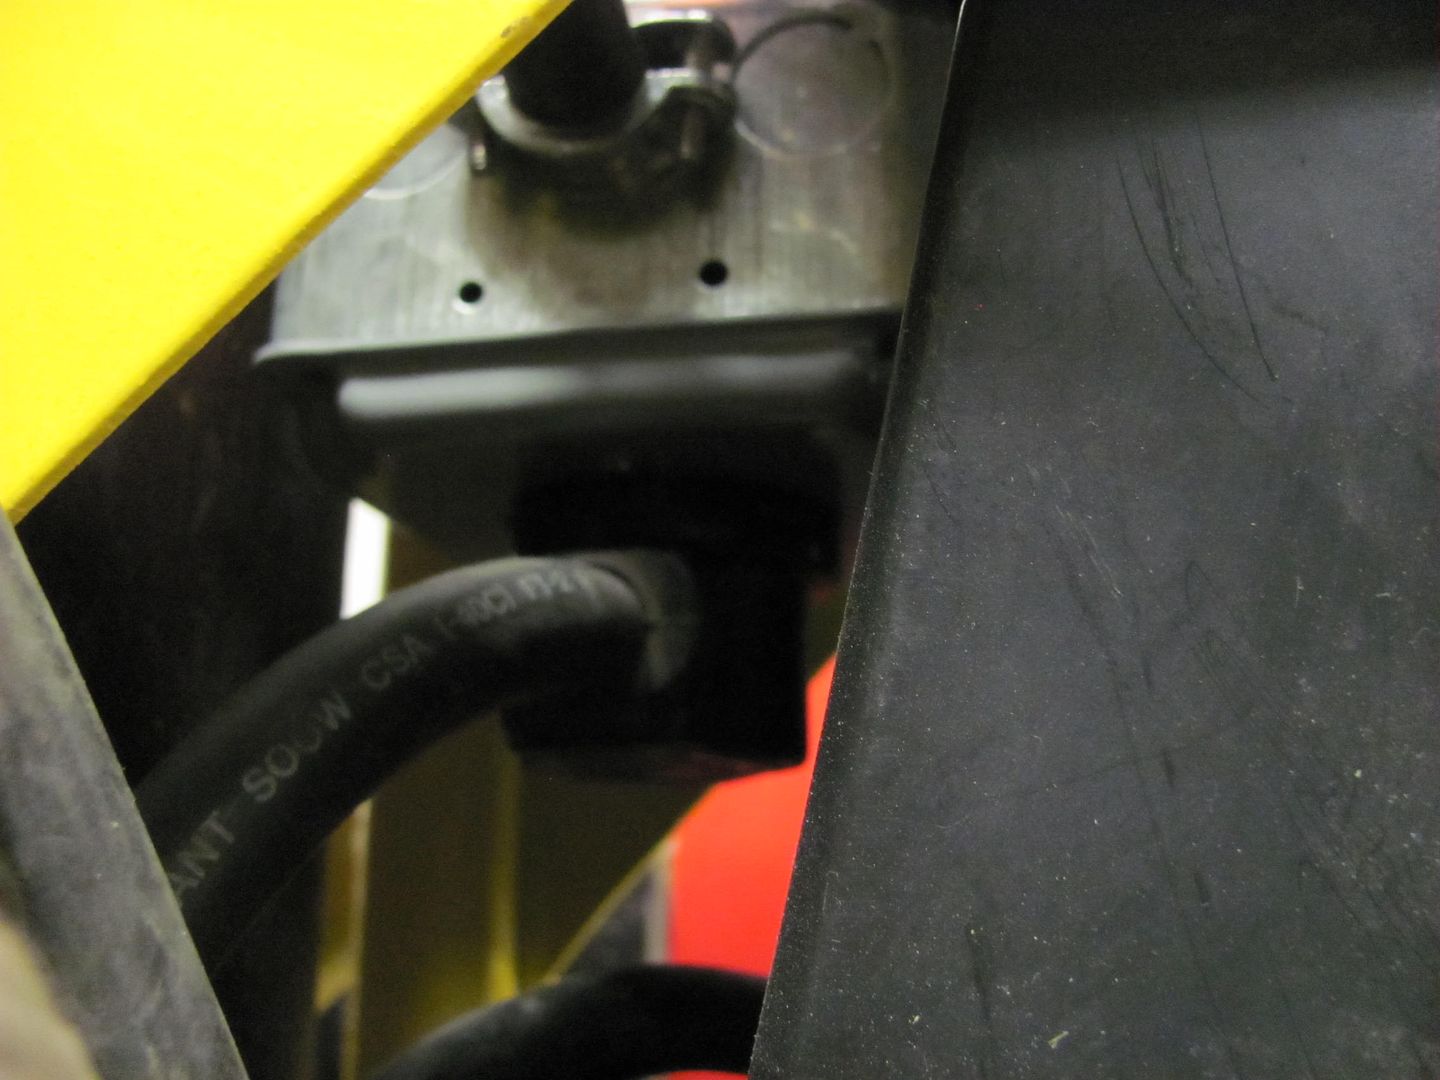
As you can see, not much for wasted space. Here's the outlet box for the Mig....
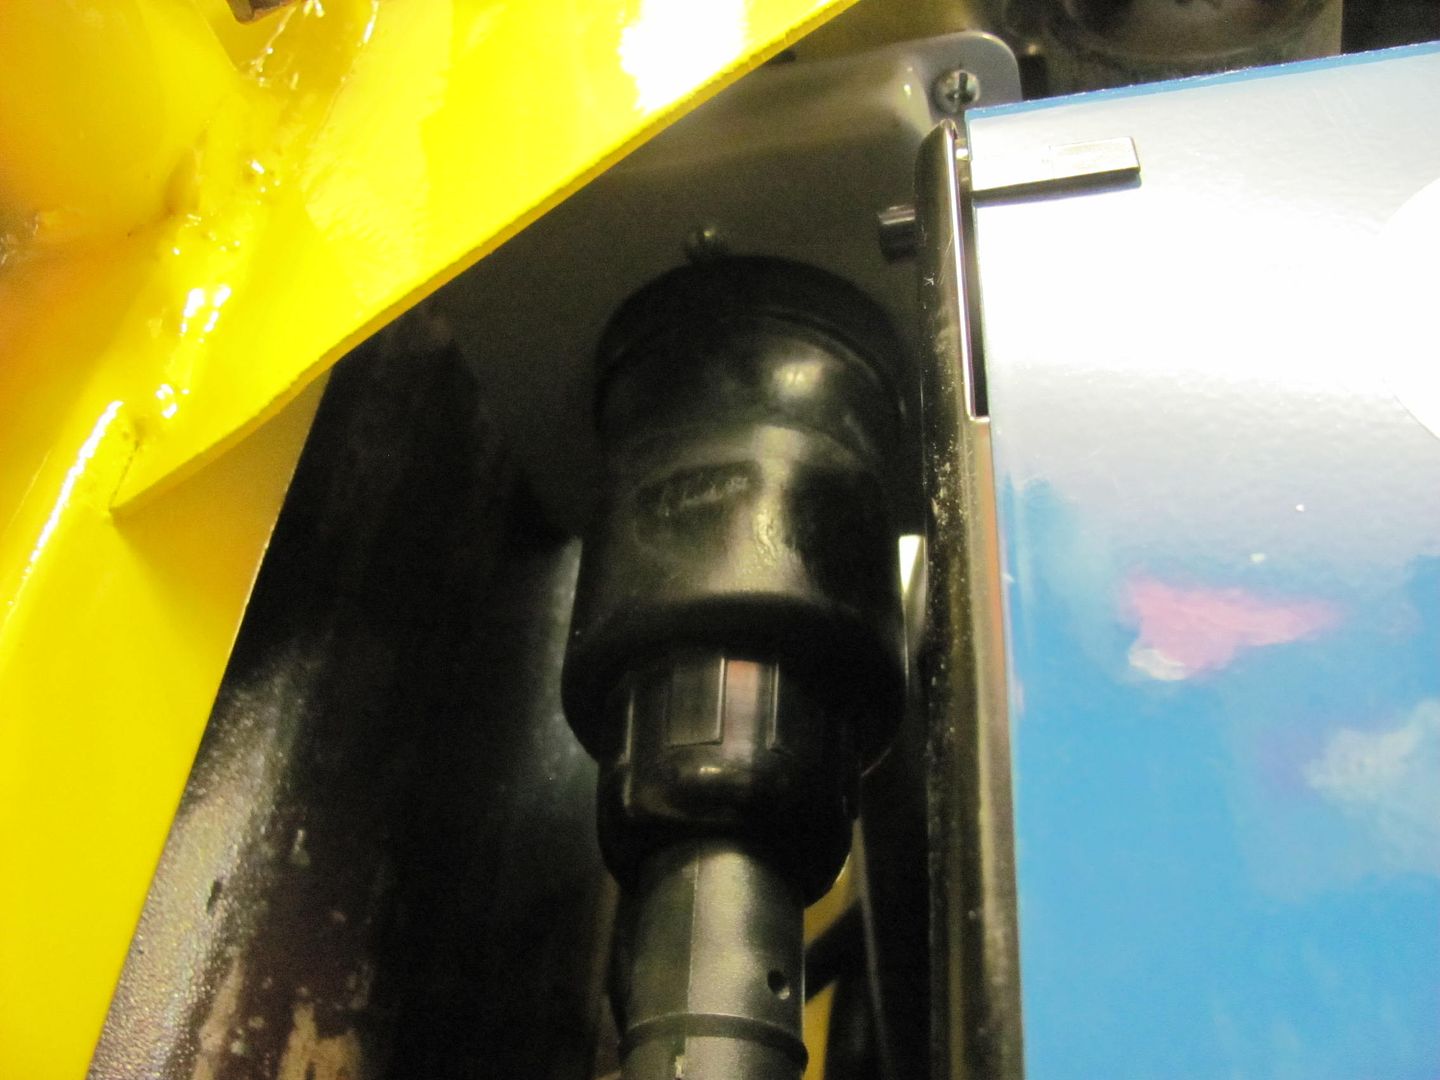
and Tig.....
Bottle bracket.....
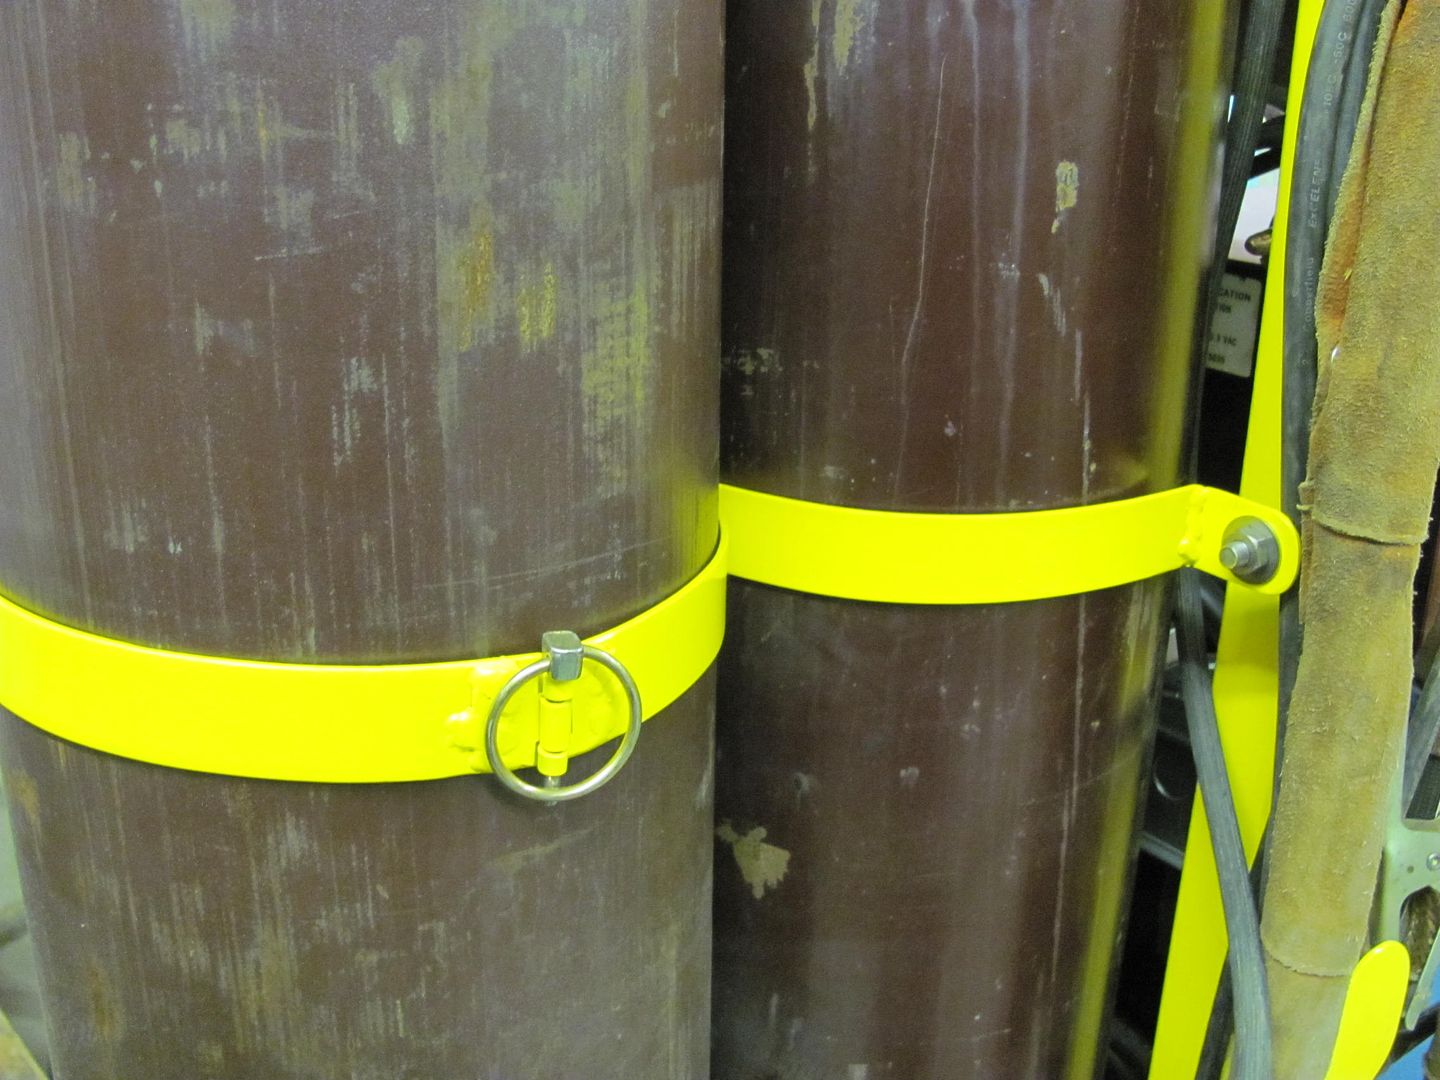
I did give it a good shove to see how top heavy it was, and with the two bottles directly over the rear wheels it's very stable. Don't think I'll need worry about any accidental turnovers...
Comment


Comment