 Tweet
Tweet
Yeah, your parts fit better than original.......
-
Ed, Mary, & 'Earl'
HRPT LongHaulers, 08, 09, 10, 11, 12, 13, 15, 16, 17, 18, 19.
Inside every old person is a young person wondering, "what the hell happened?"
The man at the top of the mountain didn't fall there. -Vince Lombardi -
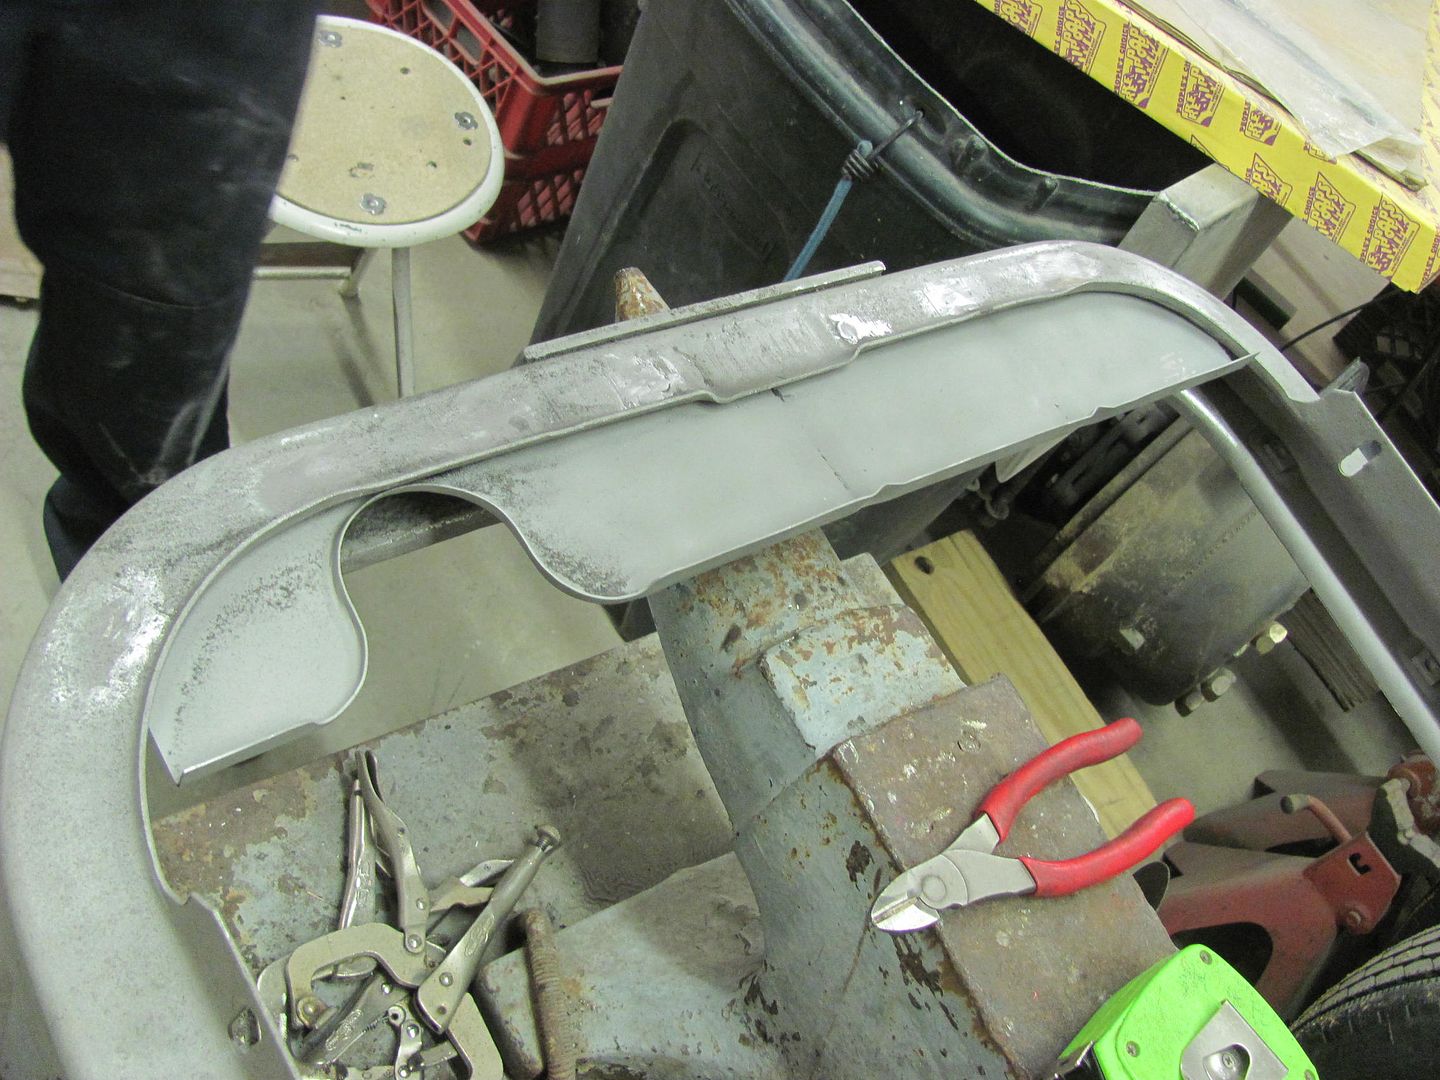
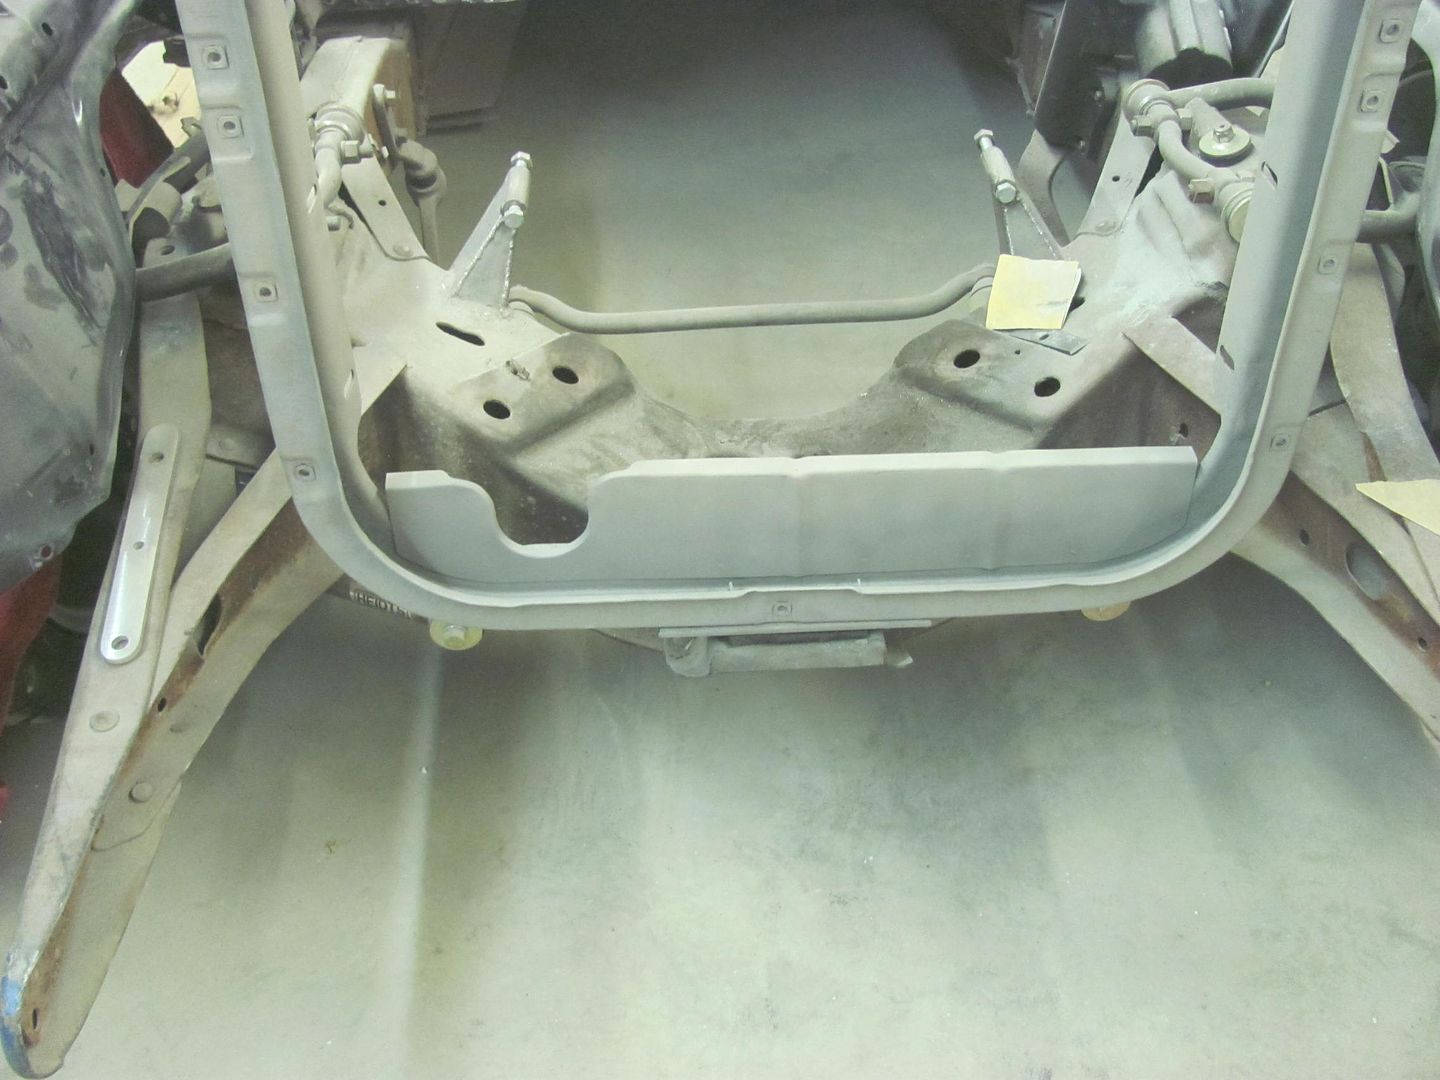
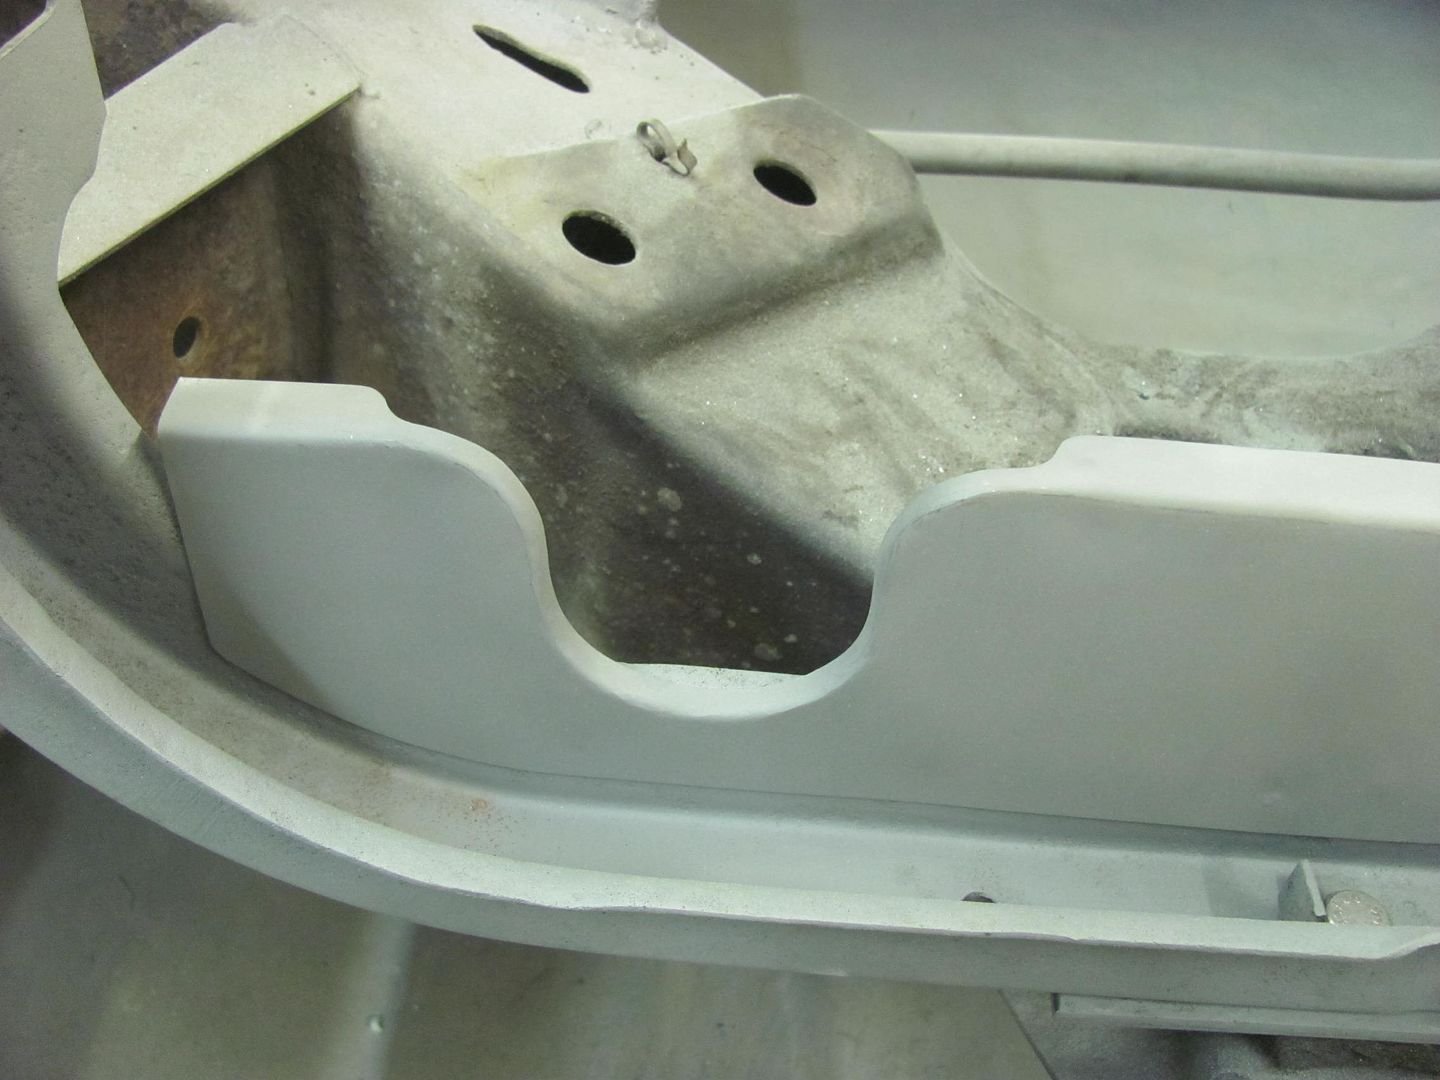
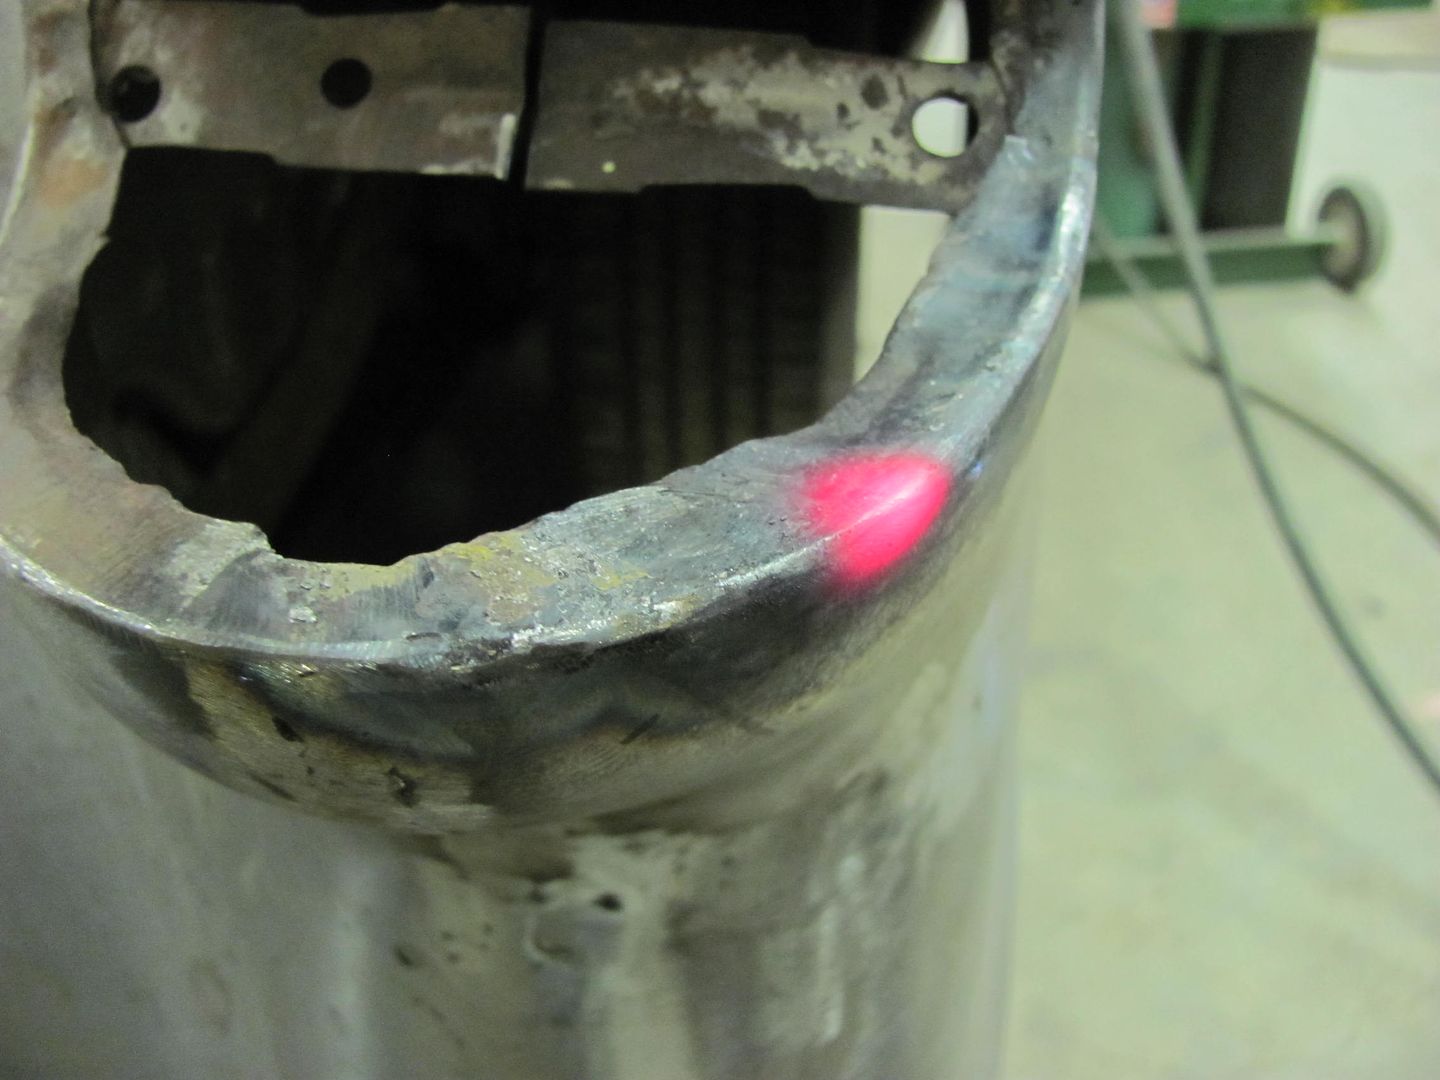
Should have an easier time of draining the radiator now...
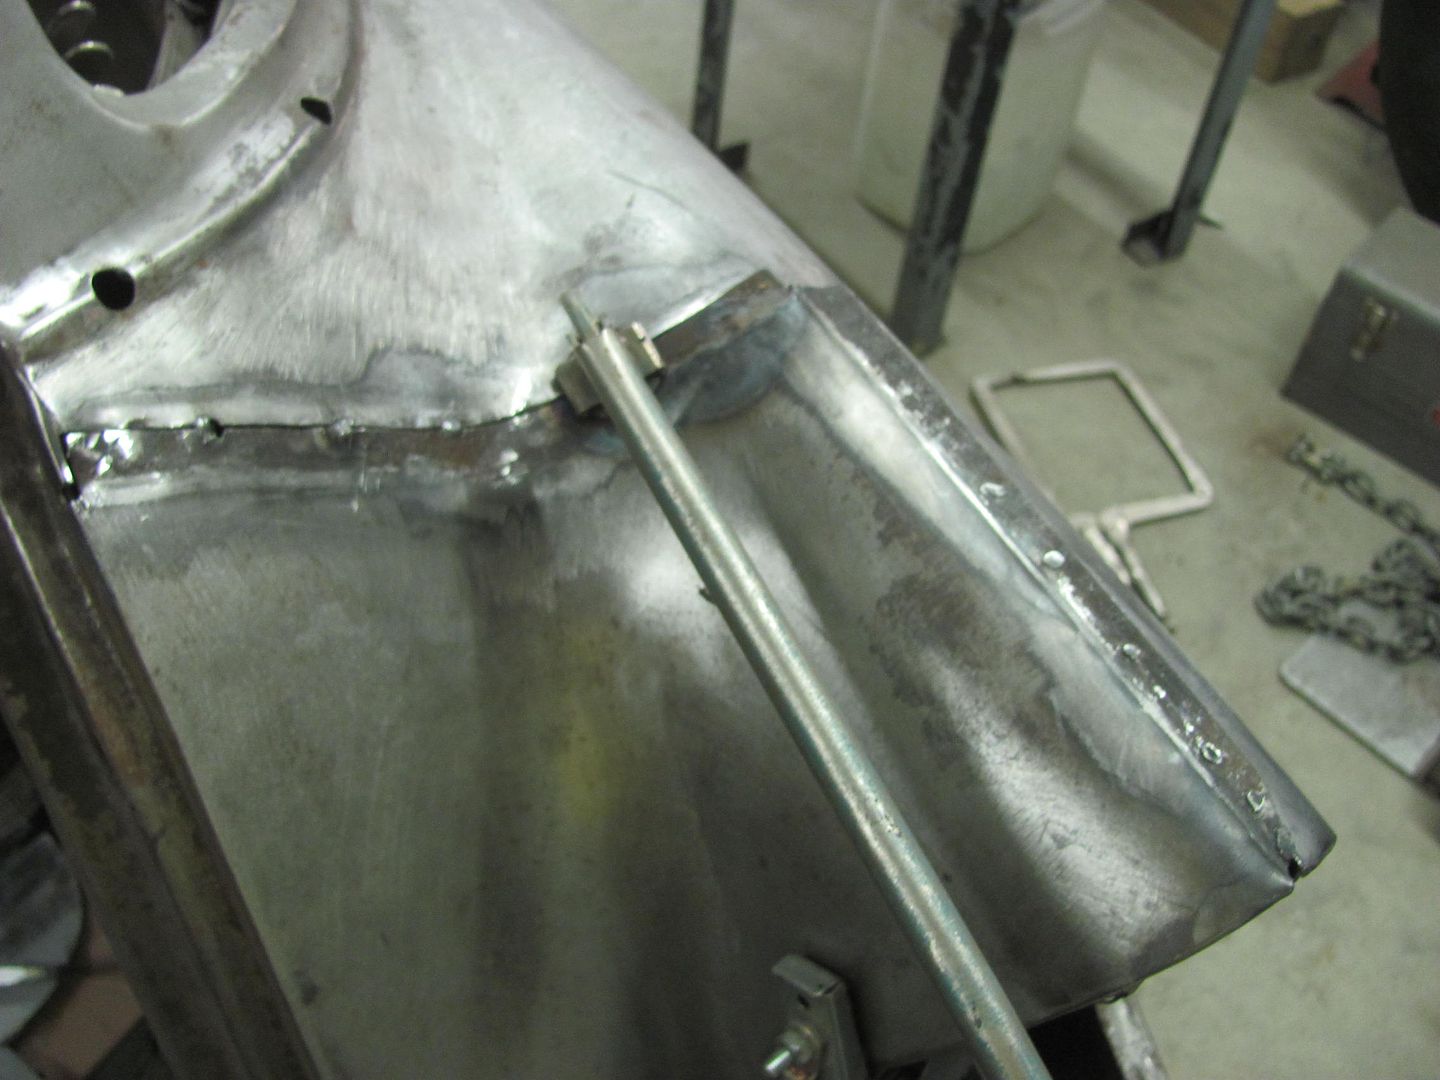
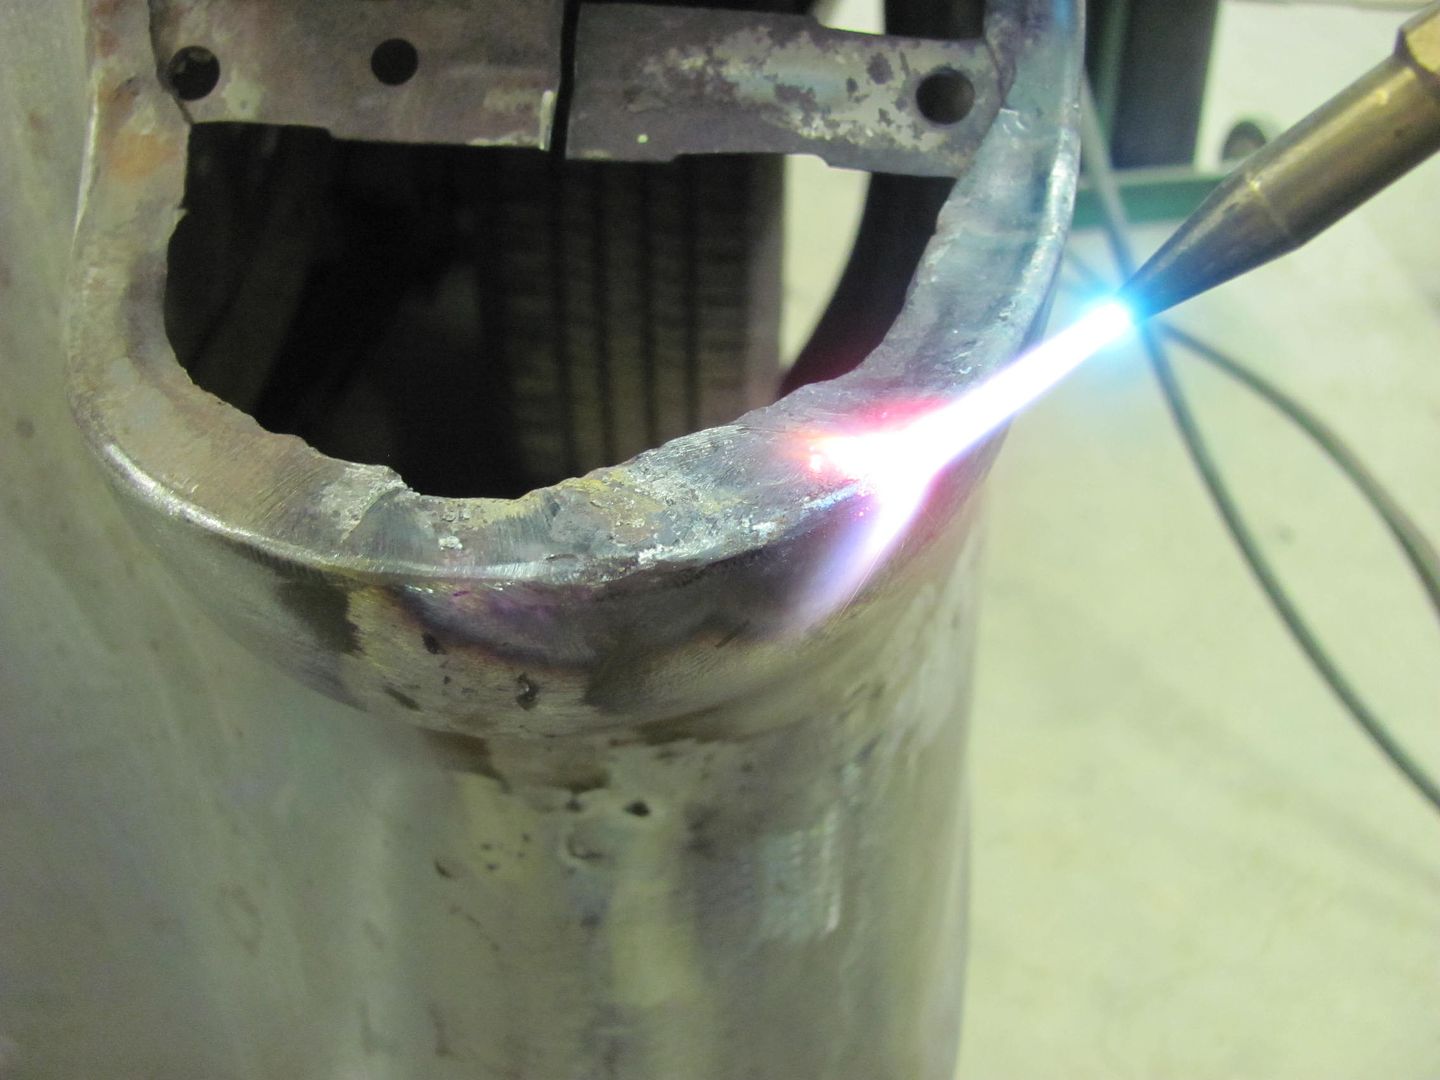
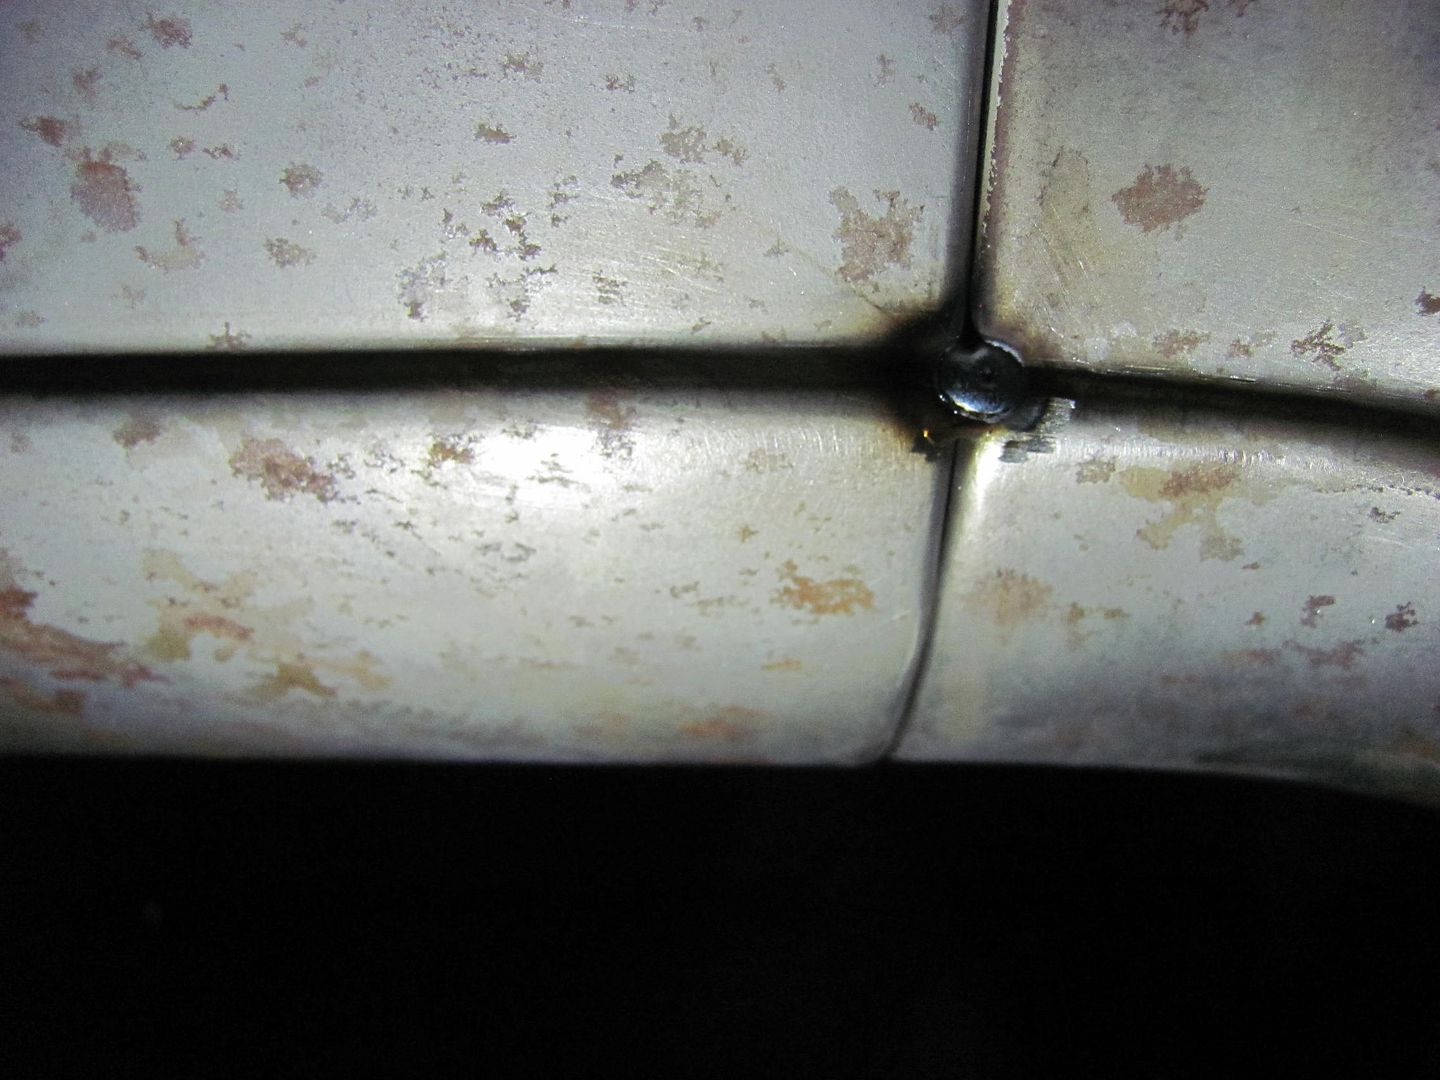
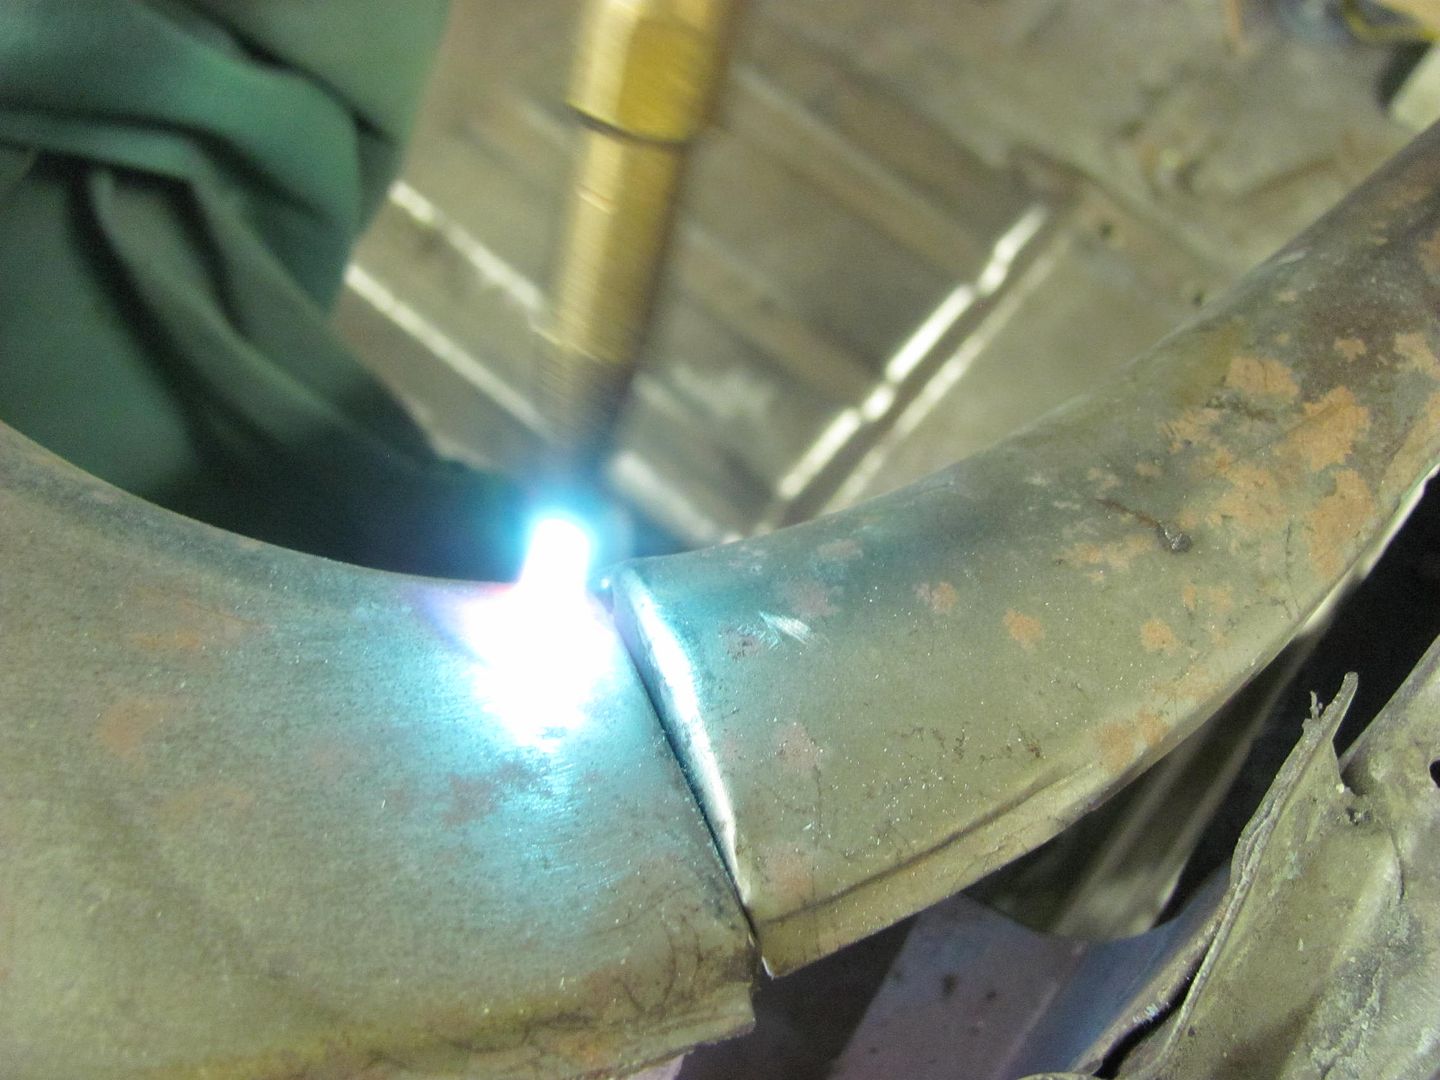
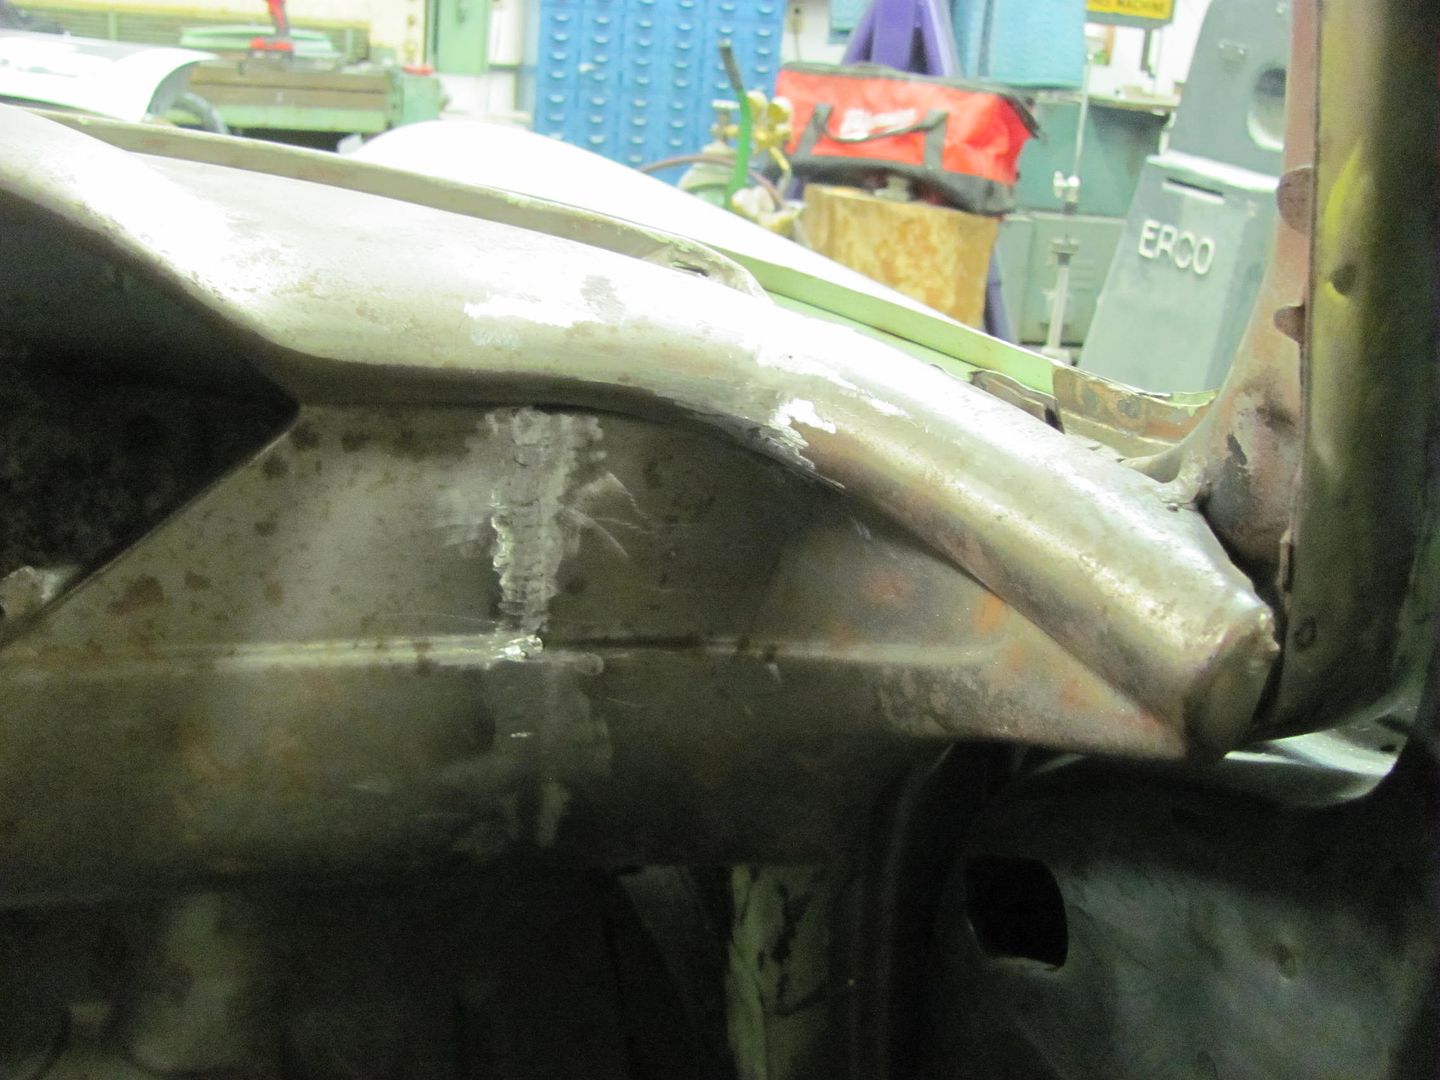
Today the baffle got welded into the core support, here with the plug weld holes drilled.
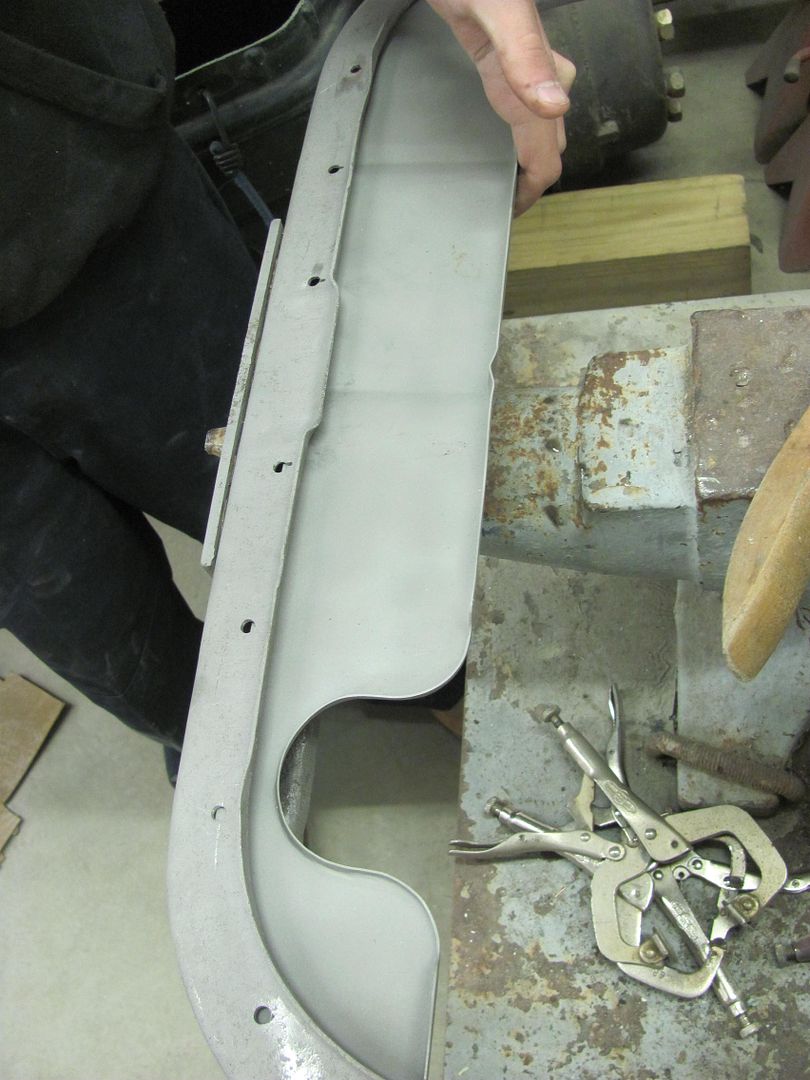
The modified relief we fabricated shows to be about as low as we could have made it..
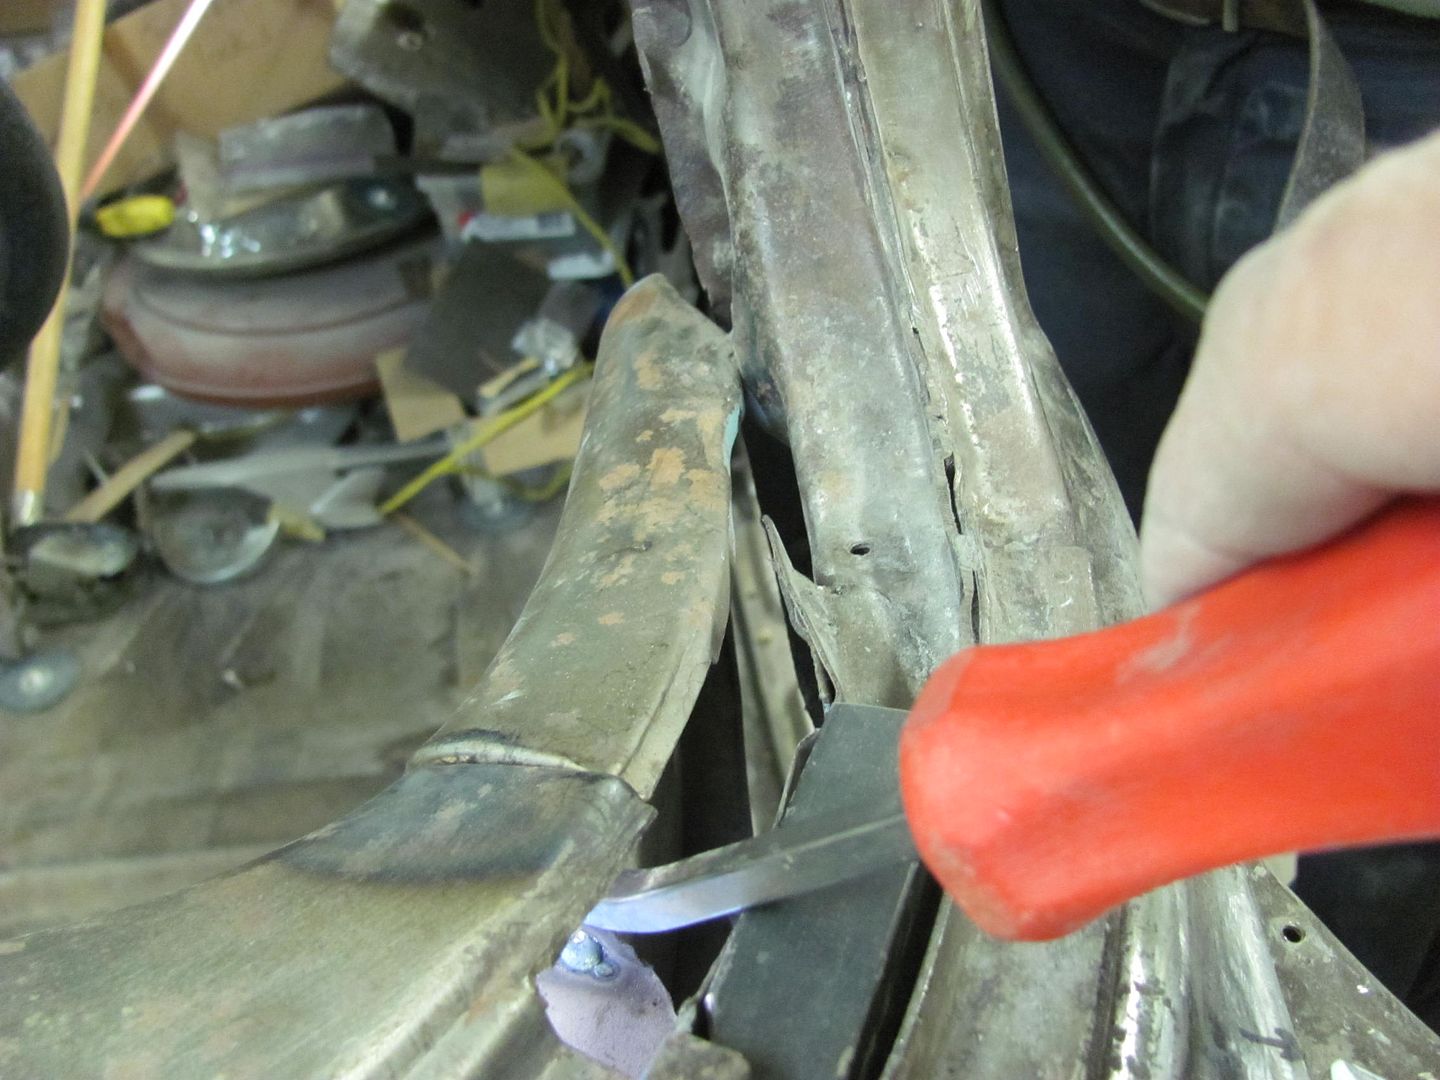
Then attention was turned to the rear quarter on the passenger side where we had shaved the lead seam..

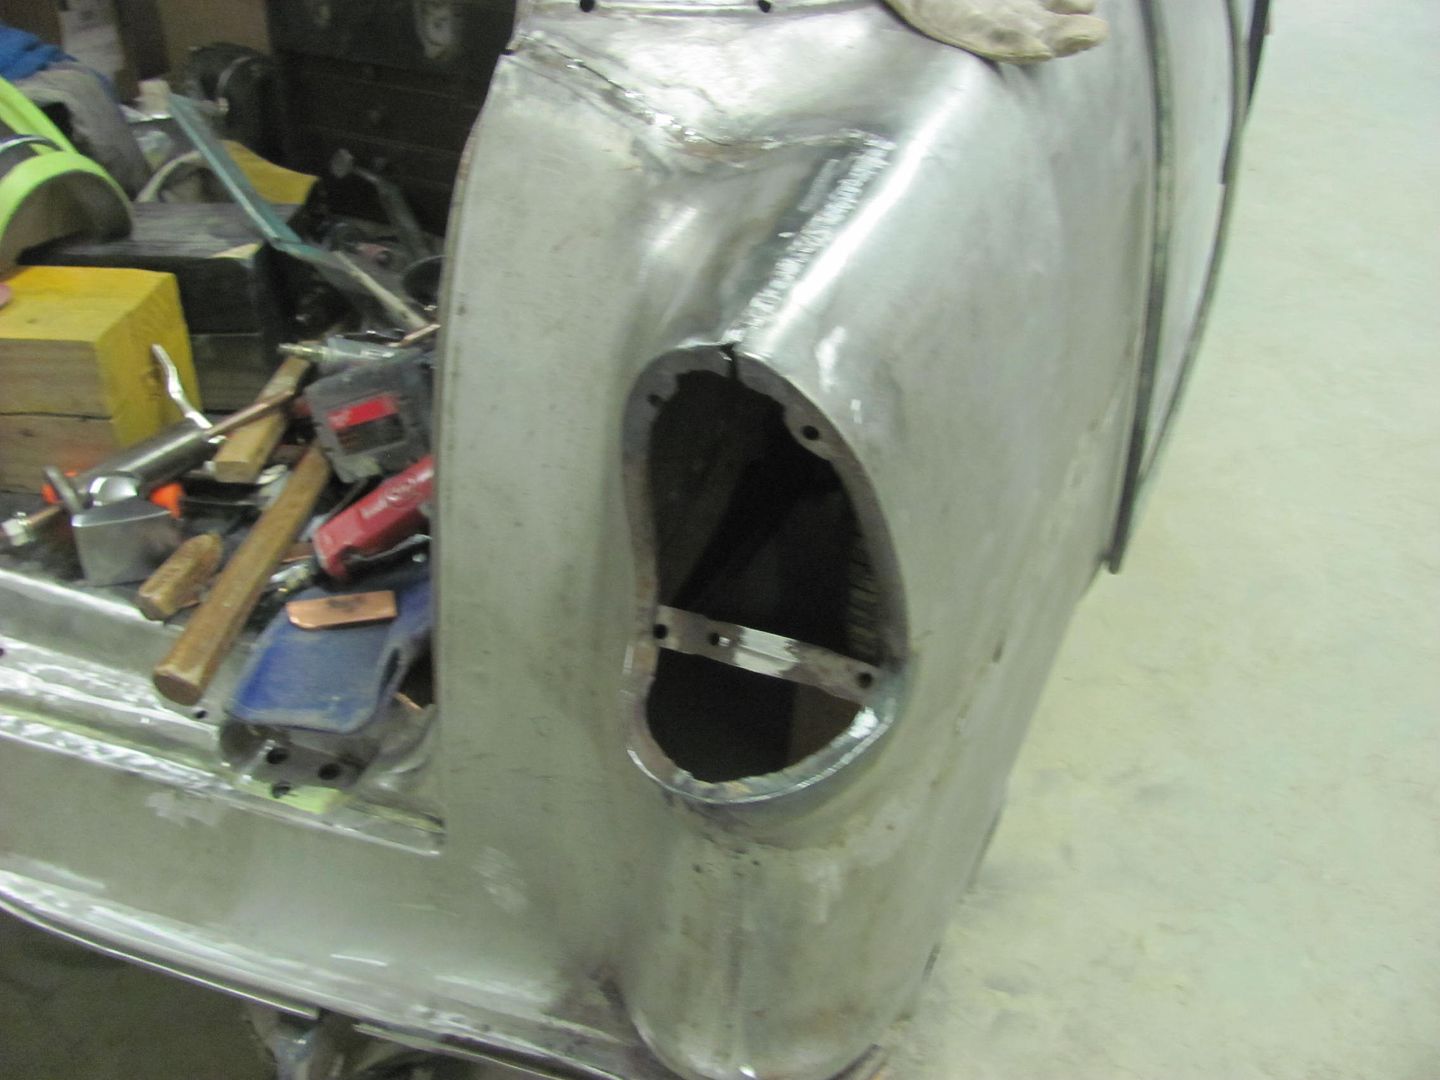
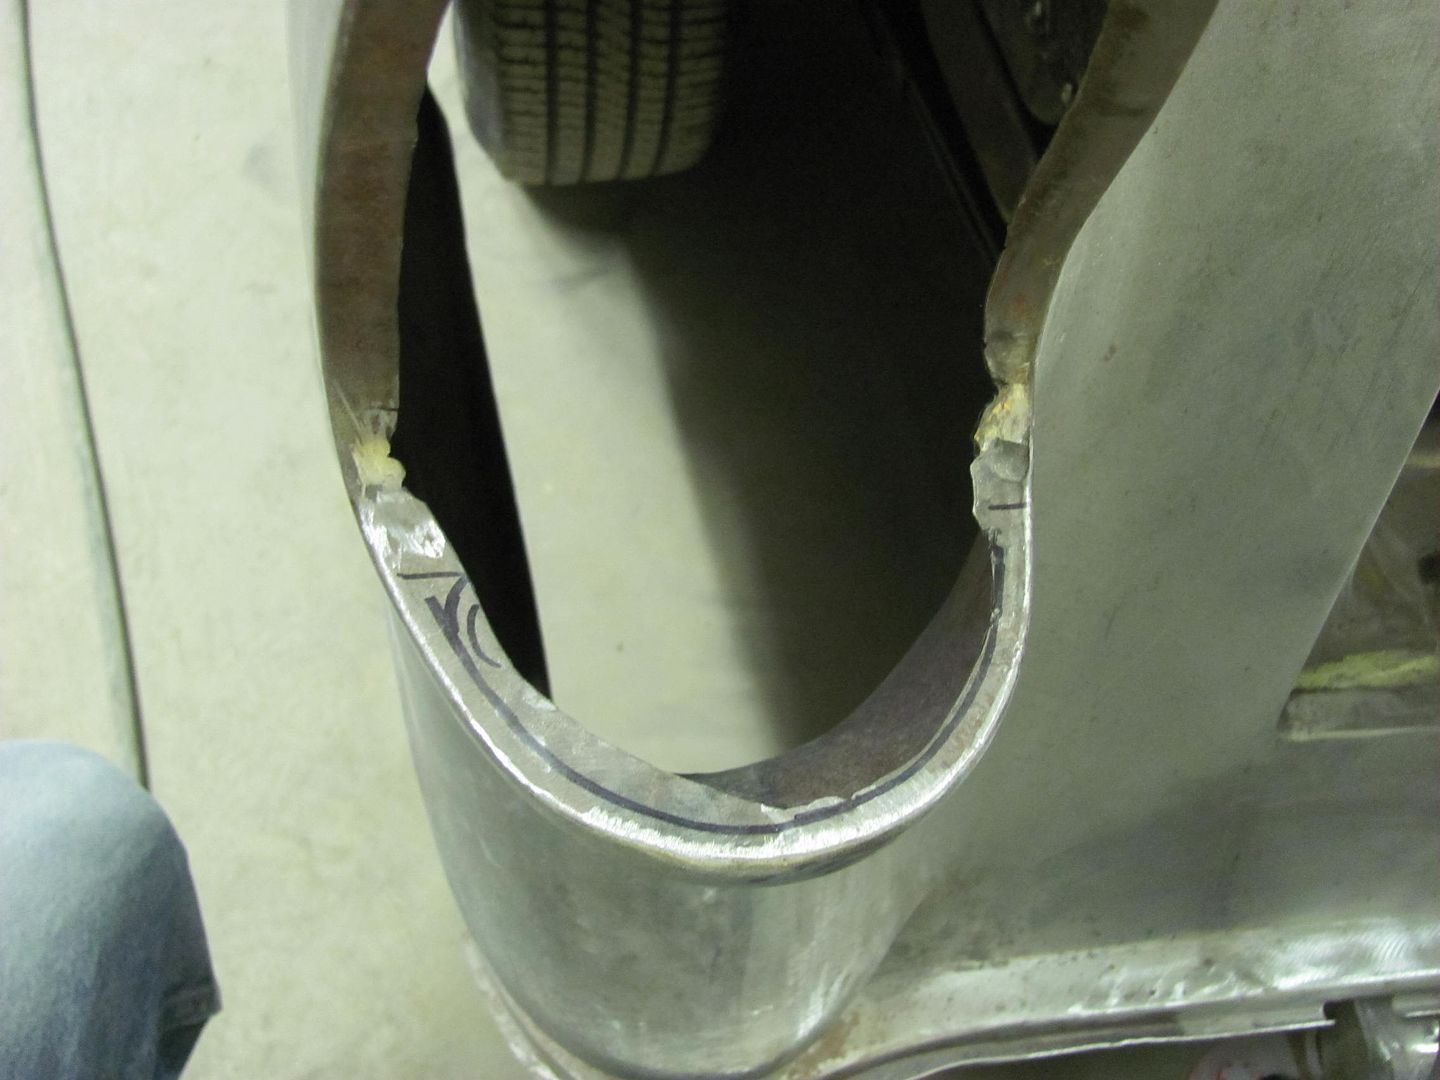
We had held off on the tail light opening as we wanted to fit the opening to the light bezels. We had received the reproduction chrome light bezels a couple weeks ago, and gave them a protective layer to keep the chrome nice and shiny..
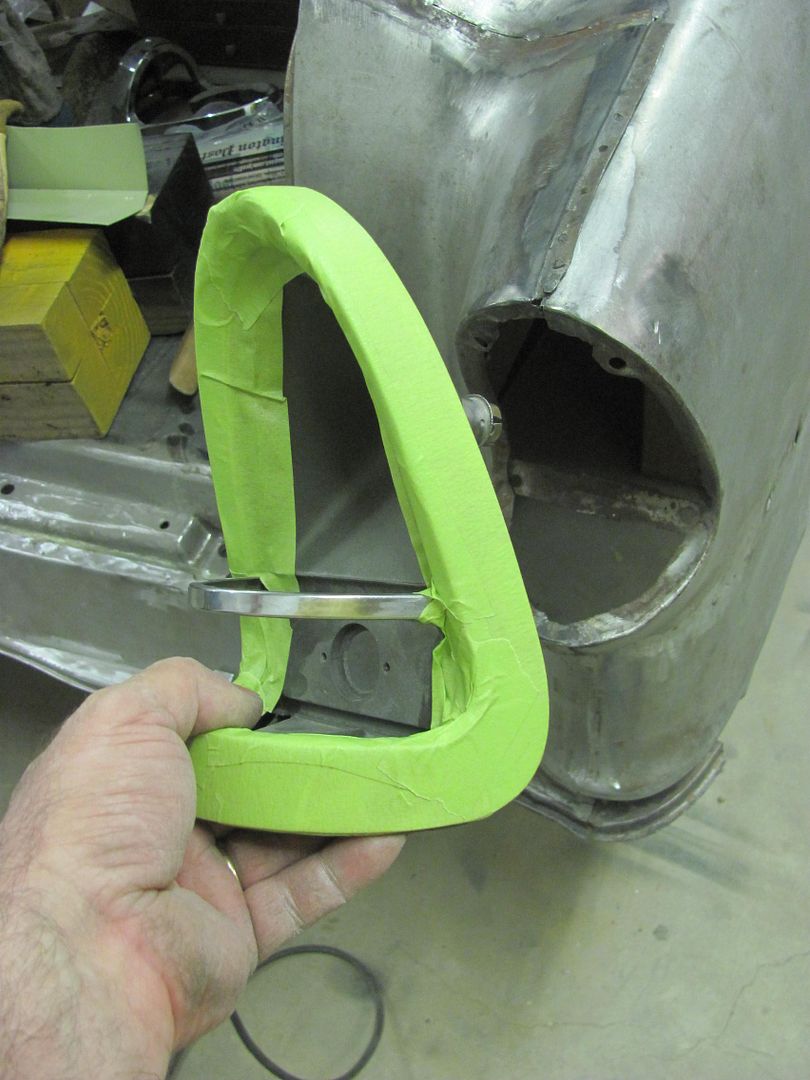
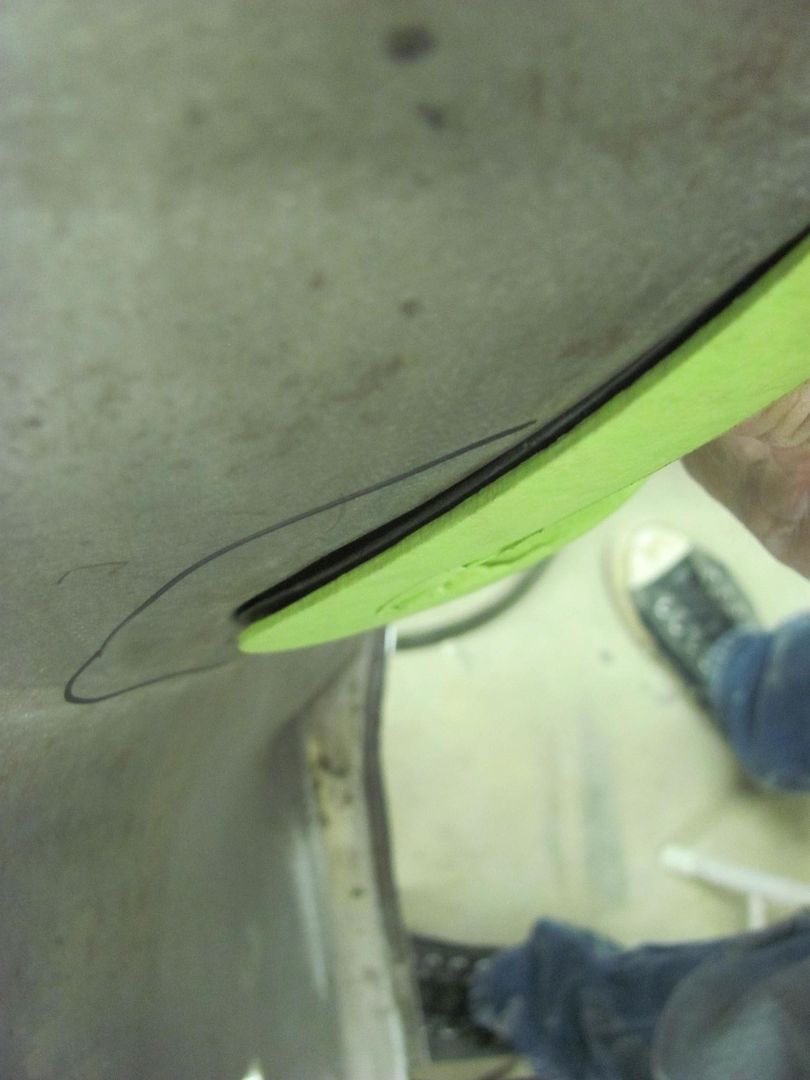
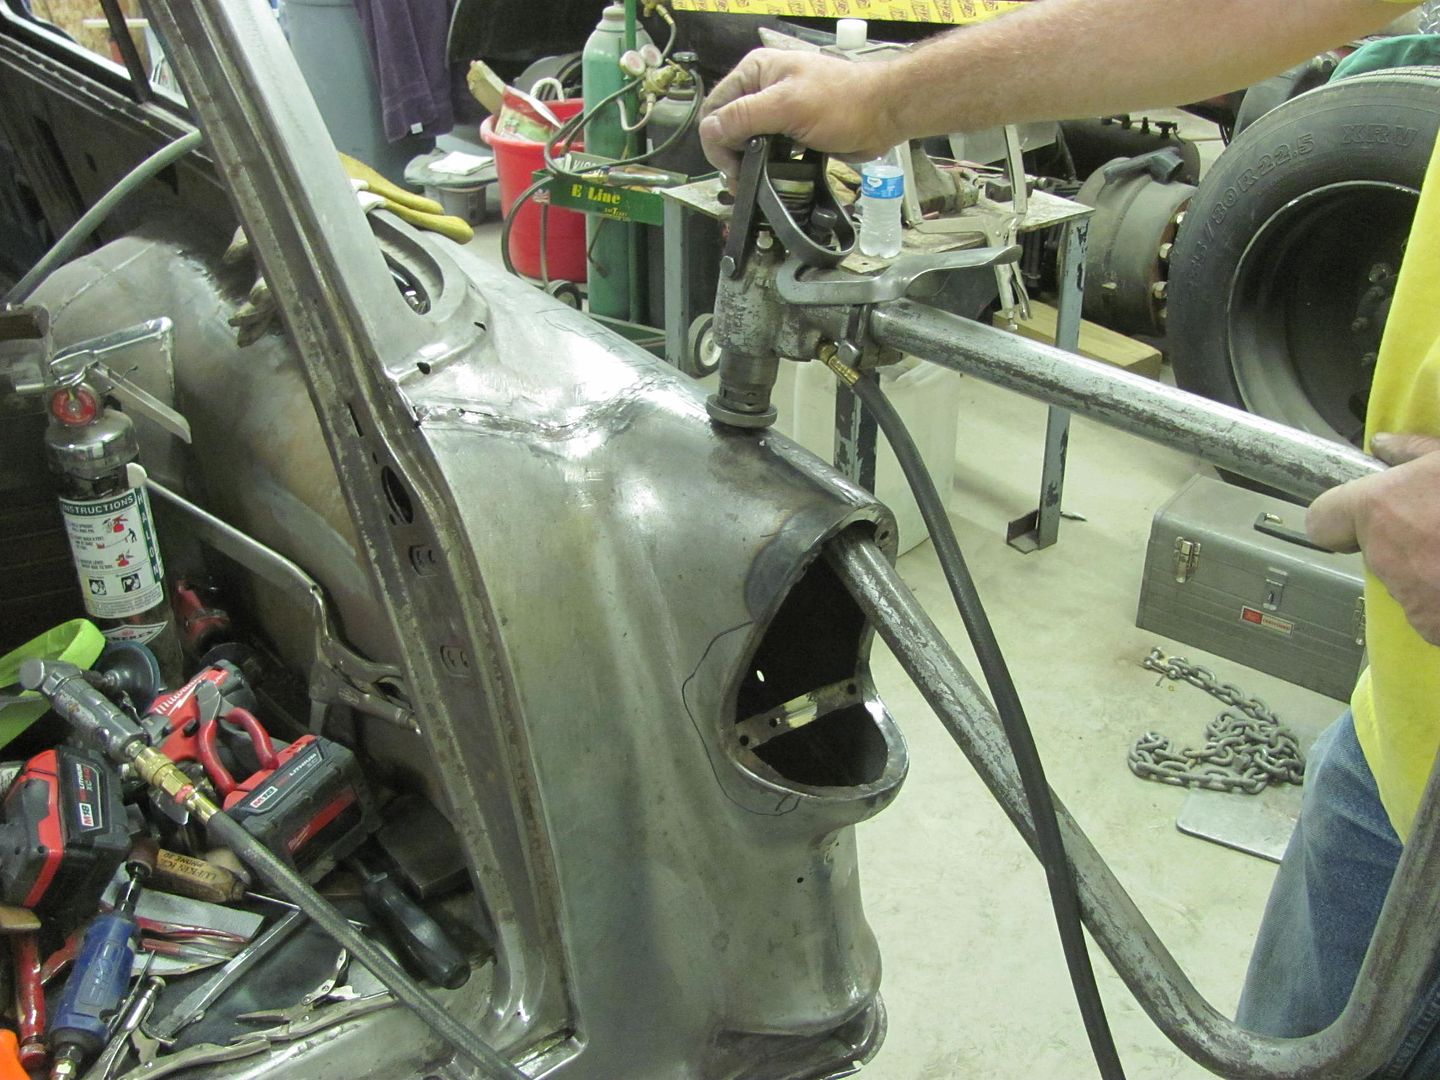
The light opening seemed all out of sorts, with a bulge protruding out past the corner of the bezel here....
Let the modifications begin!
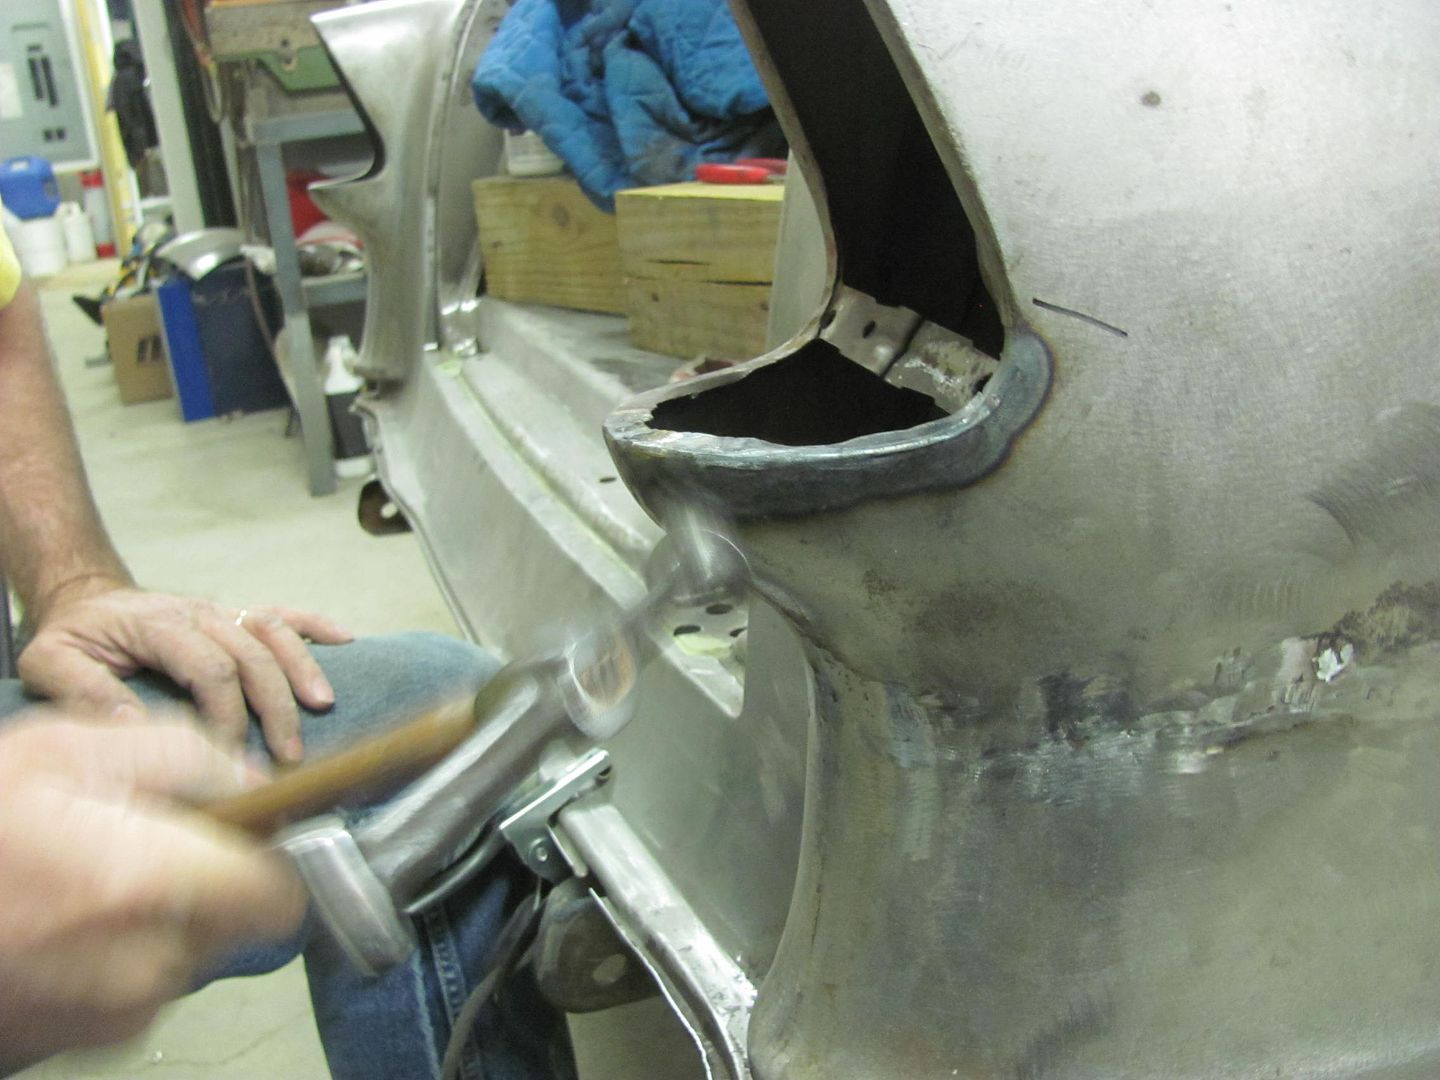
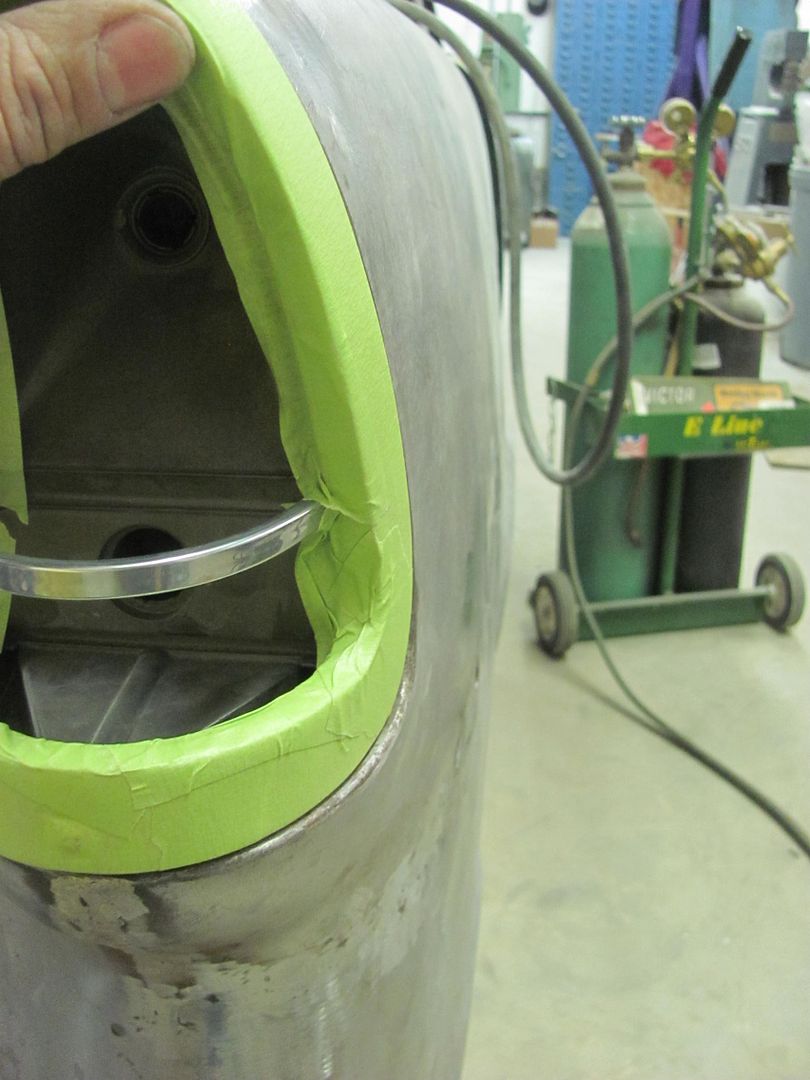
And we had the opposite problem on the inner side...
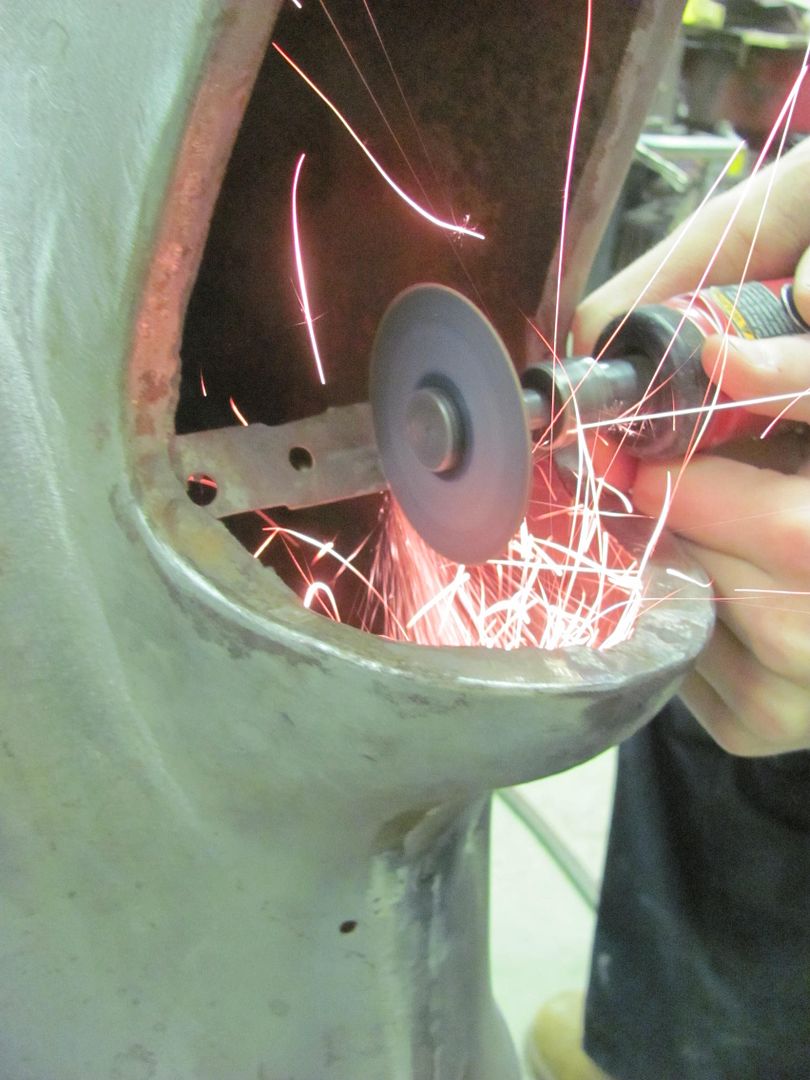
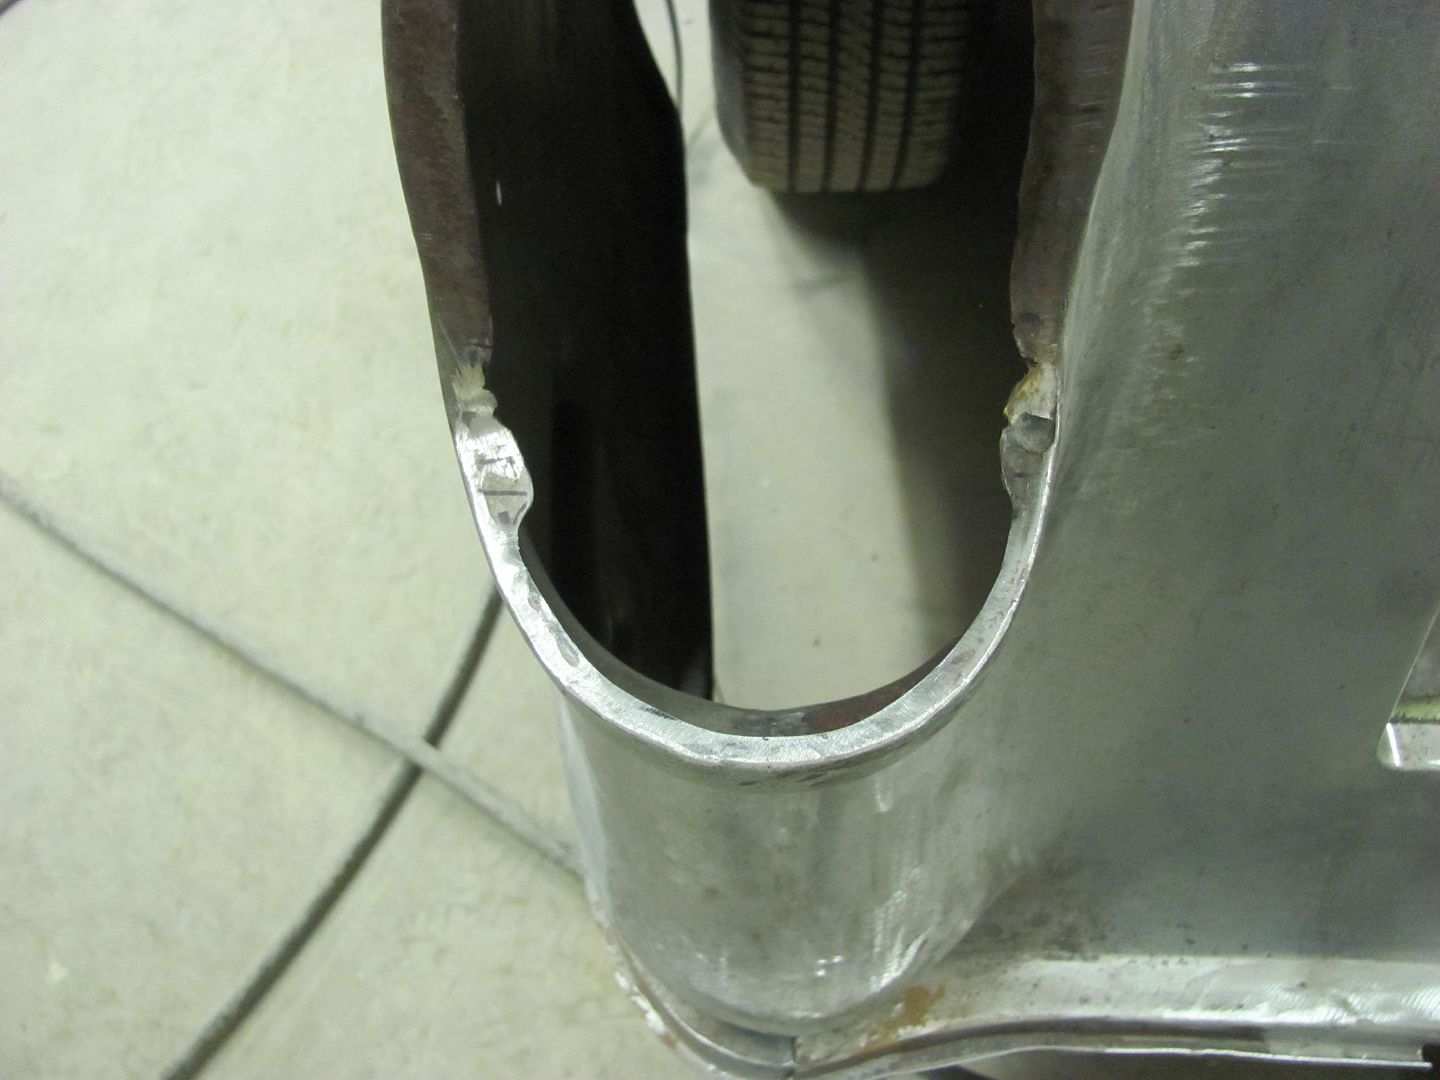
The vise grip dent puller and the special hook was used to spread the opening...
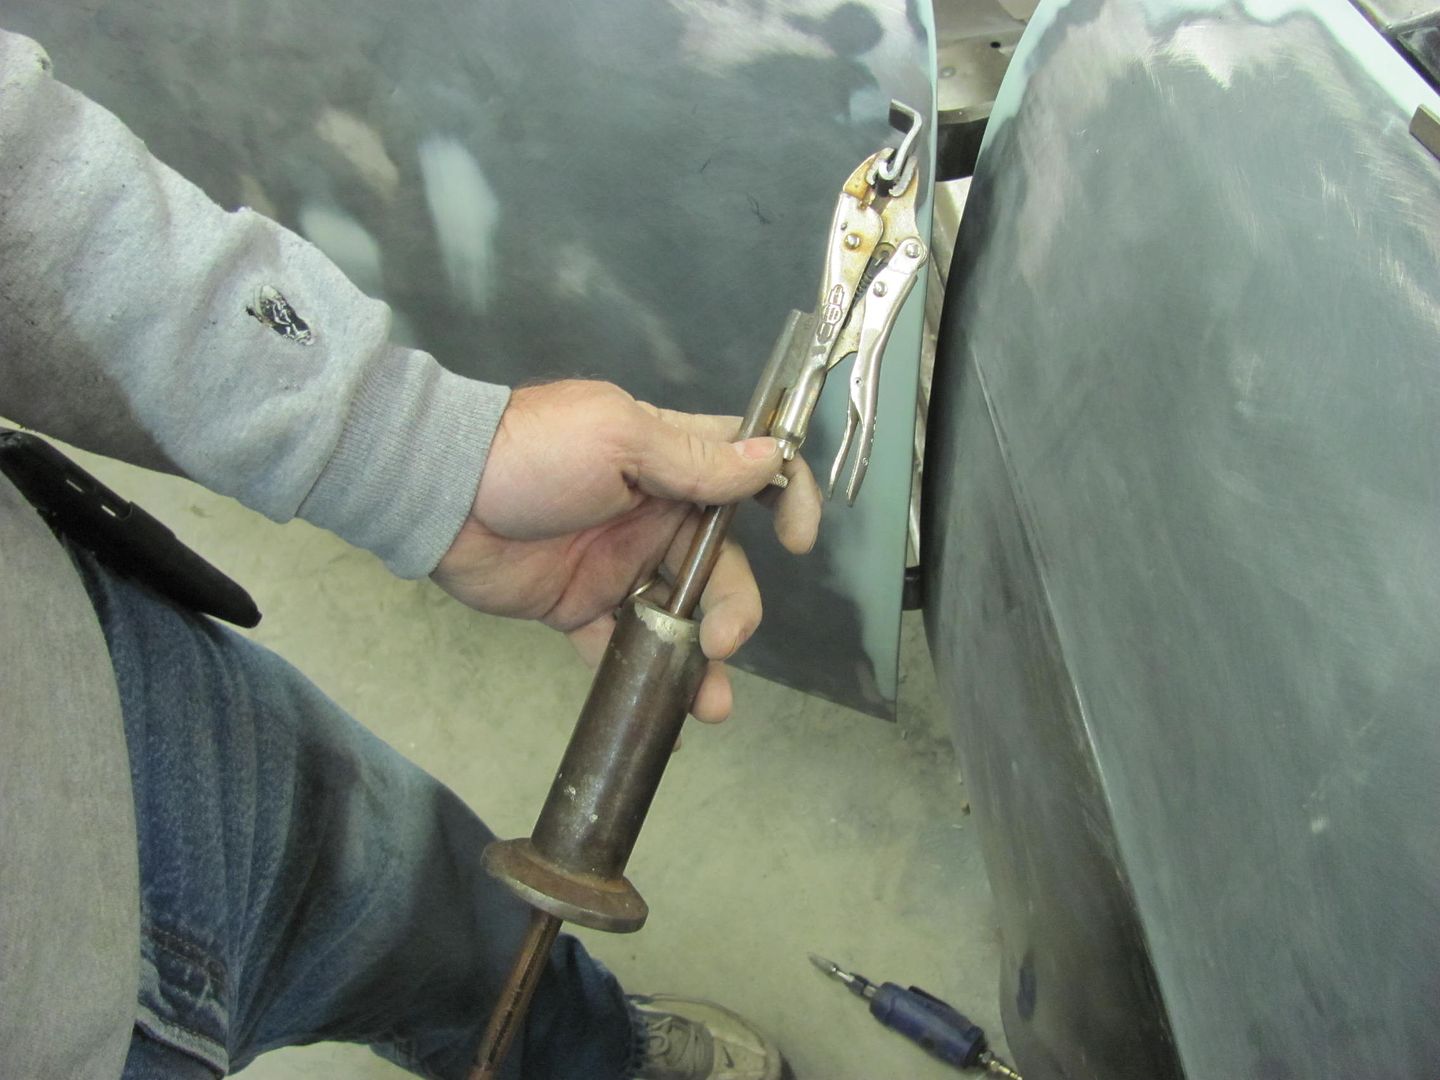
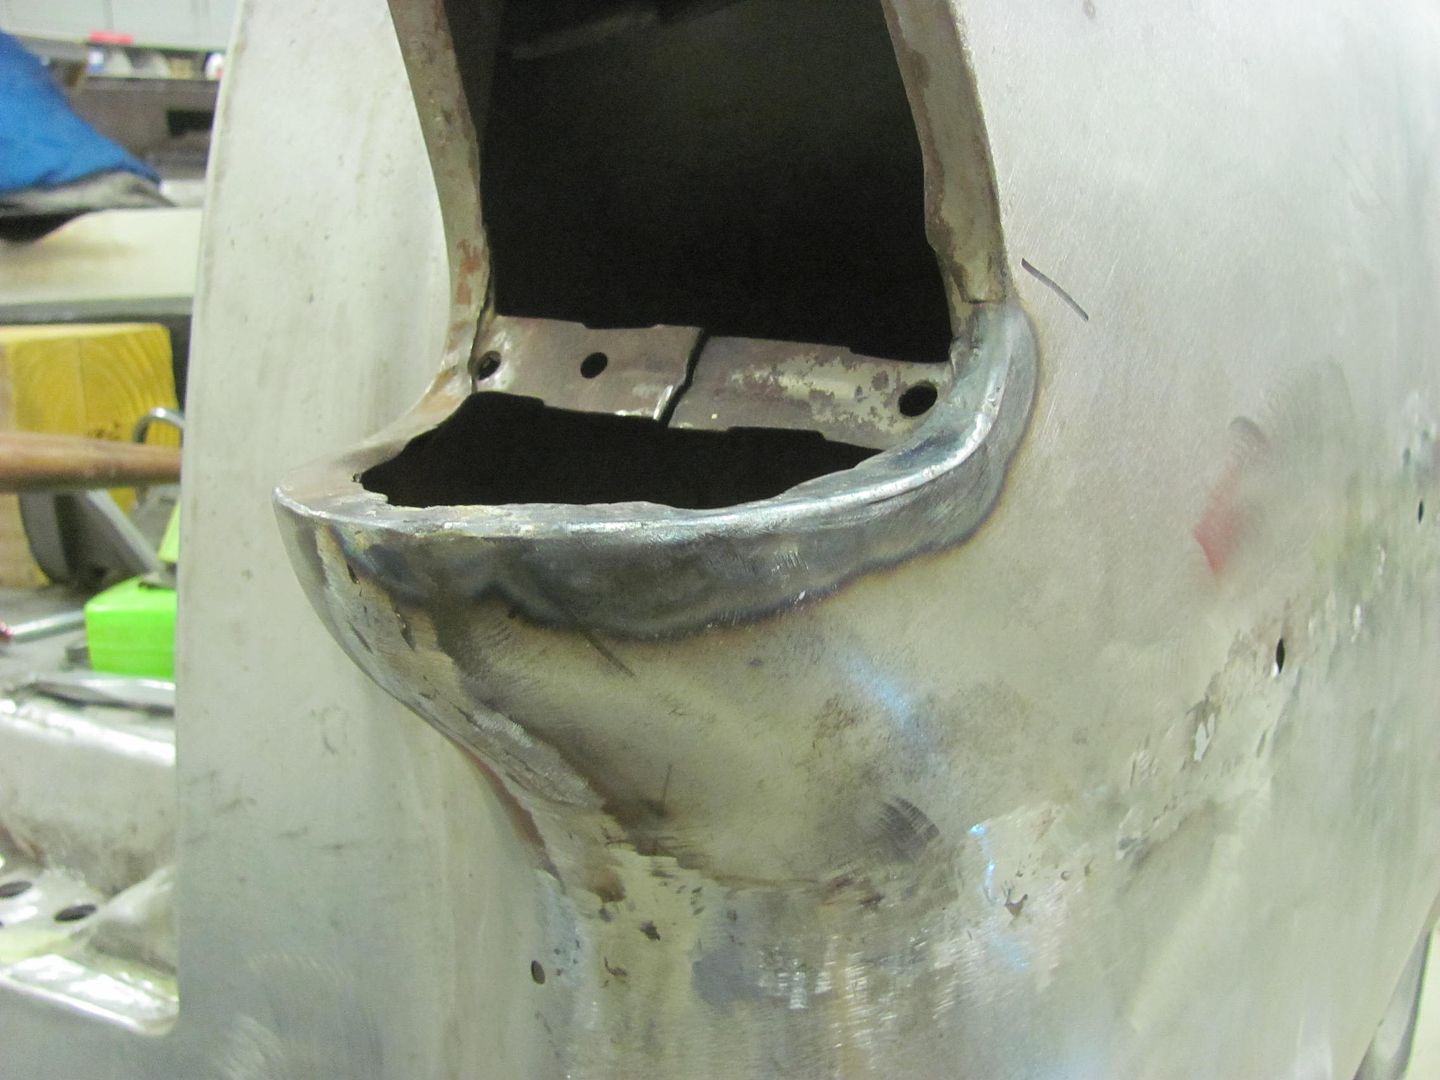
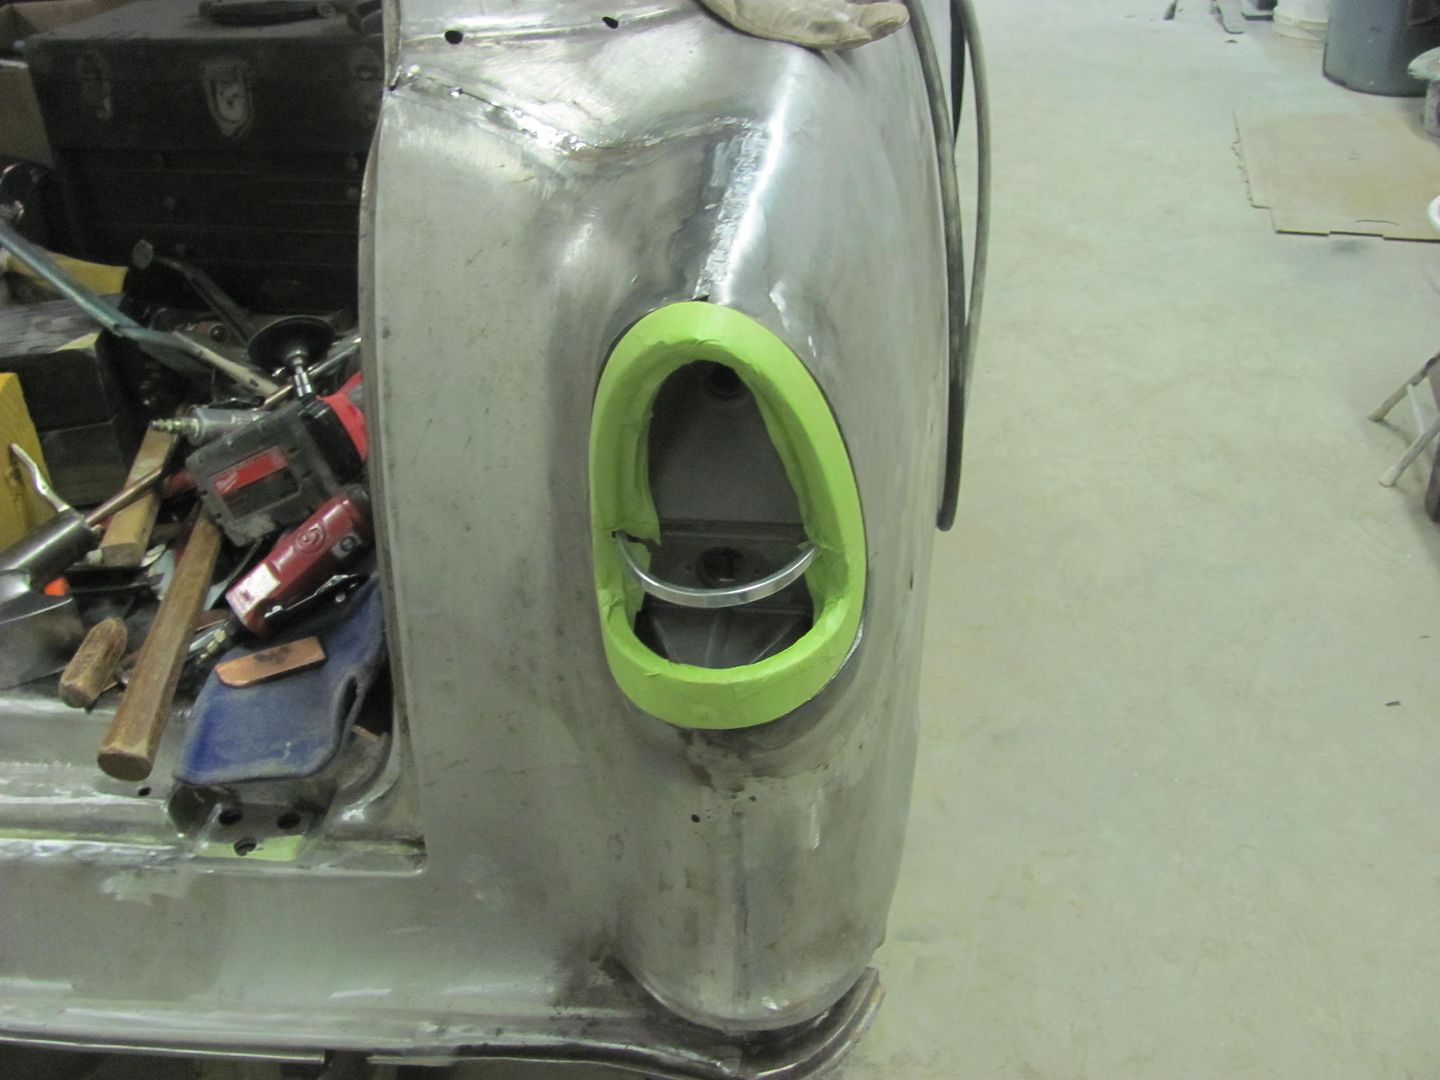
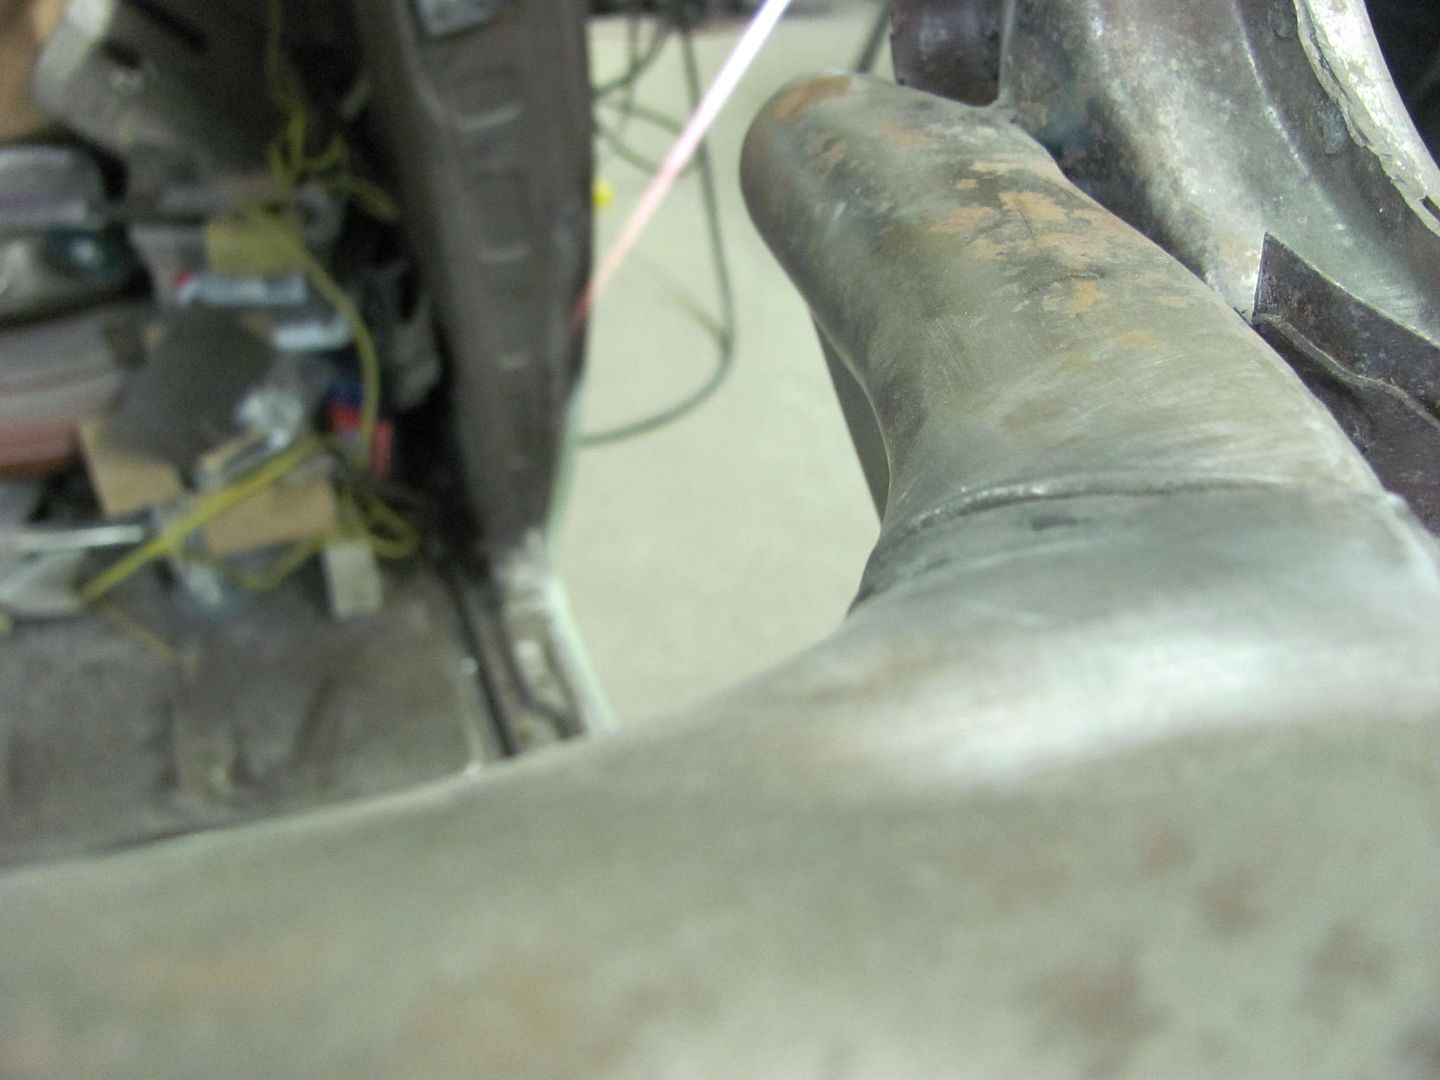
A bit better.....

...and the tail light bracket is welded back together.. This mod seemed to make the attaching holes align better as well..
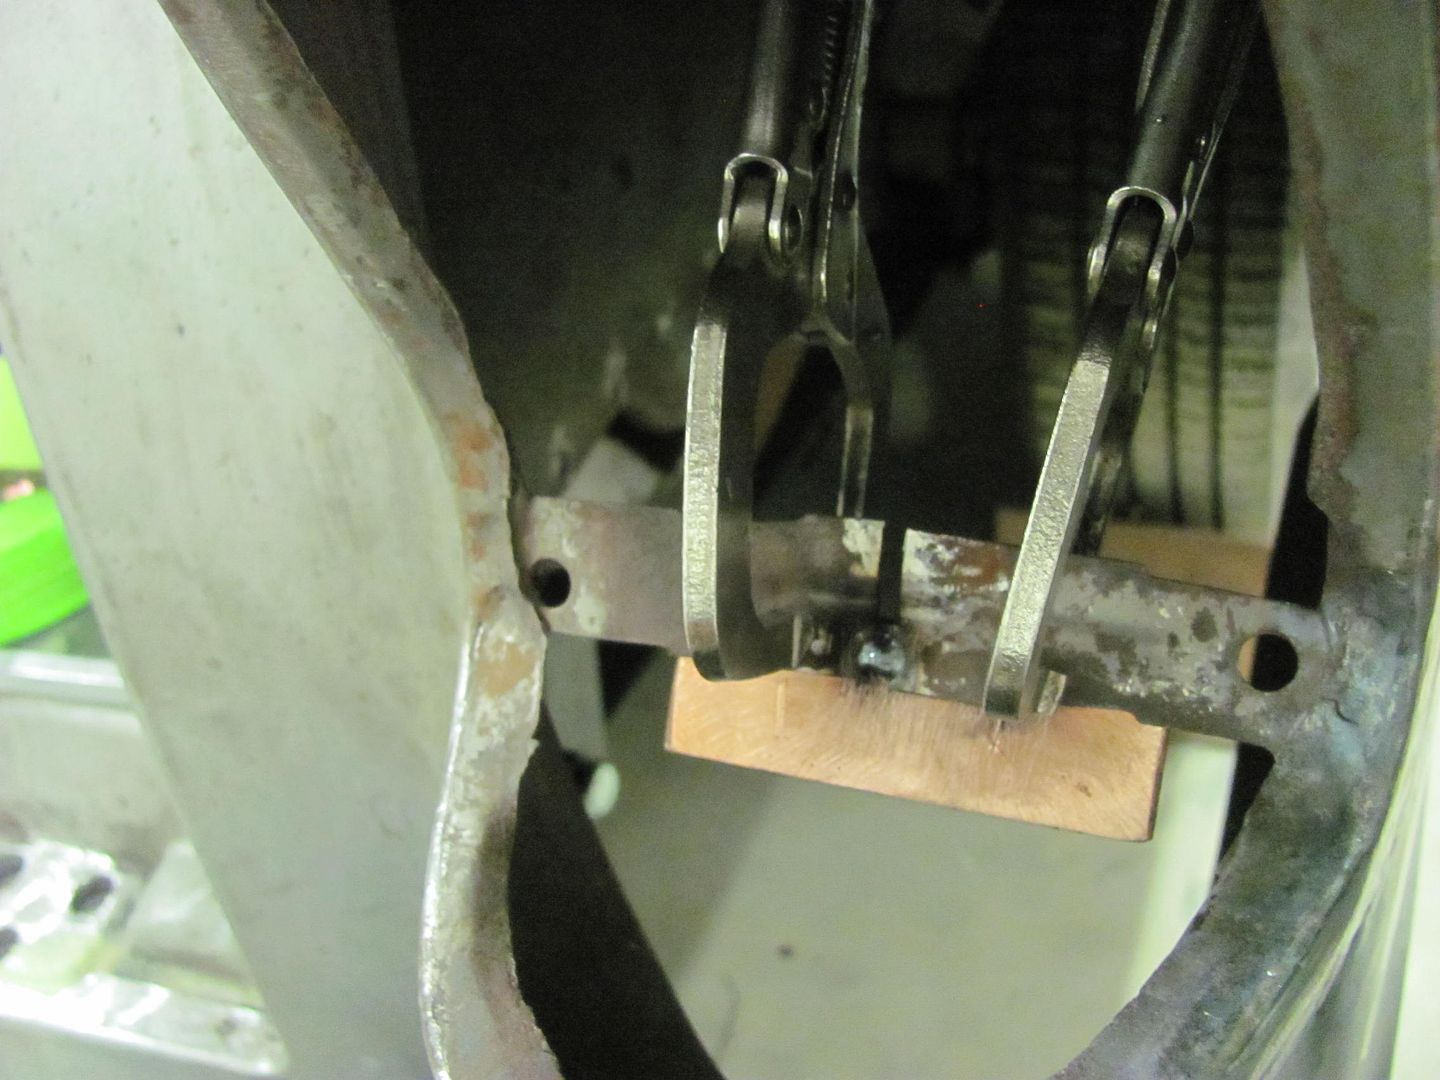
And Kyle continues to finish up the seam and we'll fine tune the opening once more when the welding and planishing is complete.

Comment
-
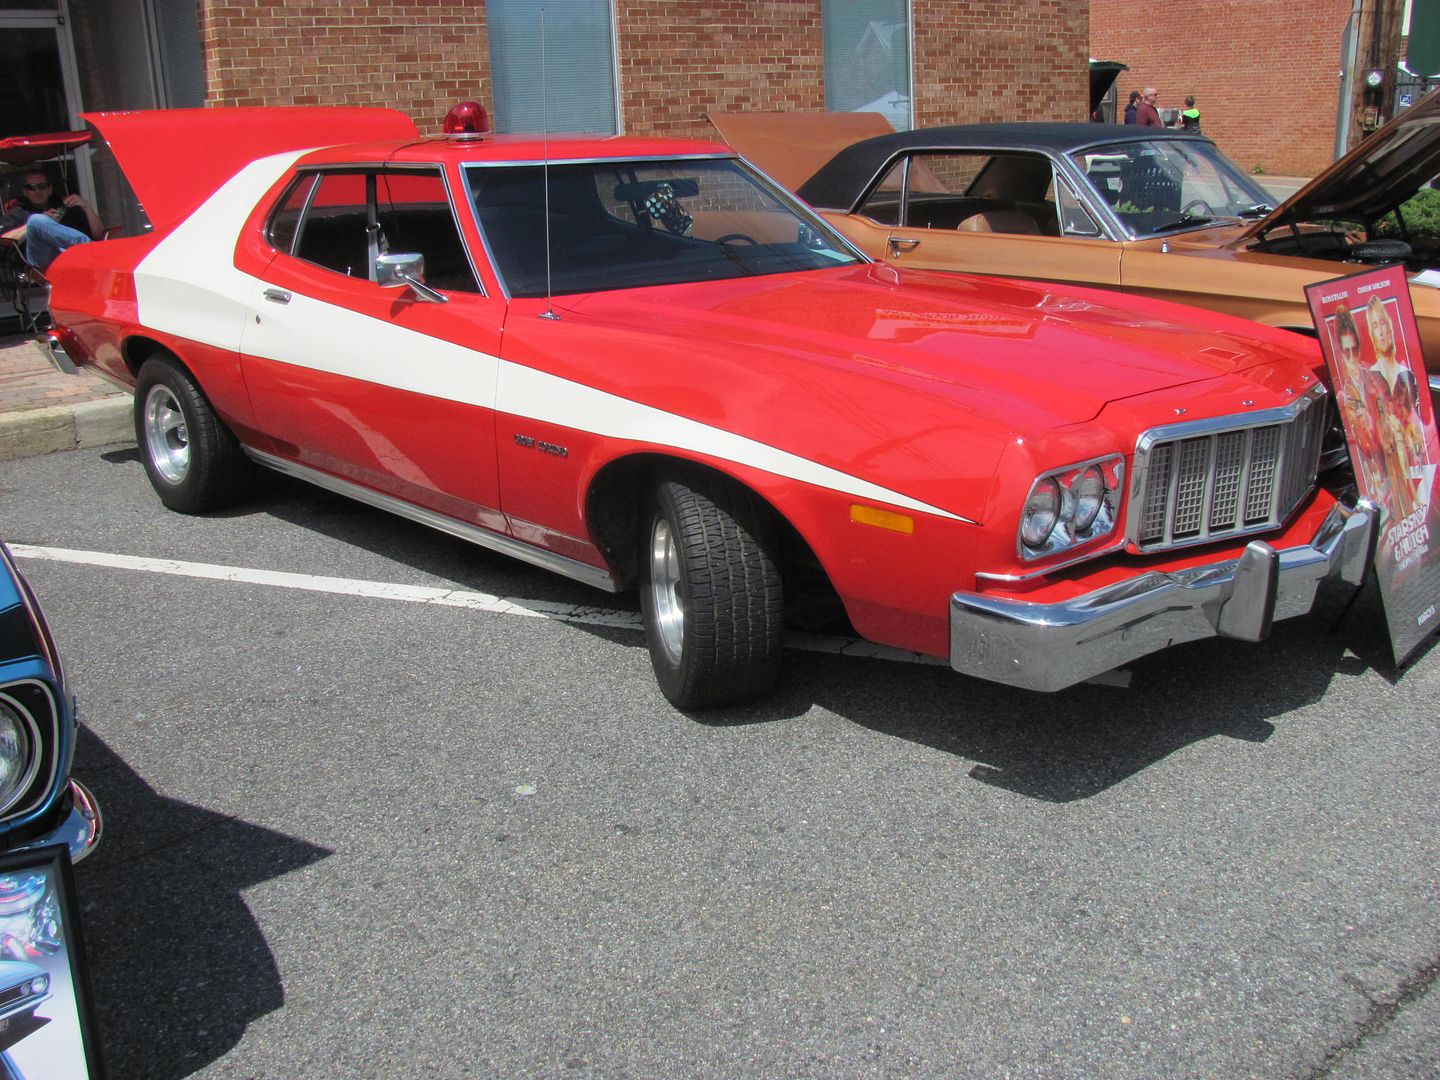
Well, it's that time of year again, and the local Arby's Wednesday night car shows are in full swing, so we've changed the shop nights from Mon & Wed to Tues & Thurs so that we'd have Wednesday free to stop by the shows. We plan on taking Brad's Fairlane (the shop's last project) to a couple of the events this year, Arby's is just over a mile away from the shop, so his 4 gallon tank may just make the trip..

This is one of those cars that you'll feel and hear well before you see it, so it should draw a nice crowd
Last night's shop progress had me doing more block sanding, and Kyle continued on the rear quarter seam shave. The top weld is about done (except at the edge), other than final bumping and planishing. The weld through the middle of the mounting bracket was dressed out. The final weld seam that travels over to the gate opening will be addressed once the body is on the rotisserie, the planishing is a bit cumbersome working around a corner, so with the car up on it's side it will make the task a bit easier.
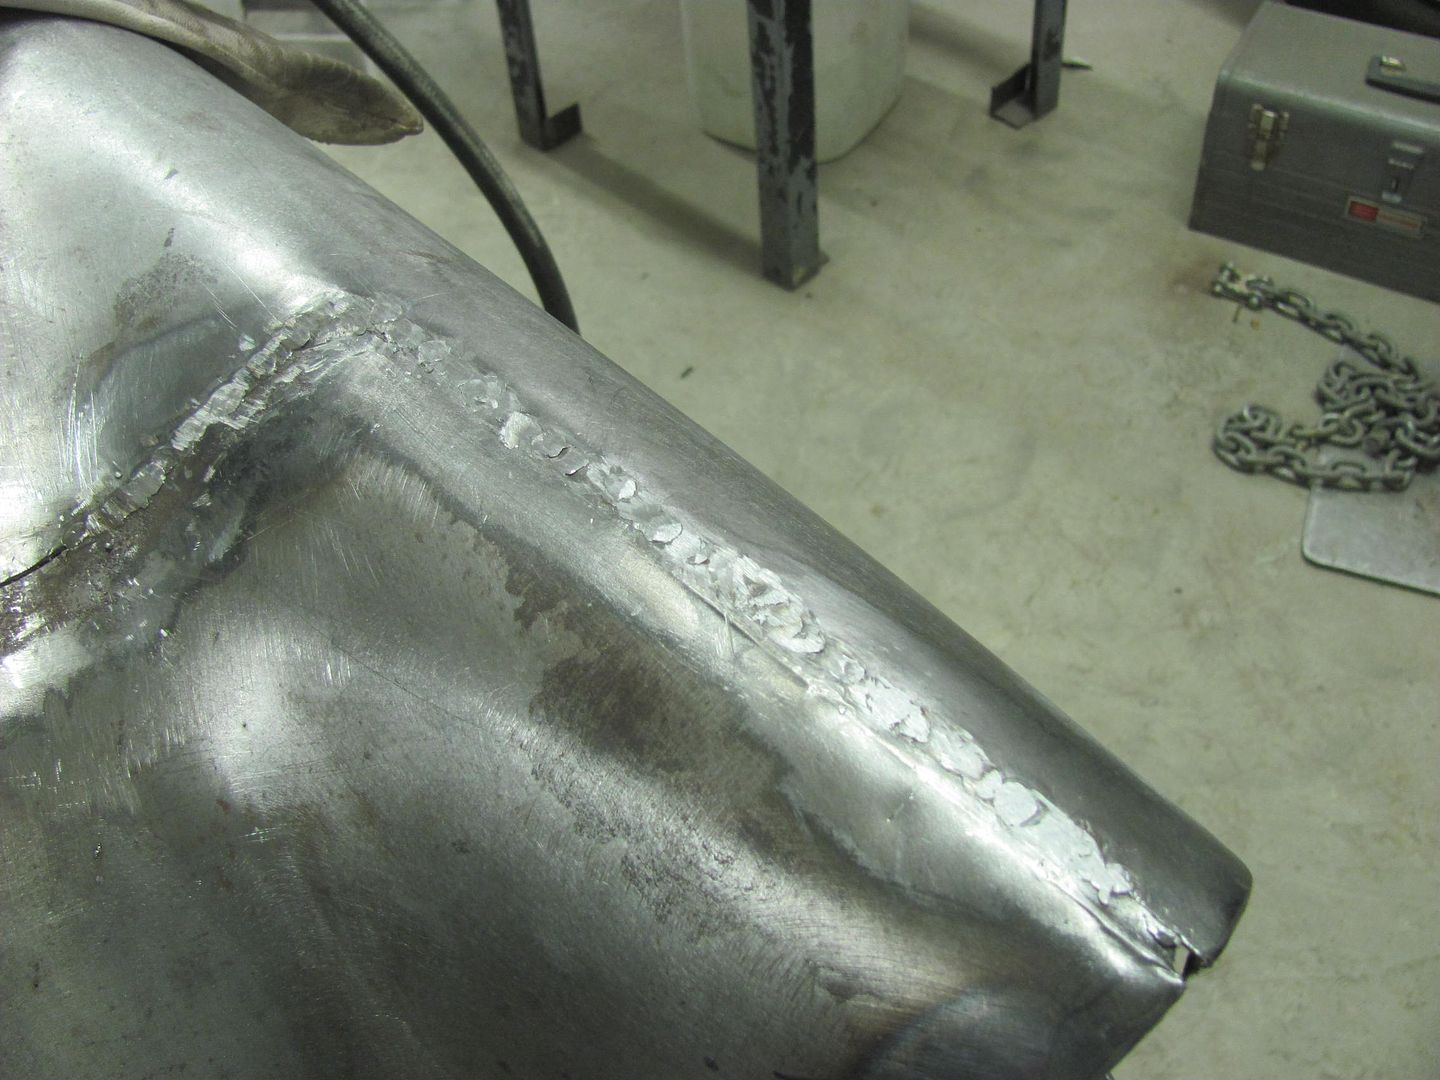

The tail light fits much better but some final tweaking will be done after the gap at the top edge is completed..
Comment
-
Well since Kyle has the top weld all the way back to the tail light opening, we checked the top crown and found a low spot by the 90* in the weld seam. We had to change the hoop on the Watervliet but since this one fit in the tail light opening so well, this will make short work of raising the low area..

We decided to go ahead and work on the opening a bit more, it was wide in spots as shown here...
Some "friendly" persuasion...
Much better fit....


Comment
-
Man you guys make this look easy.Greg & Mendy Dayton, Ohio 2007LH 2008LH 2010LH 2011LH 2012 1st 2 stops 2013LH 2015 1st 2 stops2016LH 2017 first and last stops . 2018 LH ("It's better to be dead and cool than alive and uncool!! Harley Davidson!")Comment
-
and take the time to capture great pictures while making it look easy, neither of which is actually easy!
Flying south, with a flock of bird dogs.Comment
-
For the Fairlane's gas problem, bungee a boat tank somewhere. They are 6 gallons.. We use them alot in derbys.. Big blocks drain them in an event while even built small blocks only use half..
As for making it look easy.. Knowing what you are doing anf trying to accomplish helps!
Love this thread!Comment
-
Thanks for the comments guys. Bob, still waiting on the Fairlane's carb, it was being rebuilt over the winter. But we'll figure something out on the gas tank. Worst case is there's a gas station before going in the shopping center, may just have to pull up to the pumps..
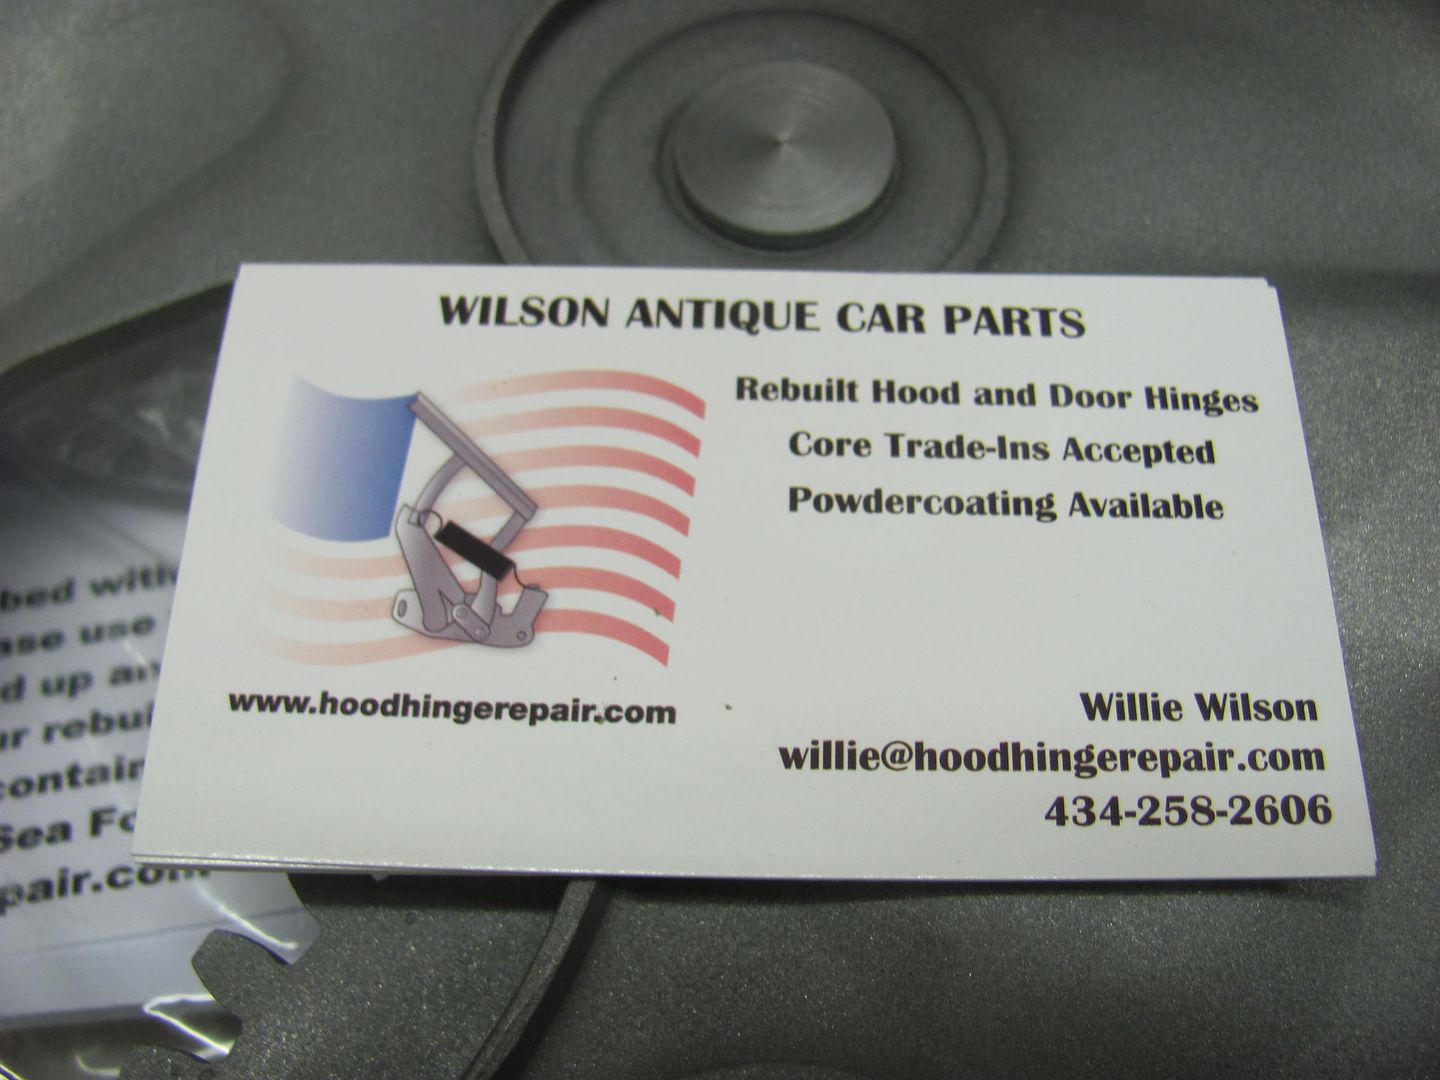
Got a care package in the mail yesterday, we had the hood hinges rebuilt at Wilson's Antique Car Parts....

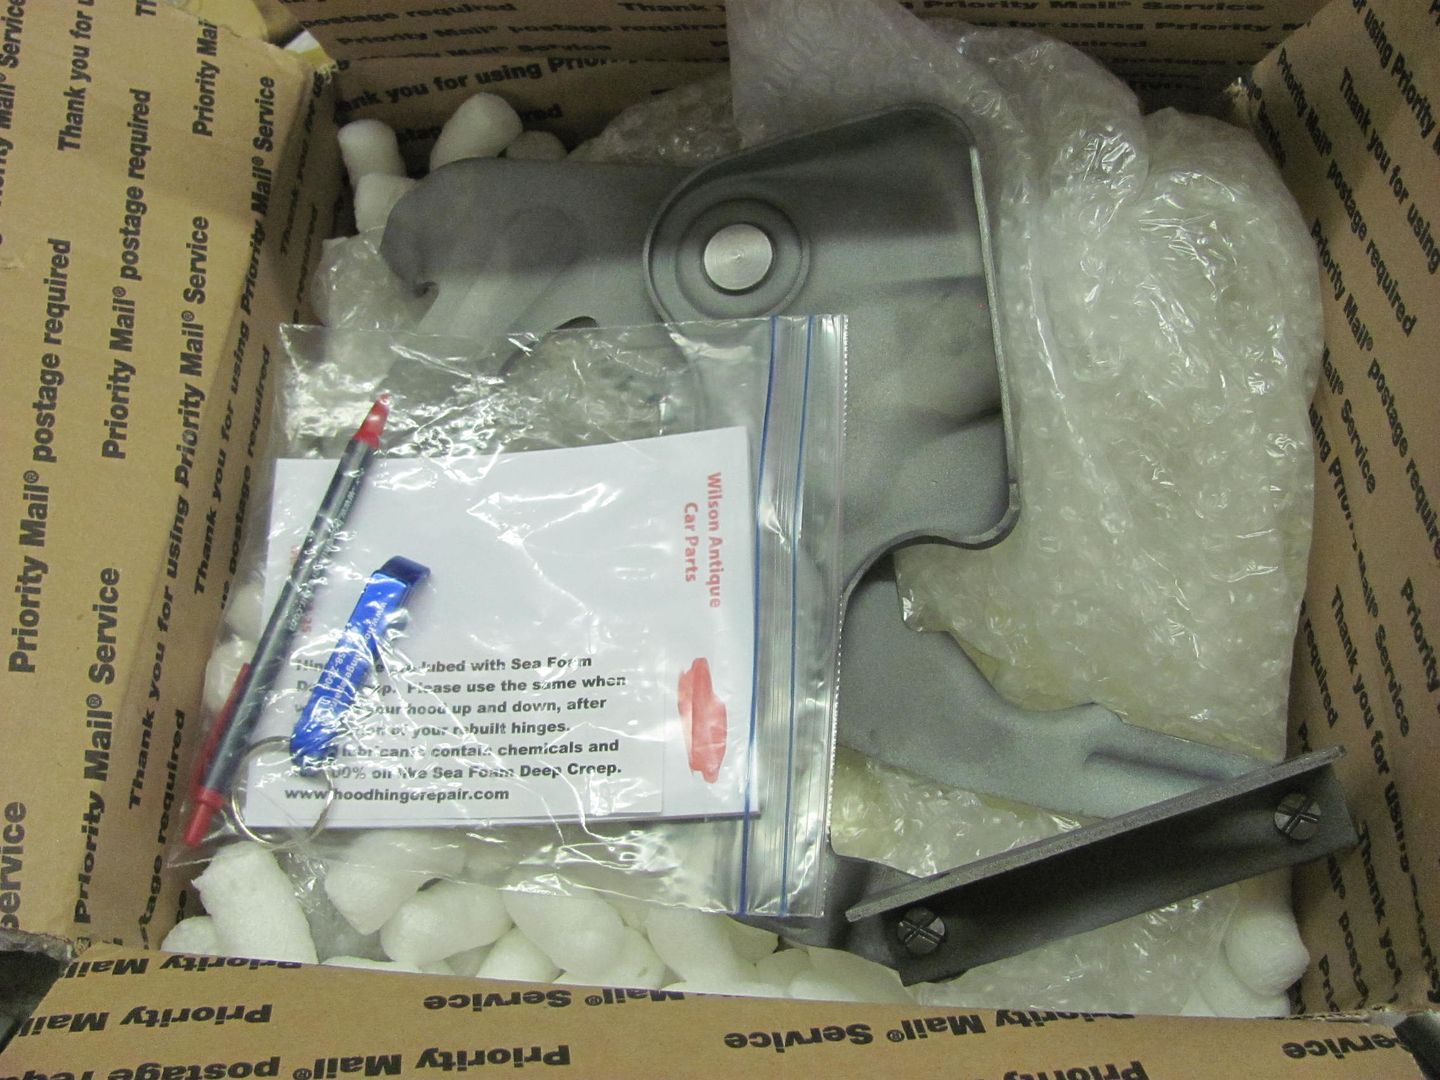
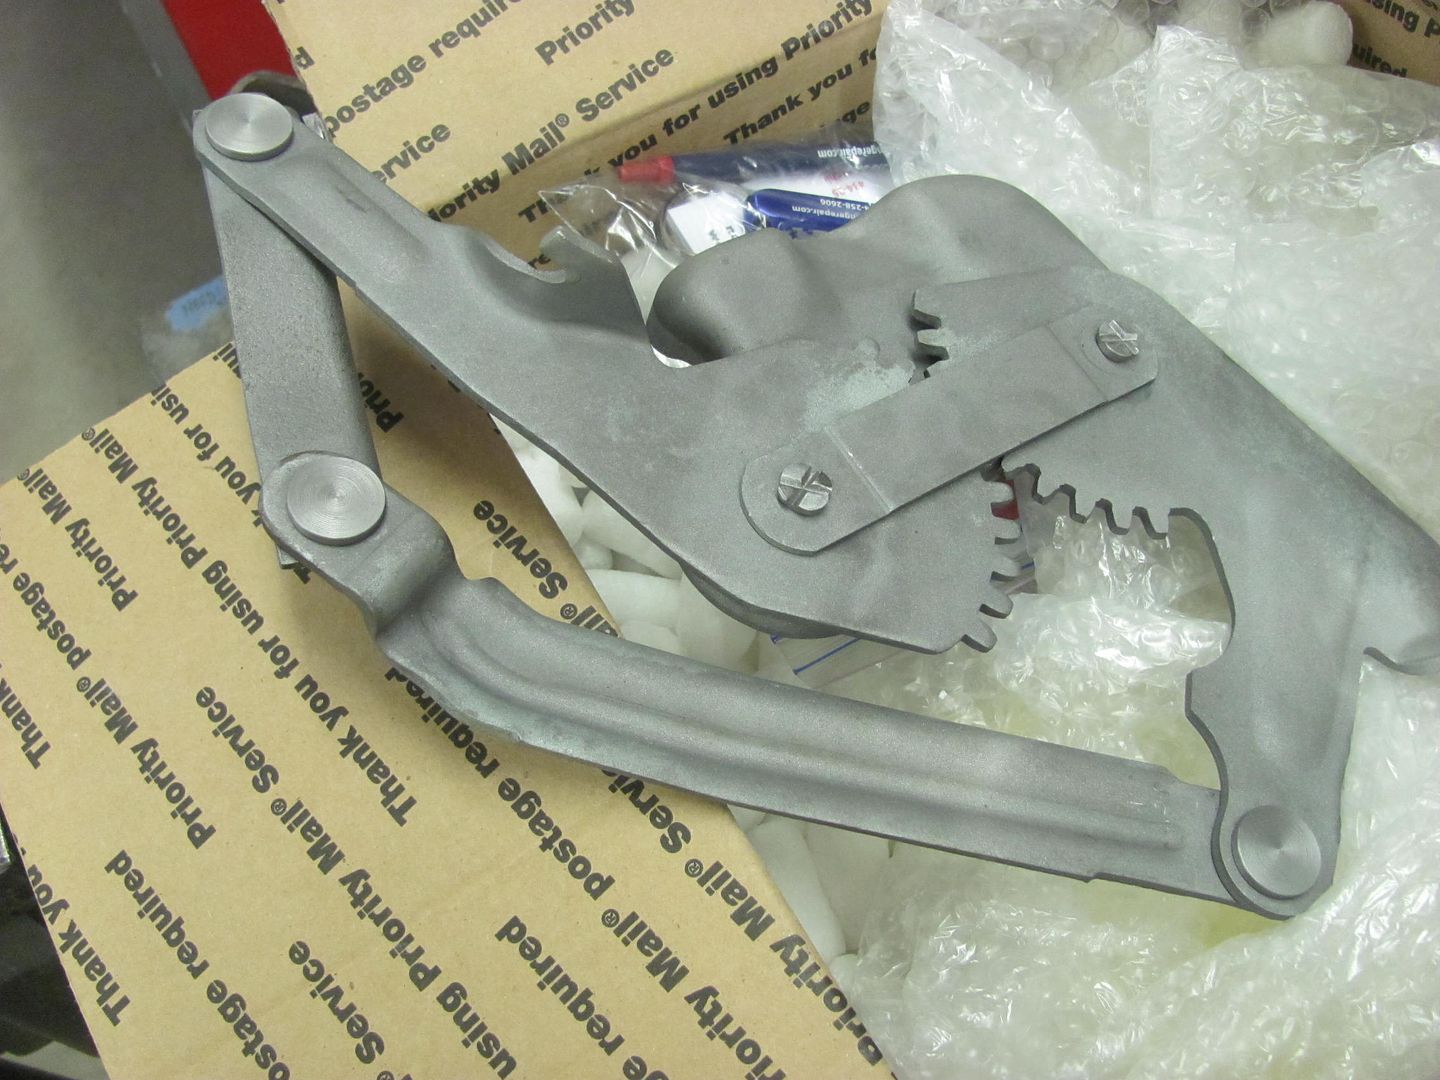

I had talked to a couple dealers about the reproduction hinges and did not hear good things, they indicated they had replaced a few sets due to the gears jumping teeth from being too loose. A member on one of the forums had recommended Wilson's rebuilding service, and I gotta say, this is top notch work. If you're having hood hinge issues, I highly recommend their services..
Kyle was looking for something else to weld, so on to the dash. Here he's prepping for welding the seam, bumping the panels a bit for better alignment before welding....
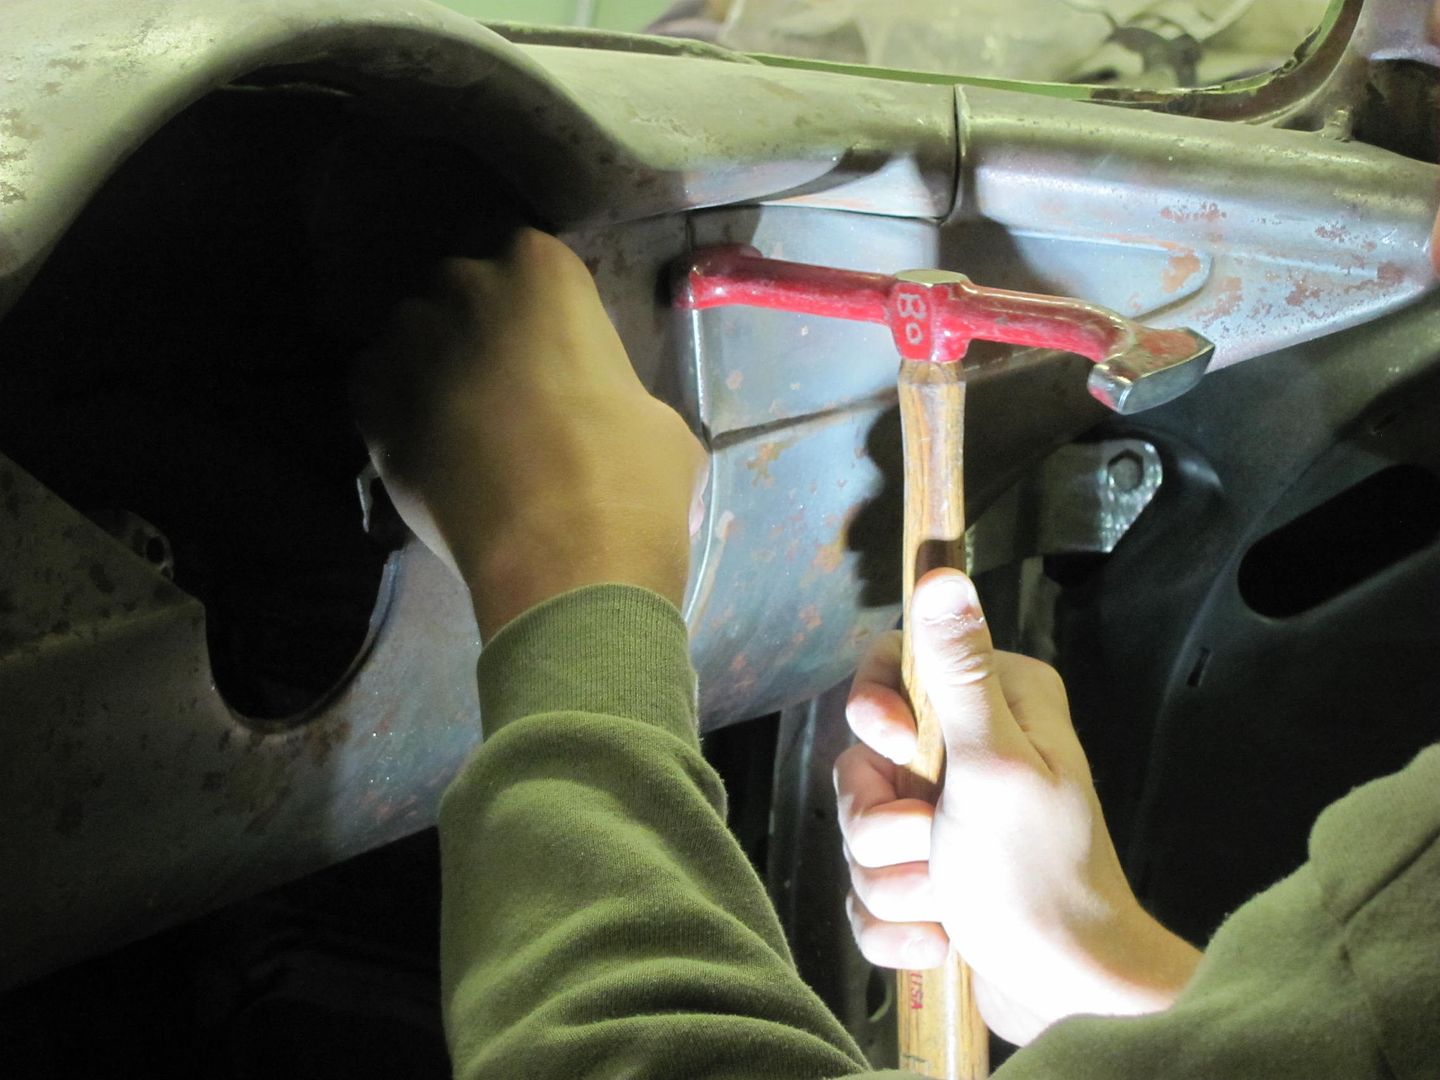
Checking across the gap using a 6" rule...
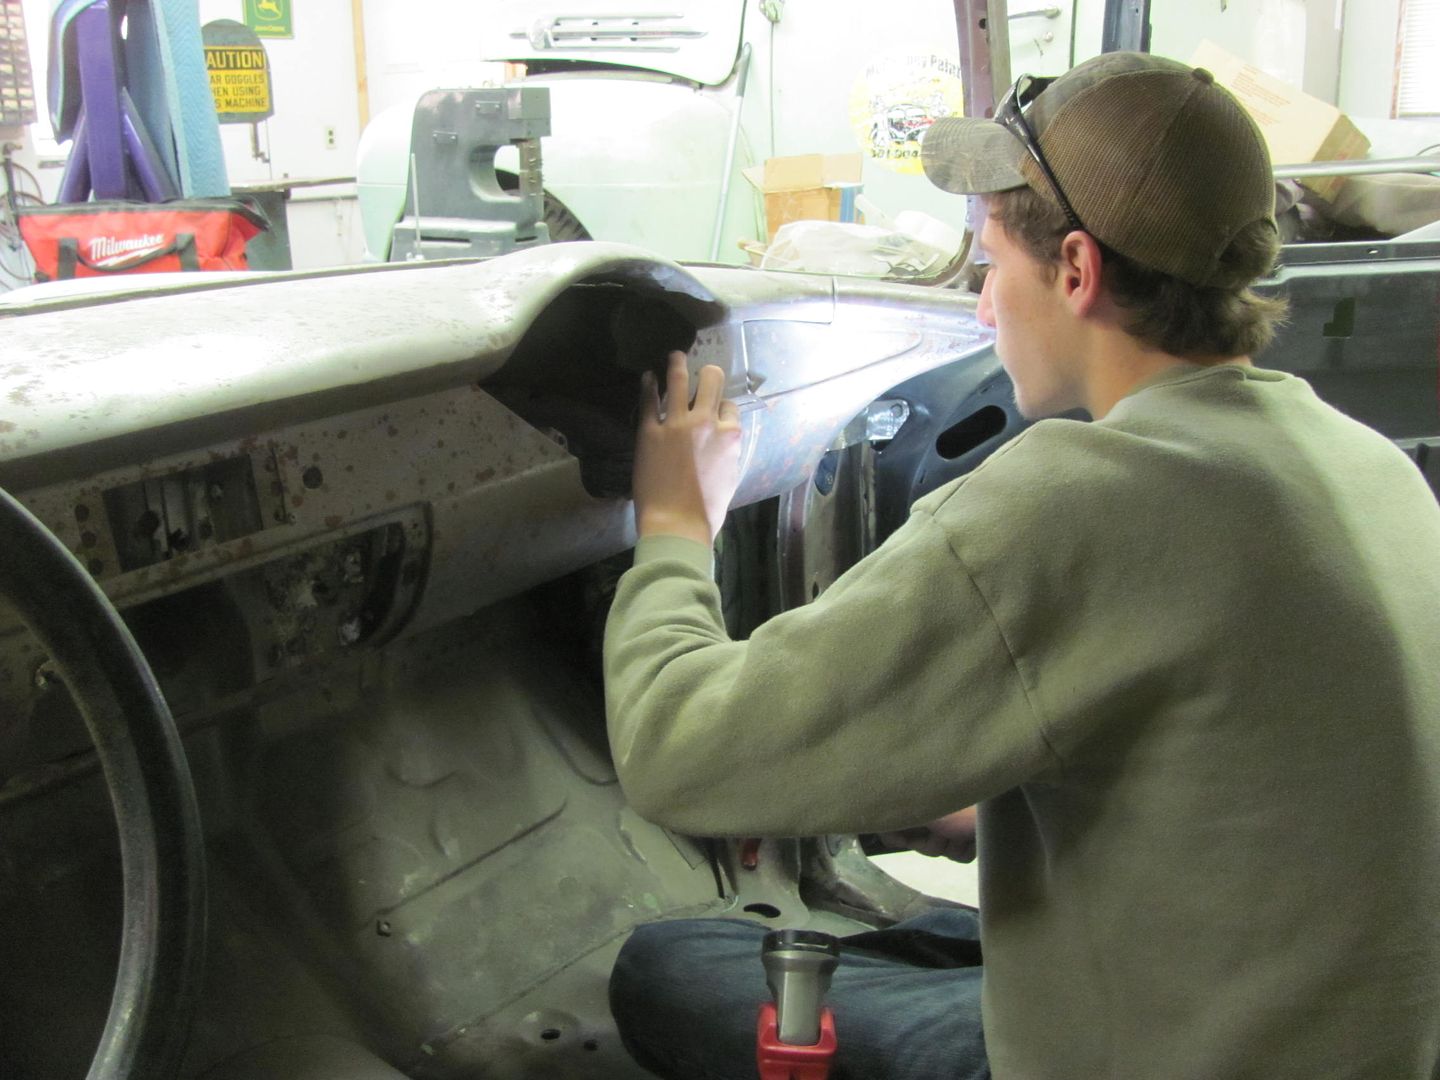
Next on the agenda was to shave the radio holes...

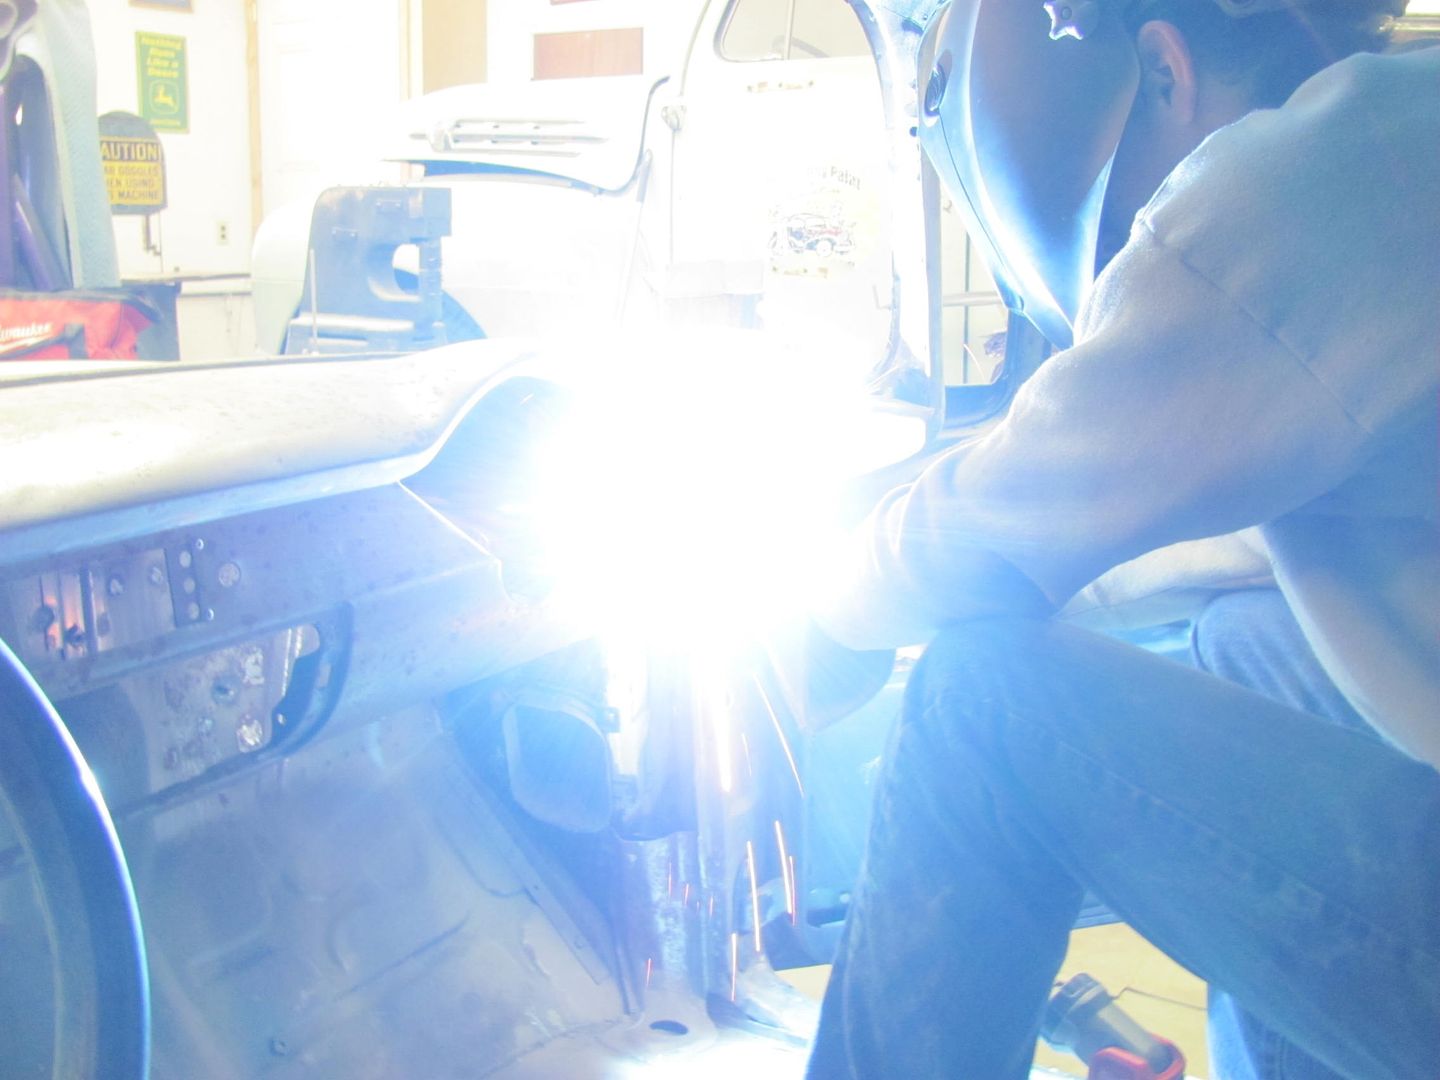
Weld, planish, grind, repeat...
Comment
-
Kyle got some more welding done and we noticed the patch he made didn't quite have the same crown as the dash next to it. He had left the patch flat, so the difference was becoming more noticeable the more it was welded.
So the Watervliet planishing hammer was used to add some crown to the panel, and also to planish some of the weld while we were at it..
An 8" radius lower die worked nicely to duplicate the crown:
Planishing welds...
Two holes to go..
rear view... both sides still need sanding with the roloc, we'll get that once the radio knob holes are done and ready for sanding as well.
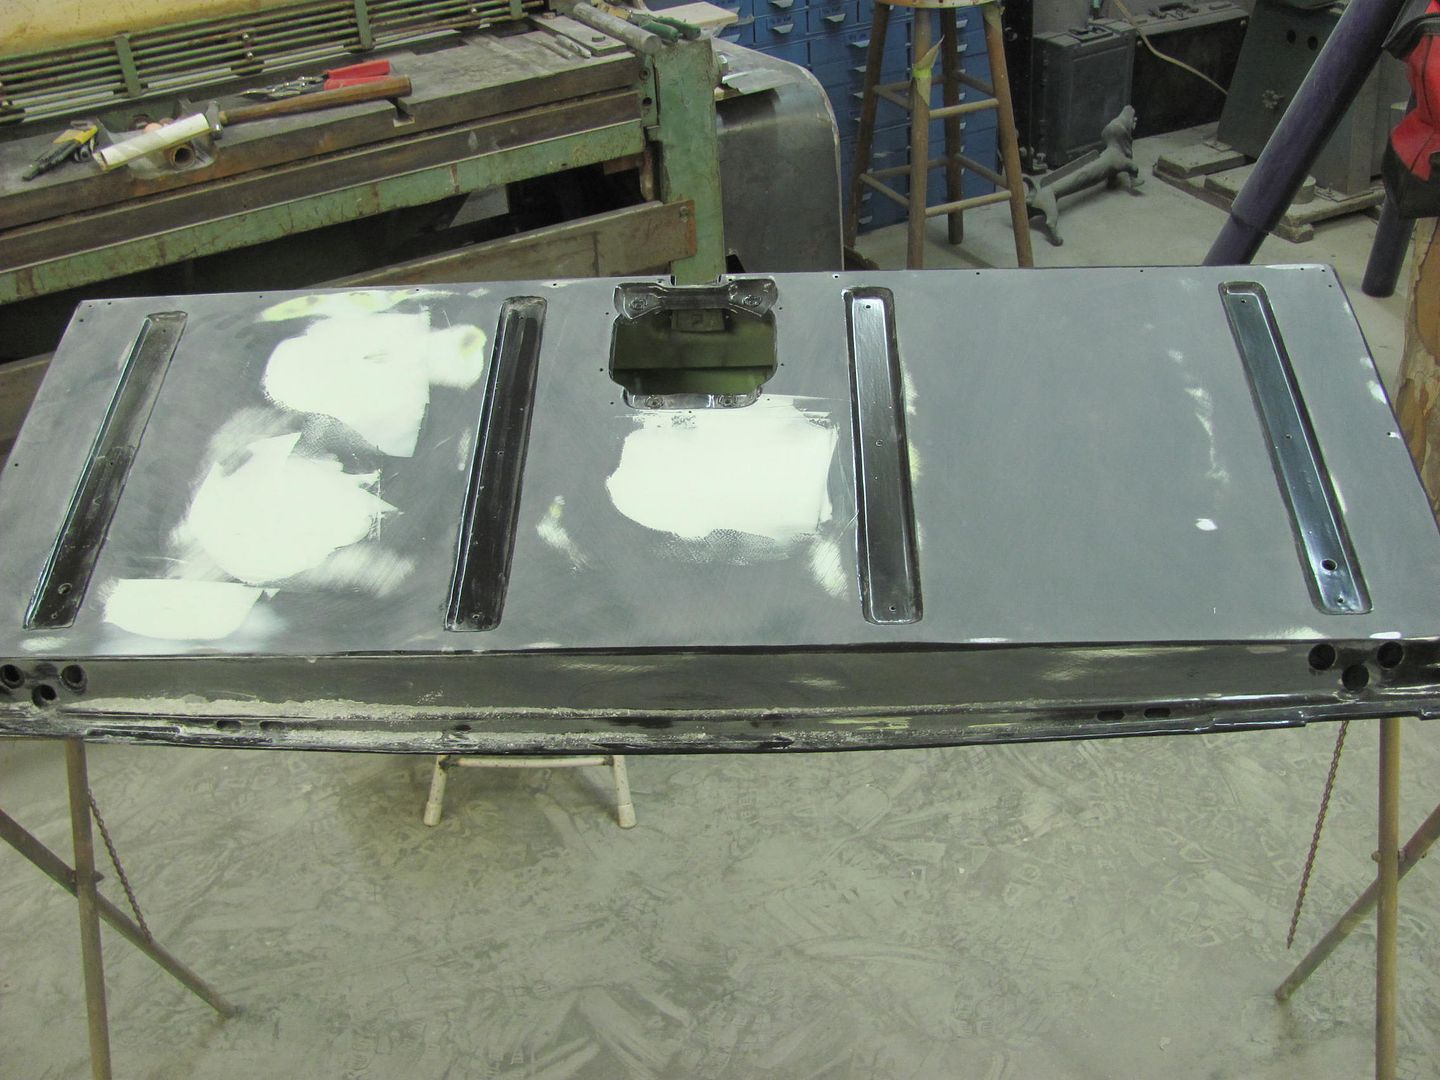
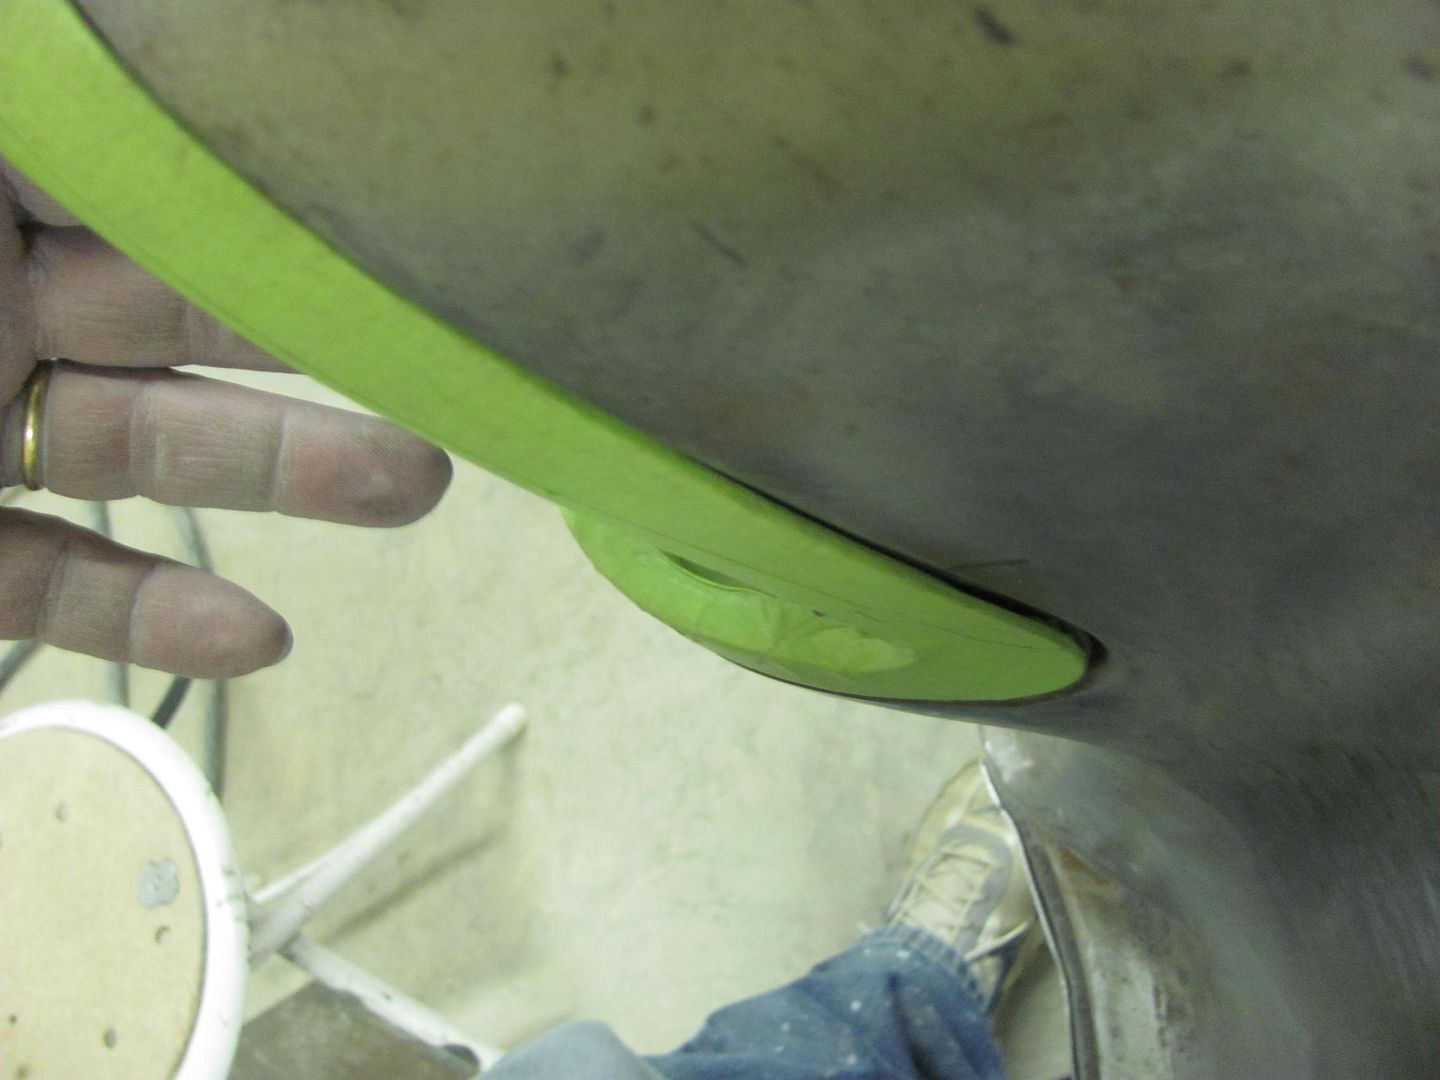
Tailgate is blocking out pretty nice, did have a few low spots to address that still need feathering out....
Comment
-
Finishing up on the radio holes...


Shaving the other seam, here bumping the panels to get a consistent height across the front...
The upper section would prove to need a bit more persuasion...
Tool modification...
A chunk of 3/4 square stock laid in dash void to use as fulcrum...

Heat applied...
Results... before..
After...


This view from the back side of weld dot penetration shows Kyle has pretty good consistency in weld dot sizing.

Comment
-
That kid has mad skills and a good teacher great work guys it's a pleasure watching you two!Greg & Mendy Dayton, Ohio 2007LH 2008LH 2010LH 2011LH 2012 1st 2 stops 2013LH 2015 1st 2 stops2016LH 2017 first and last stops . 2018 LH ("It's better to be dead and cool than alive and uncool!! Harley Davidson!")Comment
-
He's got a pretty good start, Greg. I wish I had the same myself, quite a bit of learning curve that I went through..
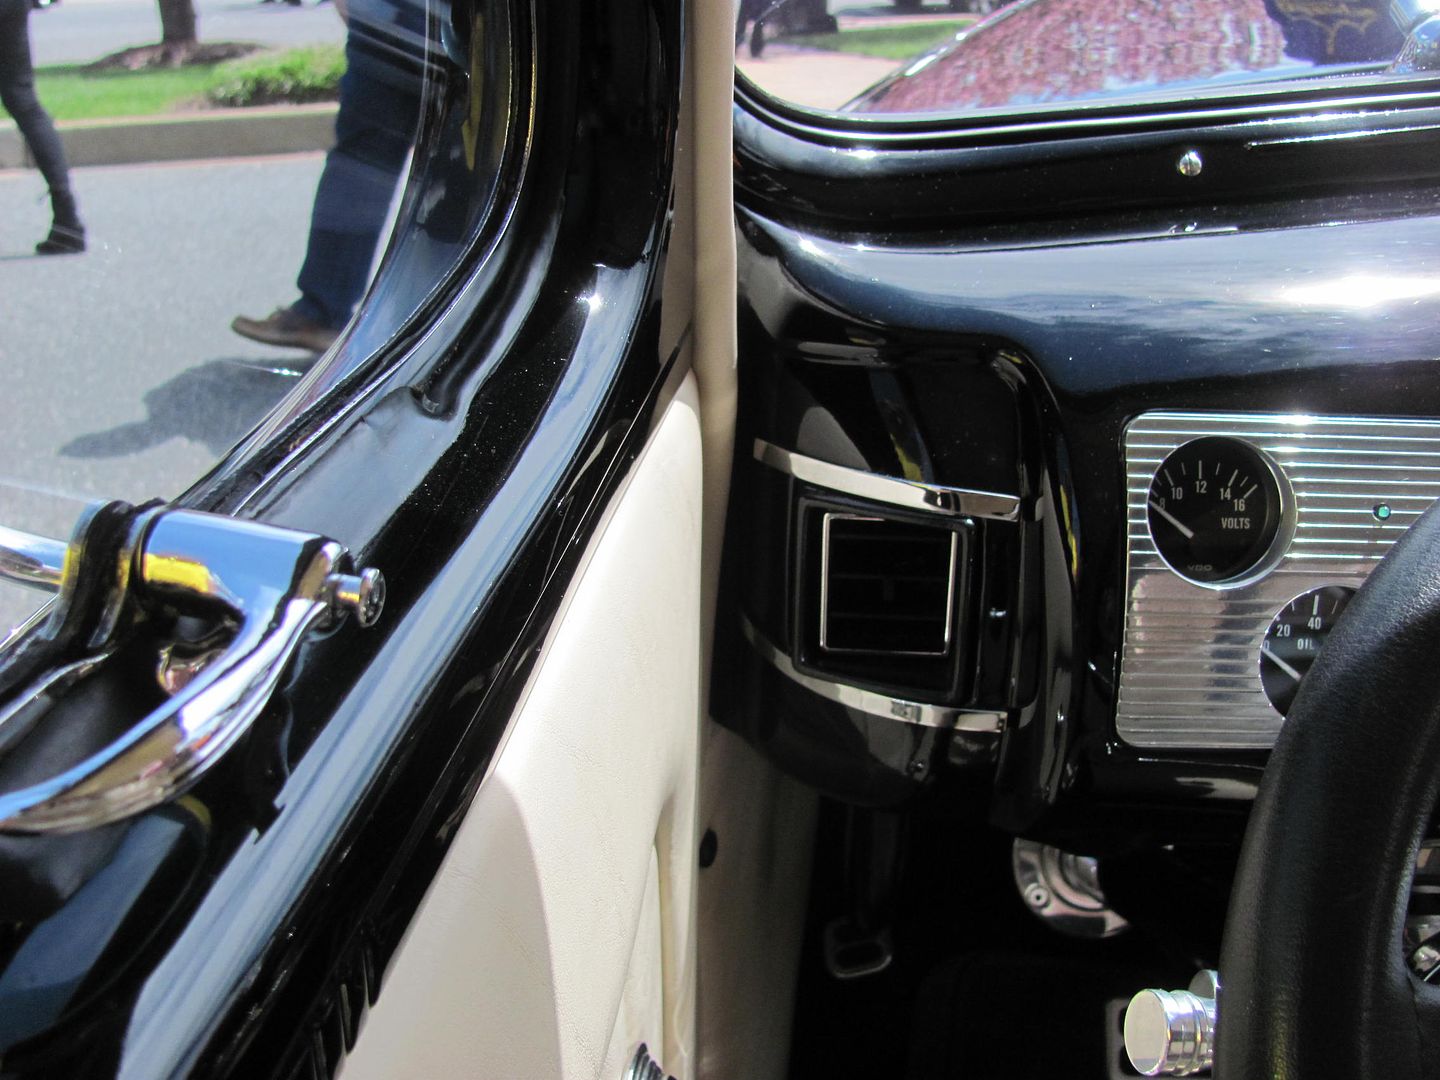
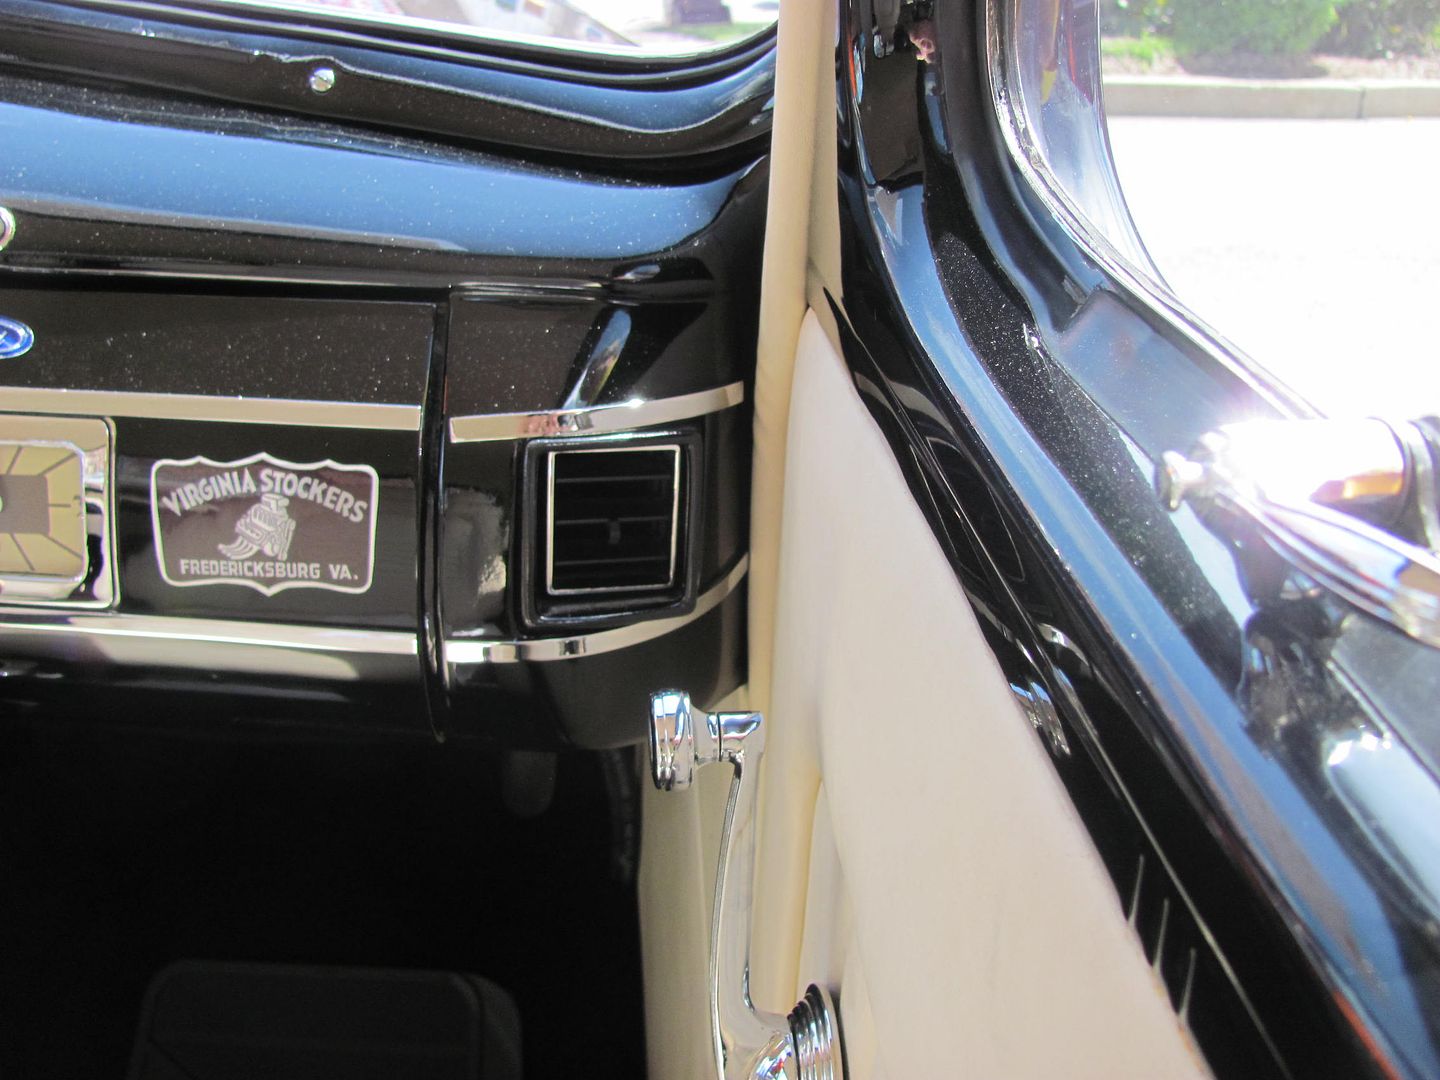
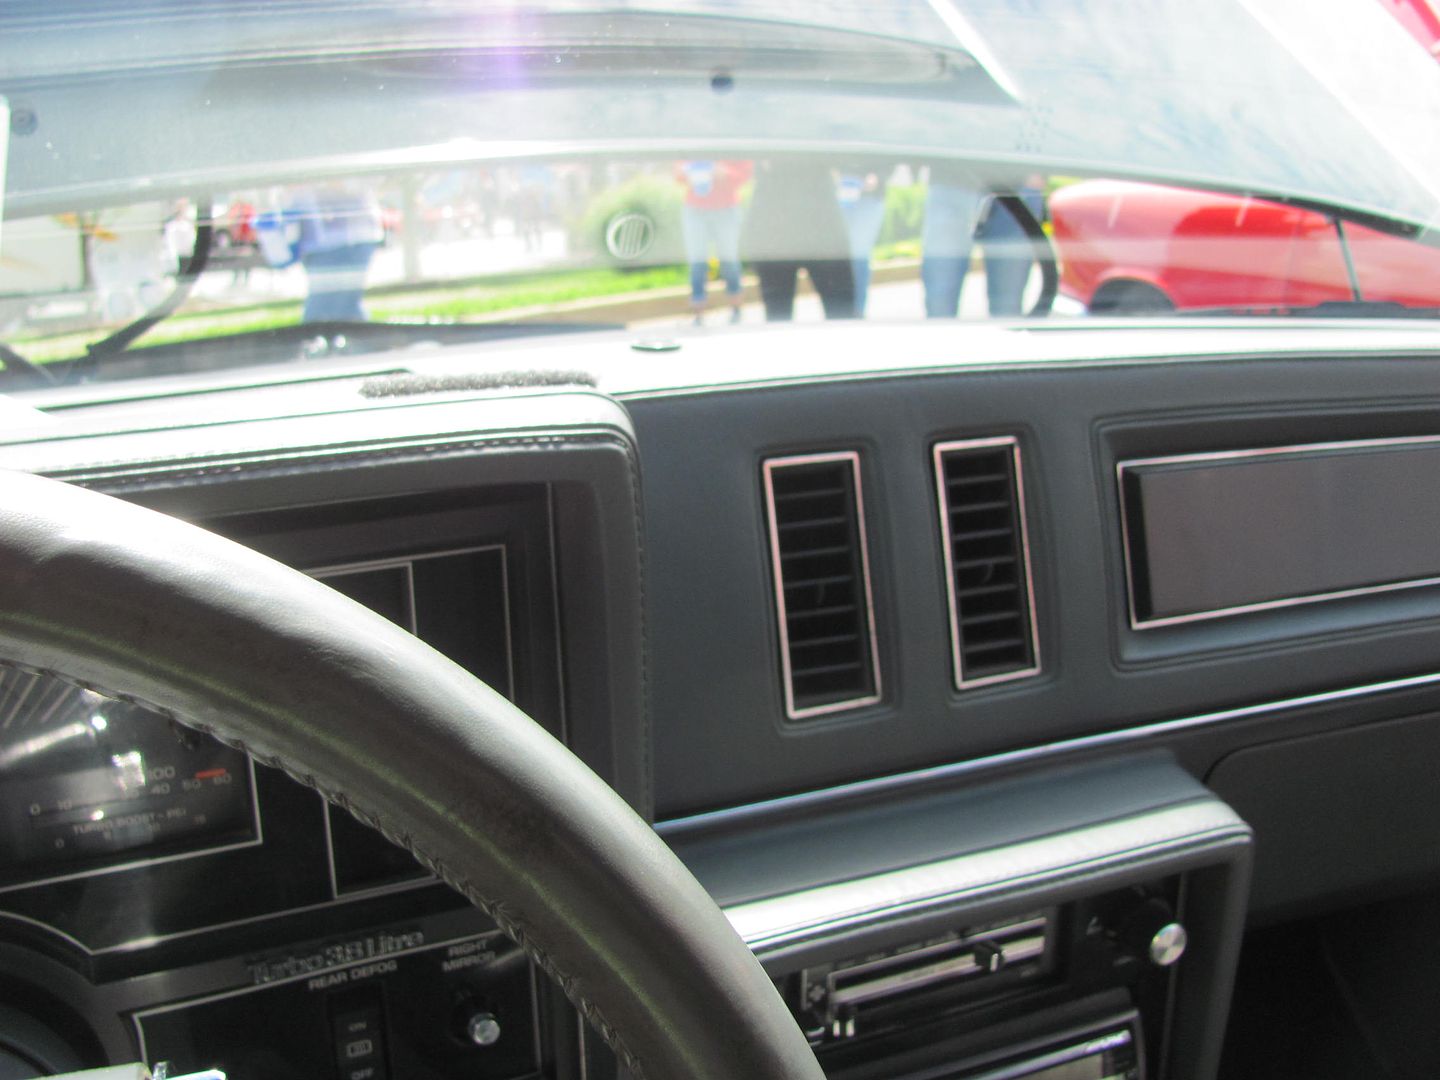
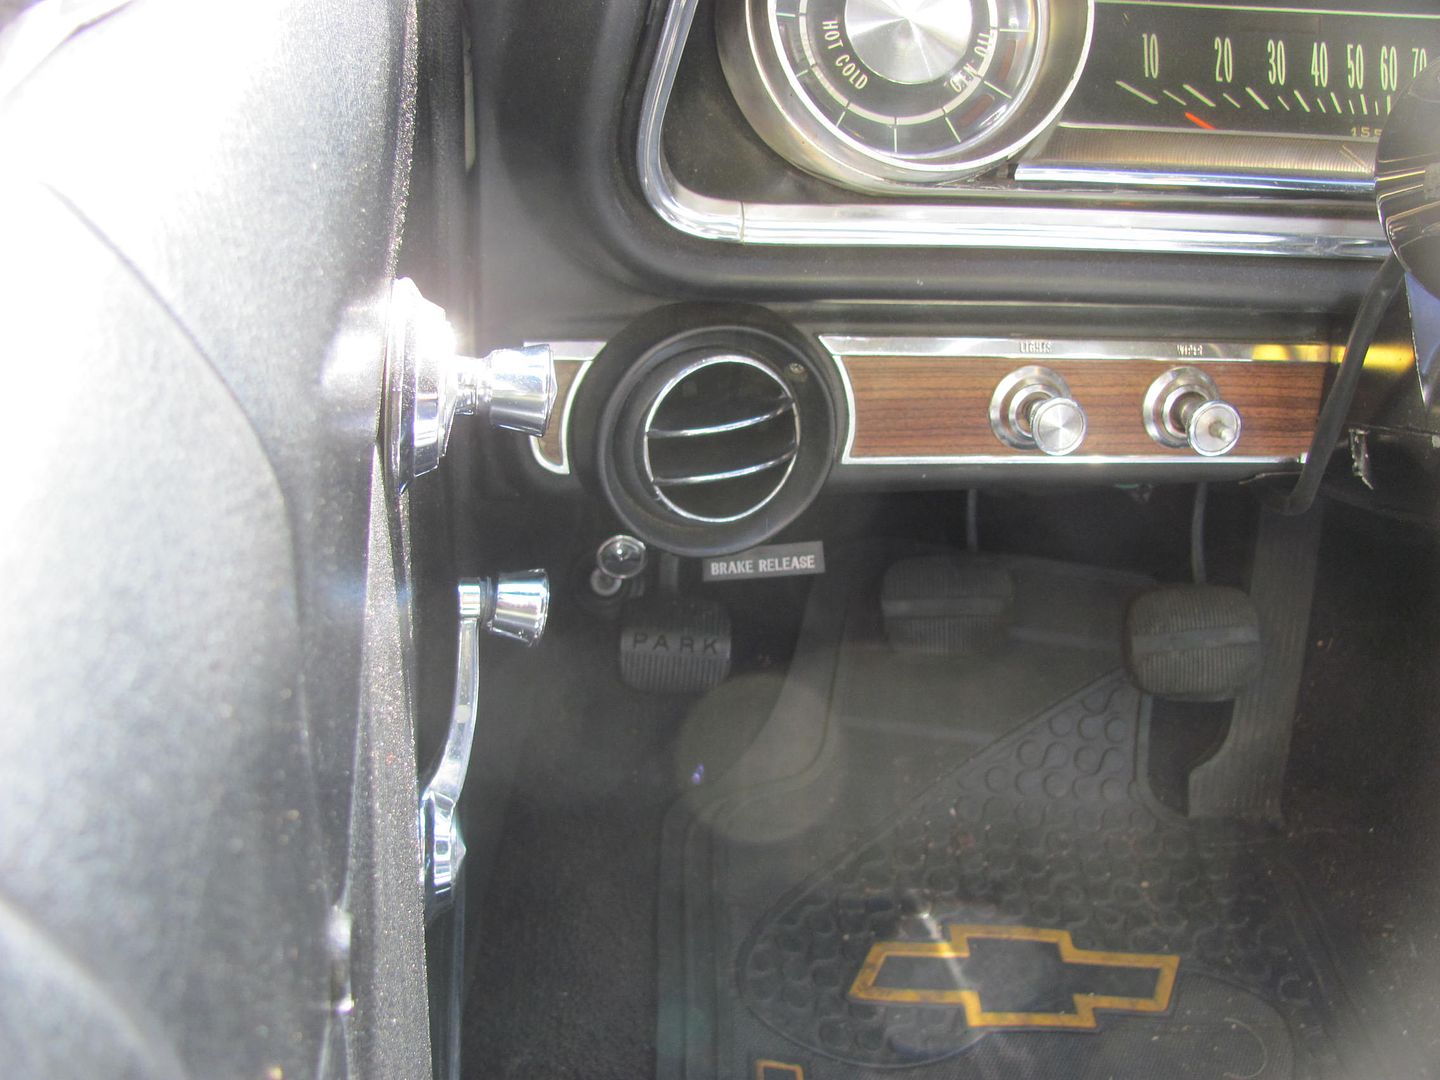
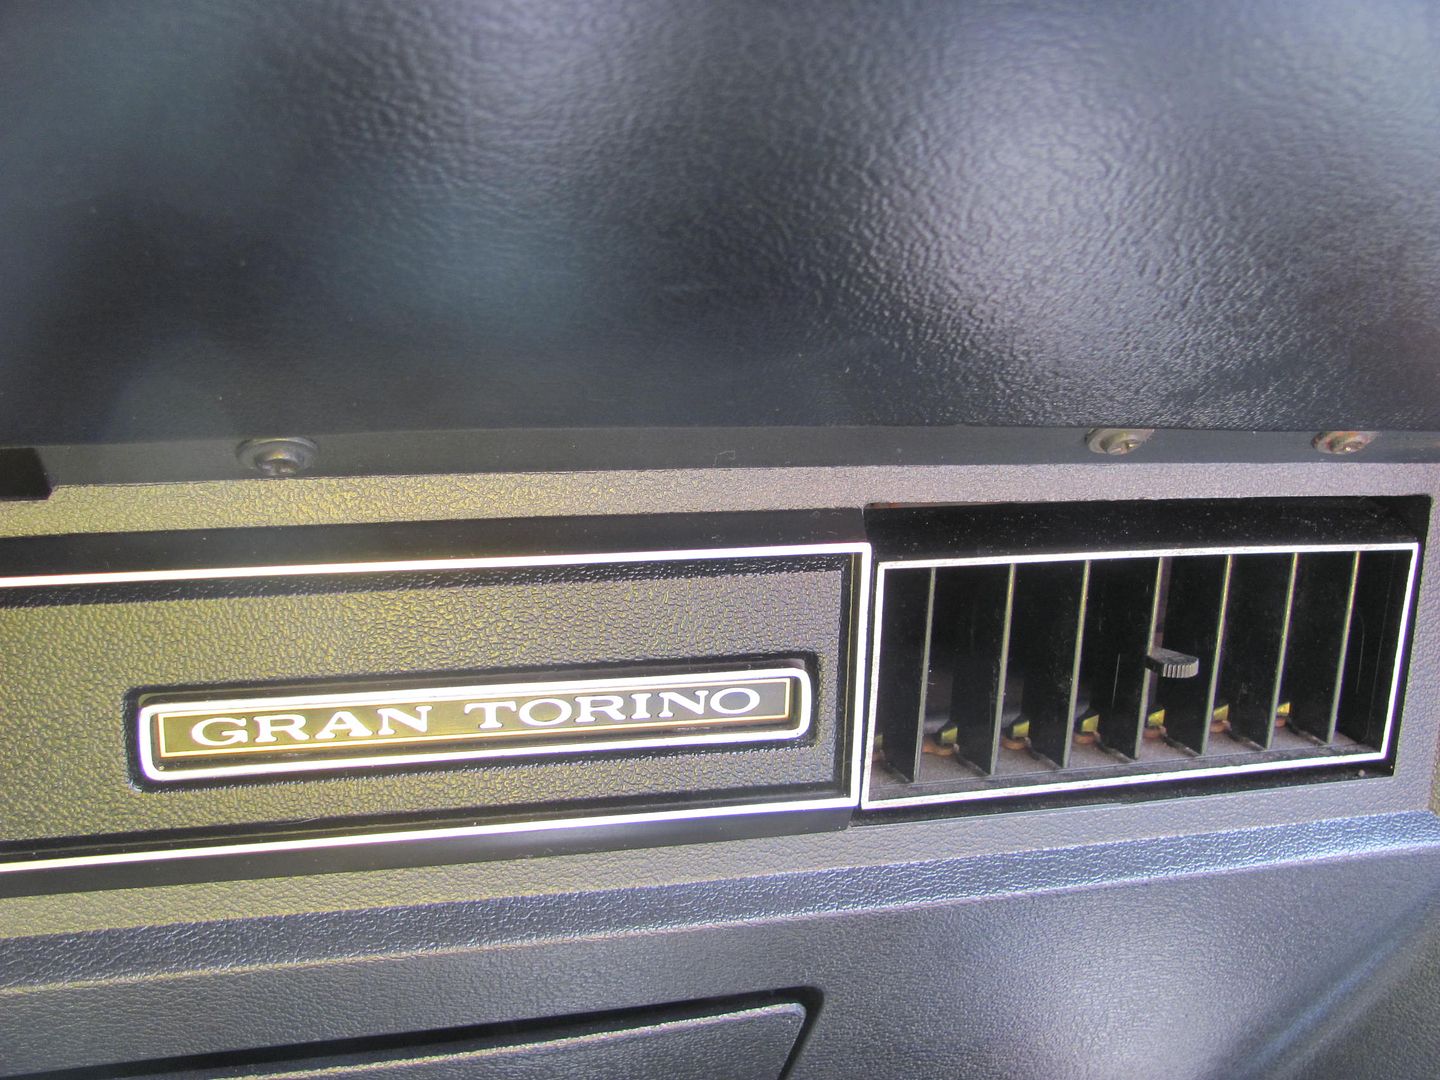
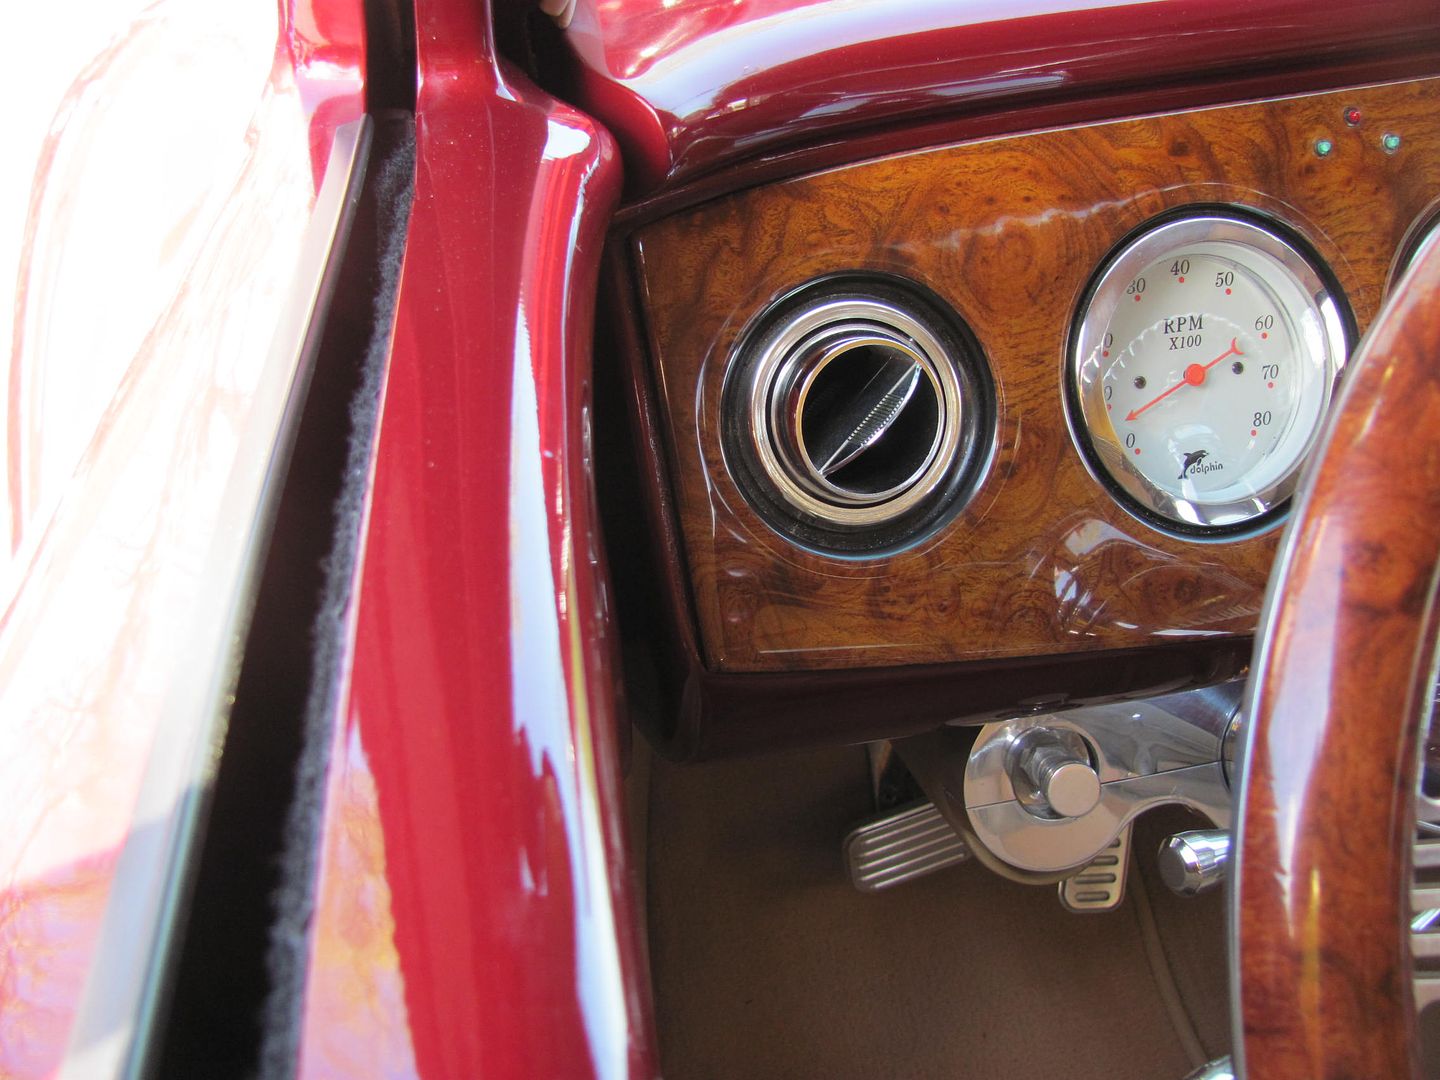
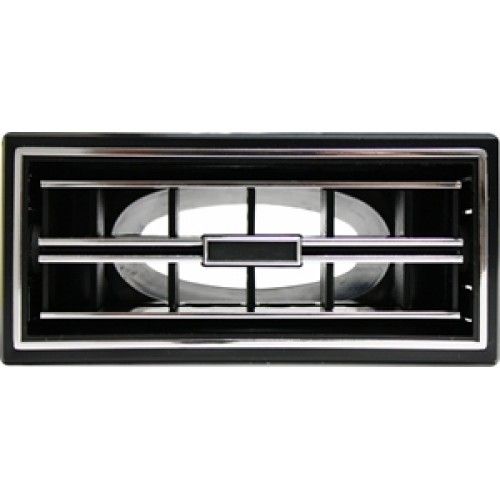
Today was the Spring Fling car show in Leonardtown so we took the opportunity to do some "window shopping" for vents to fit in the dashboard. With all this nice real estate now:
.....our plans are for some rectangular AC vents in the radio's original place. I always thought the "up in your face" vents do a better job of keeping you cool than the under dash ones that freeze the knees. So in no particular order, here are some sample vents..
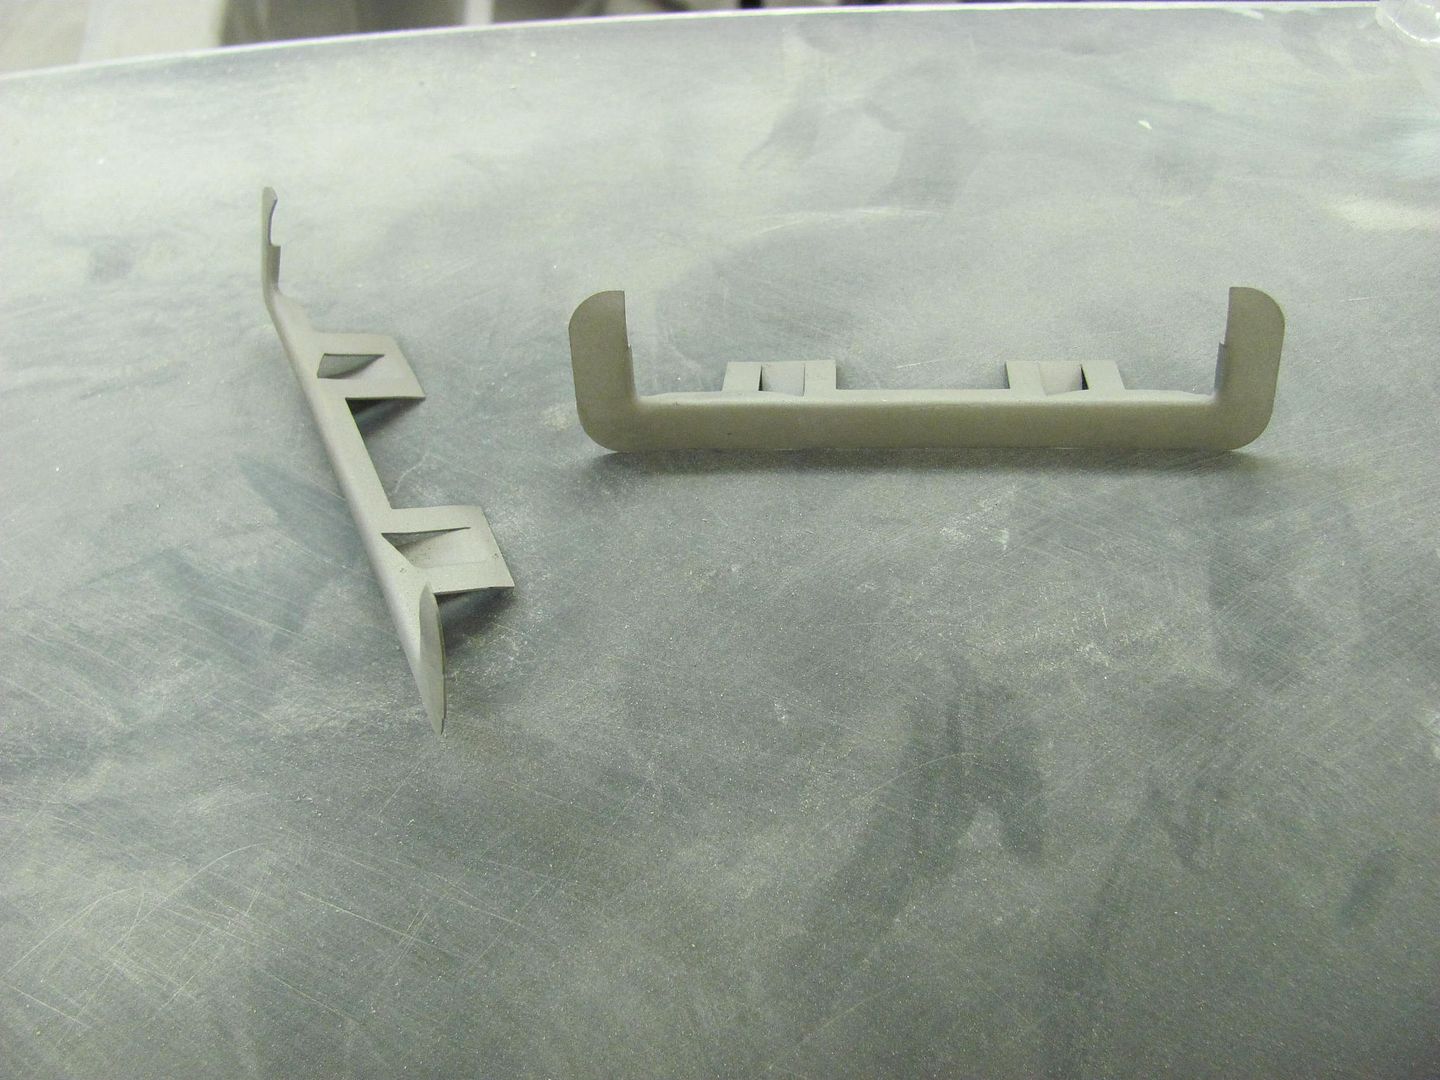
1940 Ford "ashtray replacements" by VA... Although small, thought these may work toward the outside in the same "band" area of the dash...

Grand National...
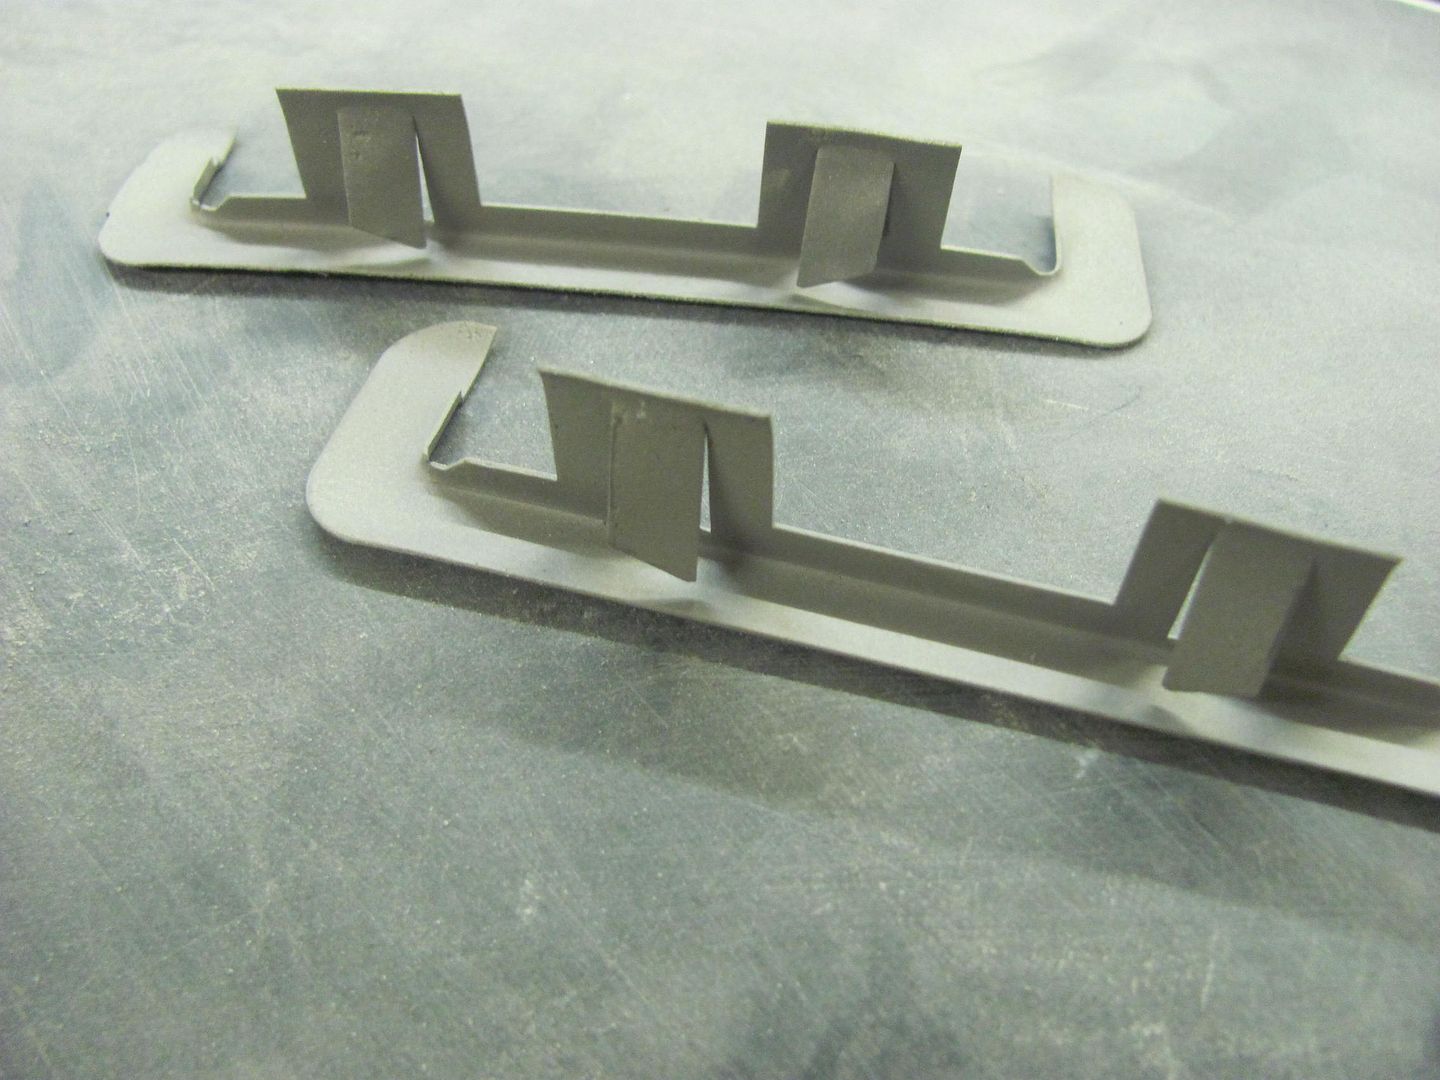
Lower dash vents for a 65 Impala...
I like these and the dual parallel deflector vanes over the 55 factory, which is a ball vent with a wide open hole.
These next ones are the ones I'm leaning toward for the dash center as they are an easier install than most of the GM ones of the era. The GM vents have a solid pivot shaft at either end that would require making a saddle and clamp deal to hold it in place. The Fomoco style shown here has the pivot pin on a tab that springs inward for installation/removal, so it requires two simple holes. A much easier fabrication of needed ducting.. if we need to fabricate..
This had no AC vents, but was a super clean ride, and still sported the Straight 8 under the hood, so consider this complimentary eye candy!
More VA pieces, these are nice and compact
I like the rectangular for the center of the dash but worry these round style vents may "clash" with rectangular ones. So the 40's small rectangular may be a good option for the side vents. Thoughts, personal choices, ones we haven't shown (with pictures) are welcome. This build really isn't a billet type, so black and chrome are a preferred option. Thanks in advance for any advice/pointers..Comment
-
Google Image search, "dash vents"
I think this one is from Classic Industries and fits a Camaro. product number 3963781 and may work as a center vent

These are from fbodywarehouse.com for a 70-81 Camaro and may work as side vents

Comment
-
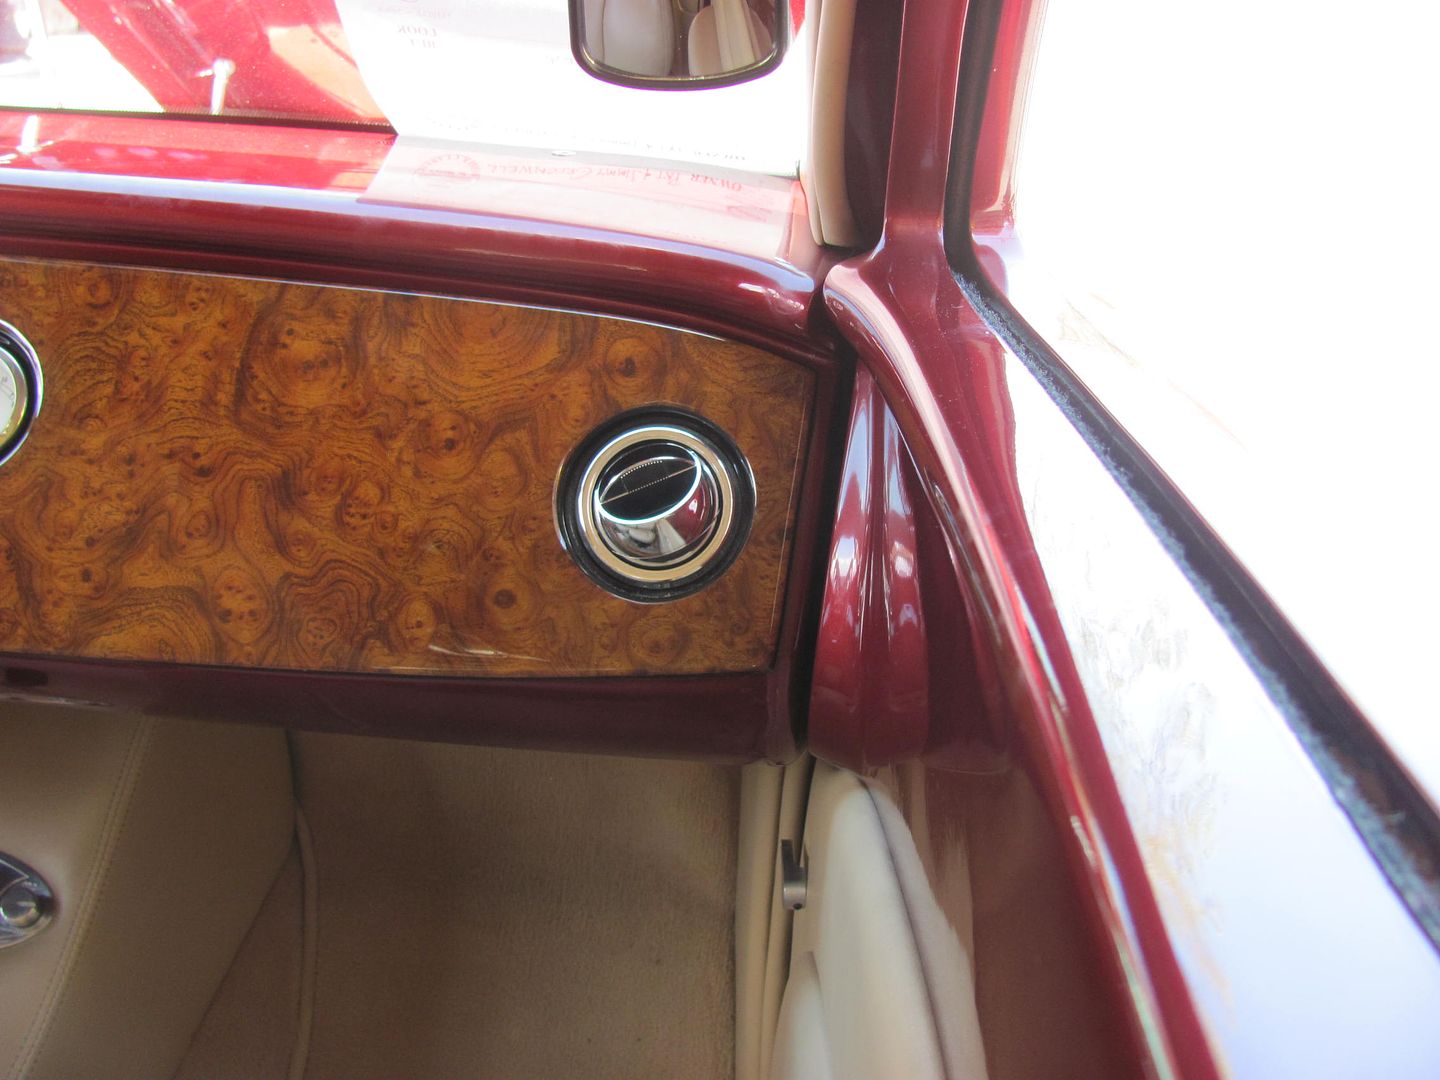
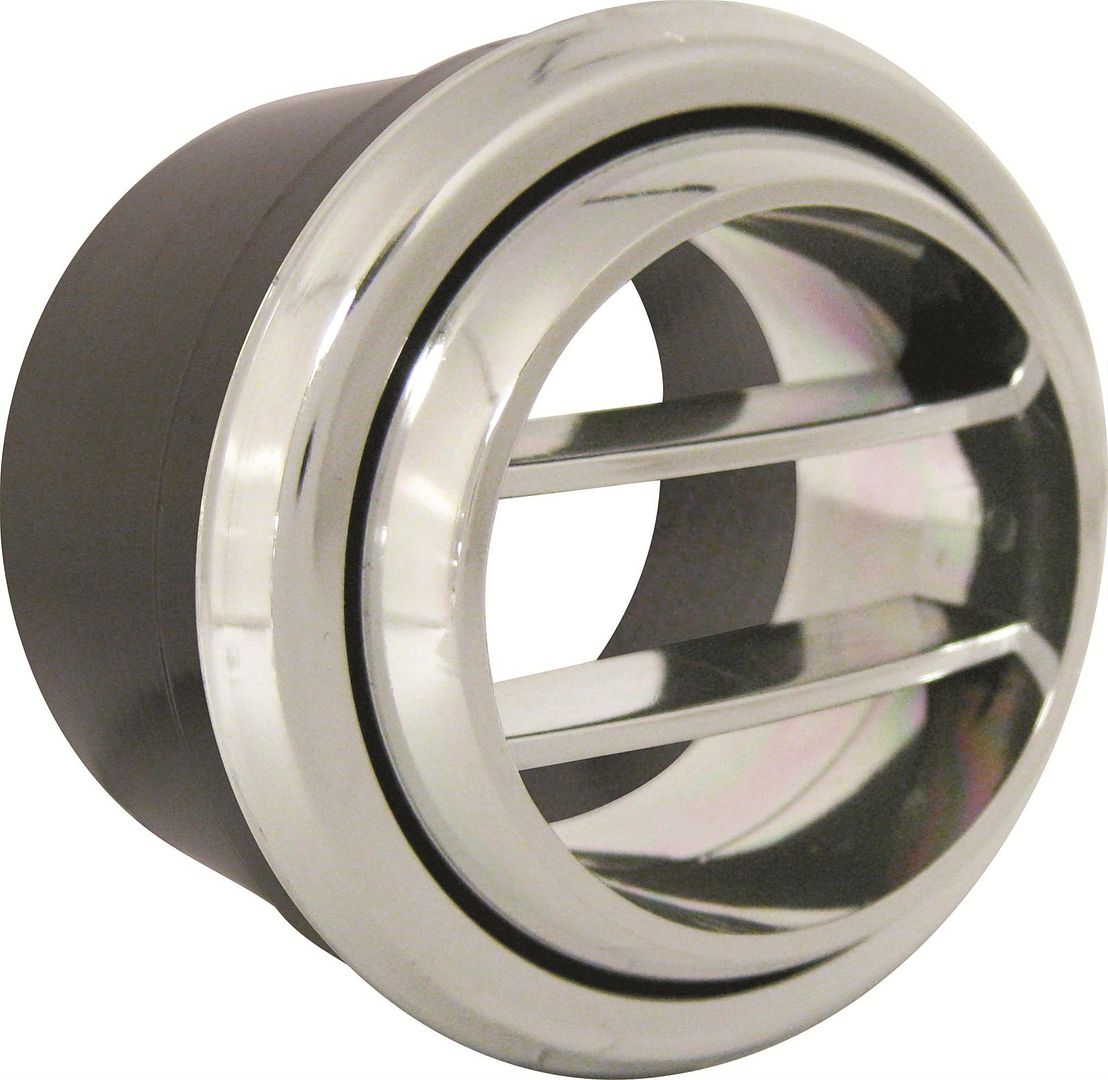
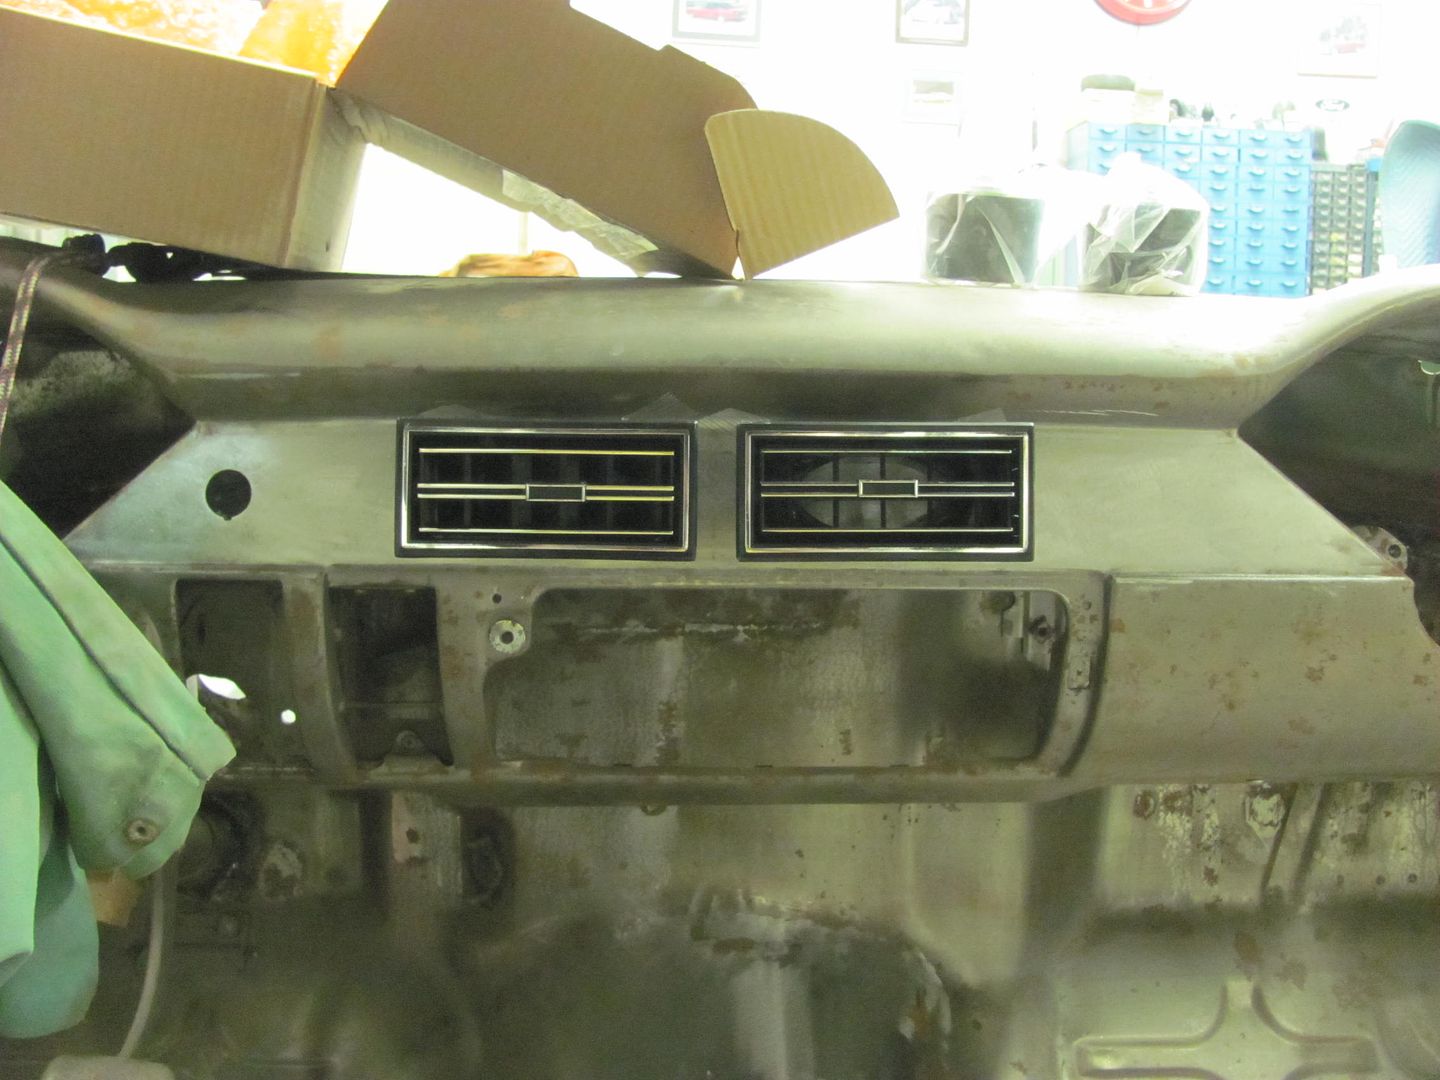
First, thanks for the input on dash vents. I'll have to agree that these shoebox cars lend themselves more to curves, but given the long, flat, rectangular mounting surface in the center of the dash, it seemed that two round vents would not begin to fill the void. Thus we were leaning toward the rectangular vents to fill the space. Dana wanted to keep the outside vents round, and mount below in the factory location. So these are the ones decided on, Vintage Air pieces...
for the corner locations.....
for the center of the dash.......
Of course, something told me to keep looking, and given your suggestion to do the Google image search on "dash vents", I skipped the catalogs this time and looked at installed vents. Then it hit me, how could I have not seen this before.....
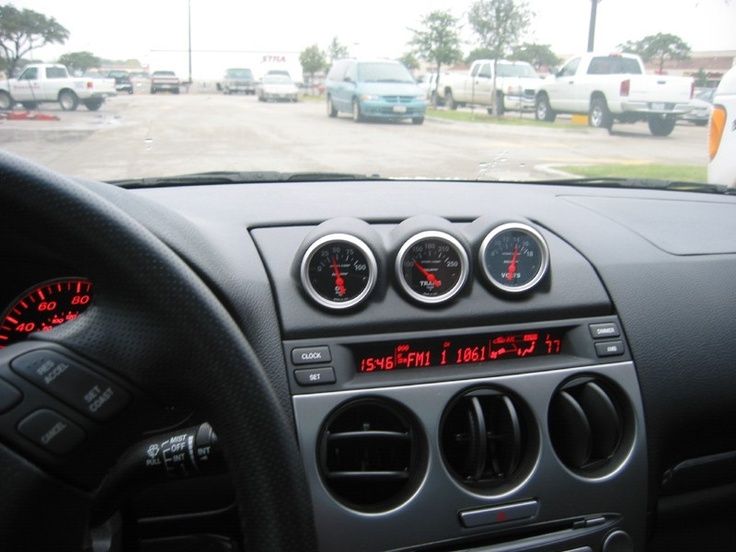
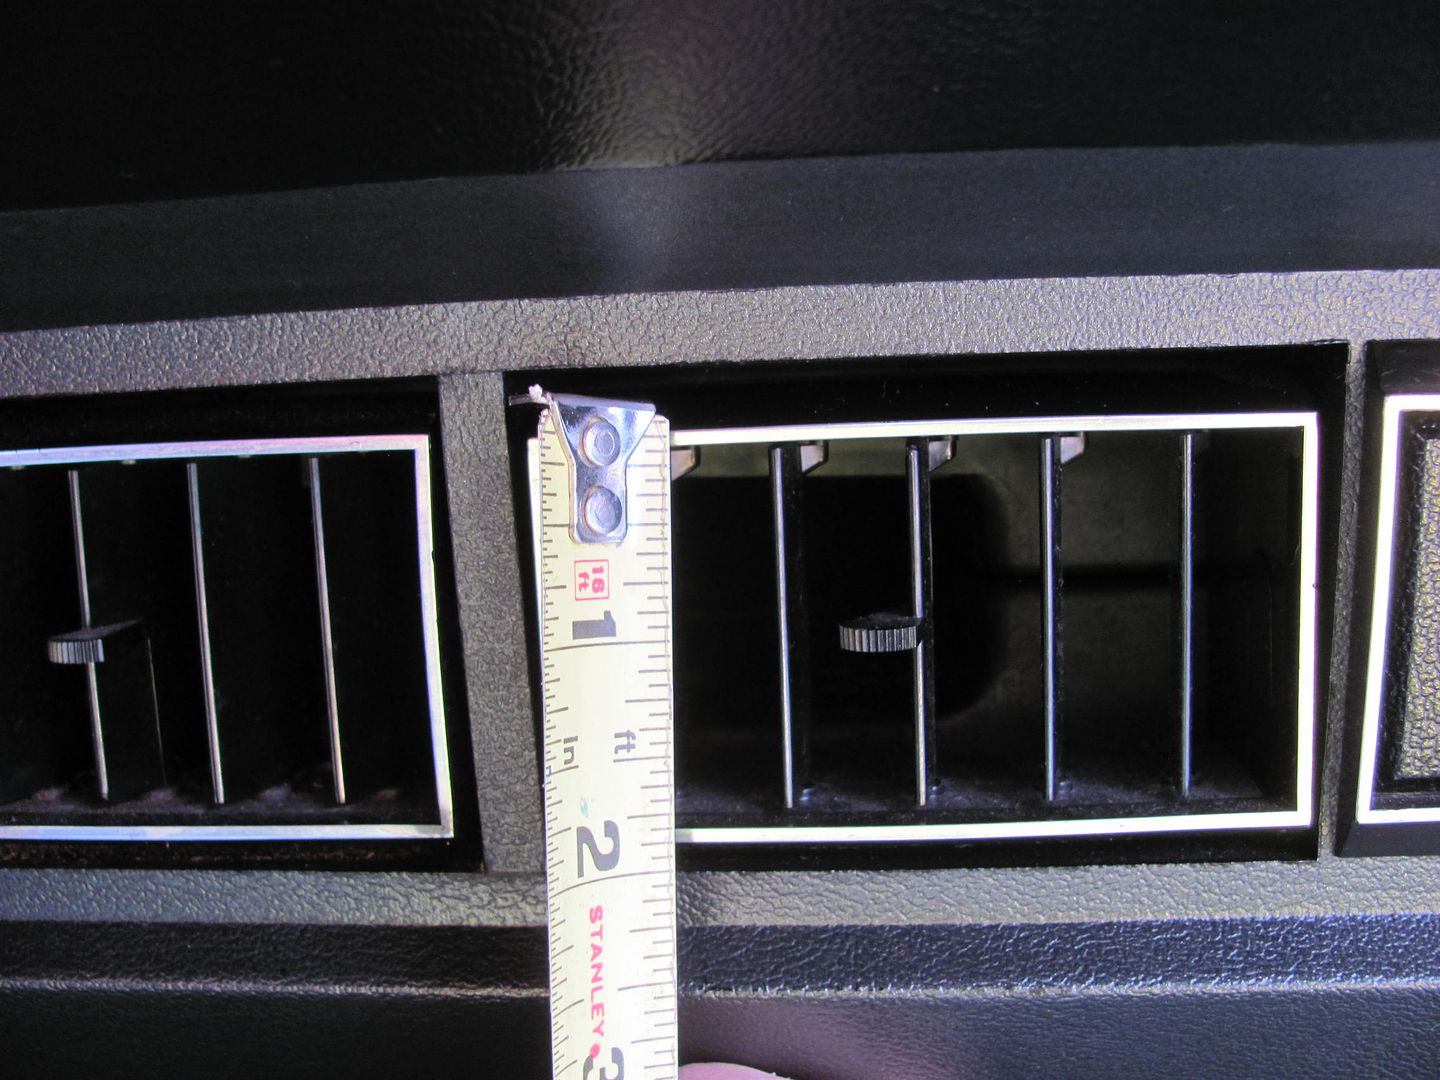
Three wide in the round vents vs. only two did a better job of filling out the dash and would give us matching vents all around. So, with only two round on order (and two rectangular that will likely go back), we plan to see how "tight" these 2-5/8 round bezels look on a 2-3/4 high flat area, and make the final decision from there.. The saga continues..
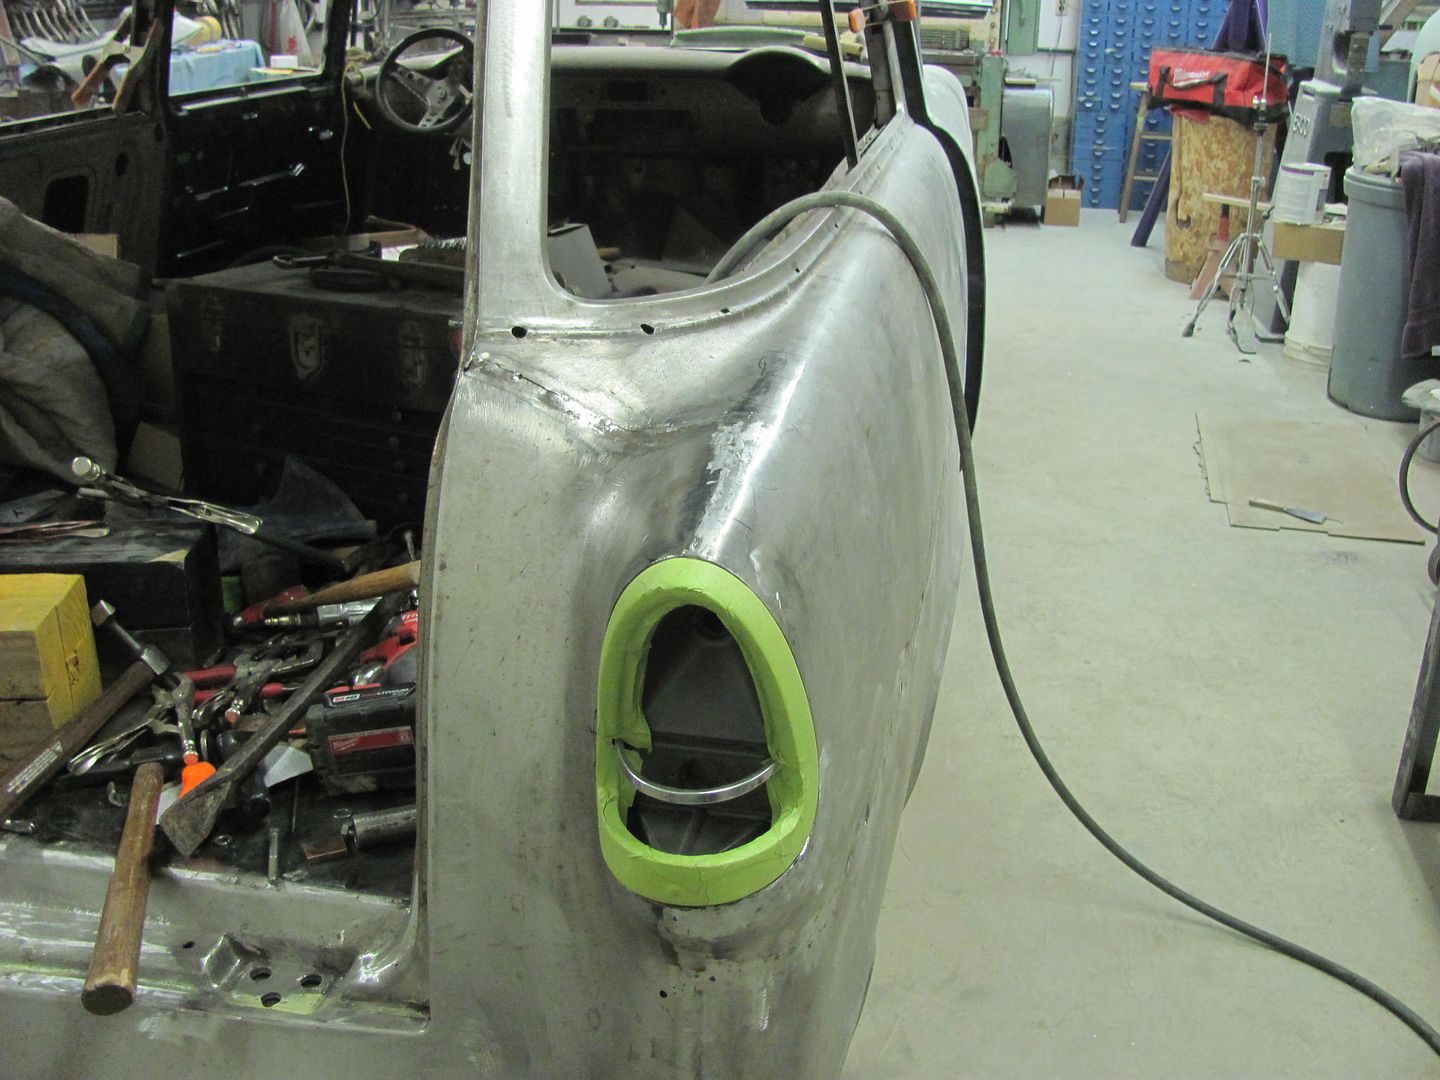
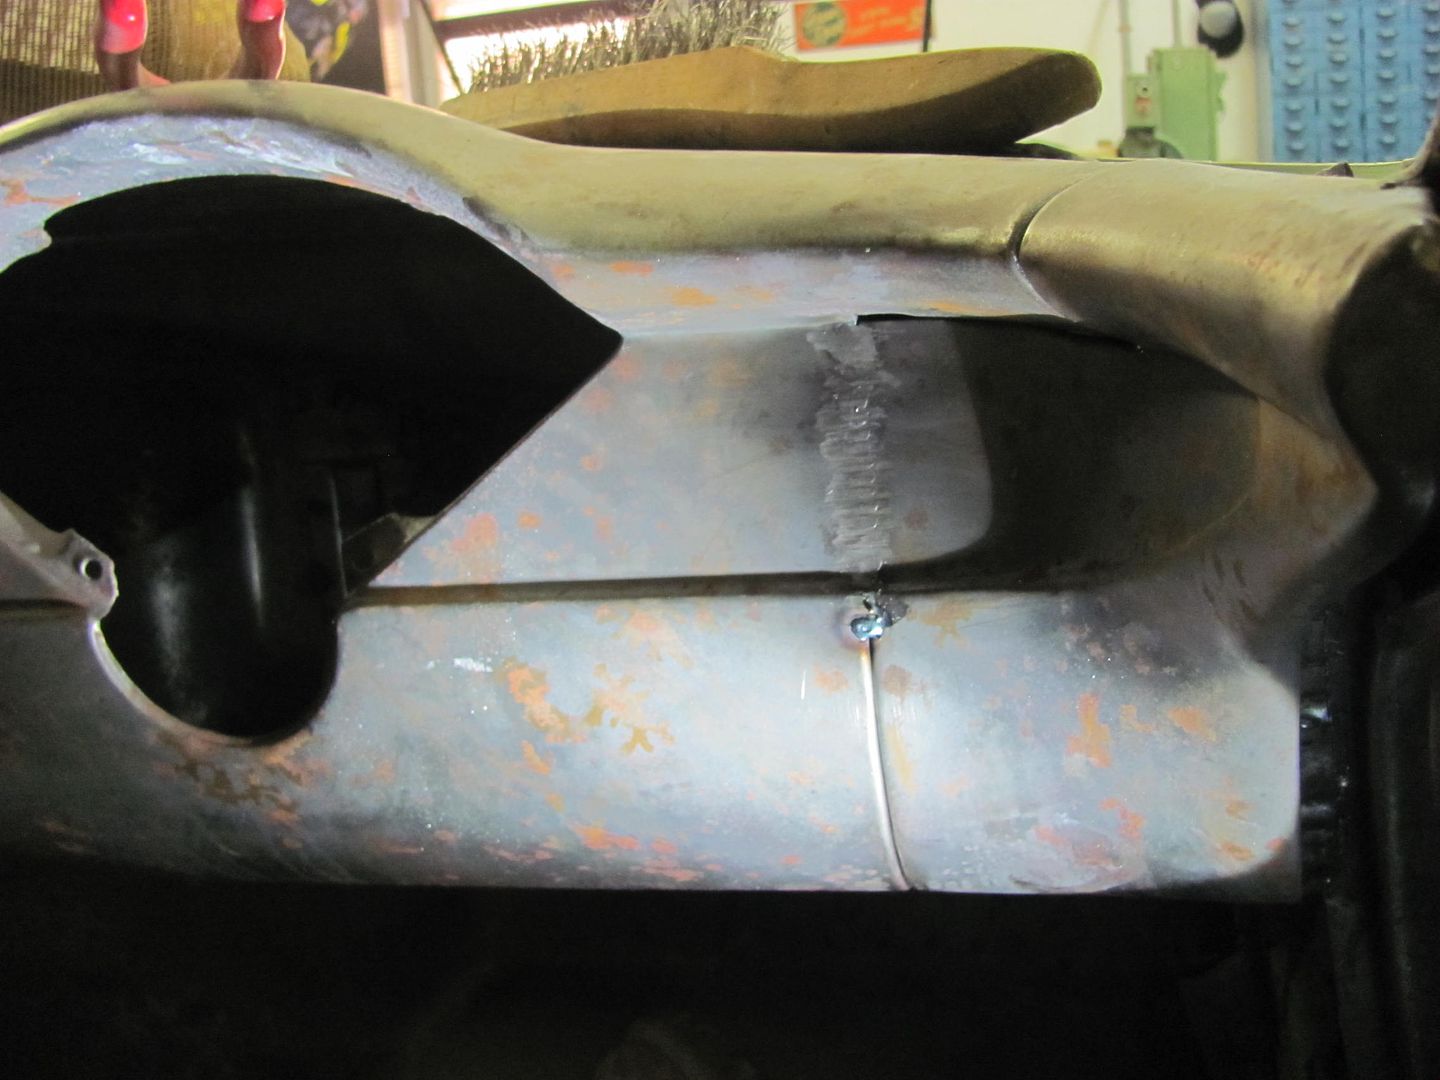
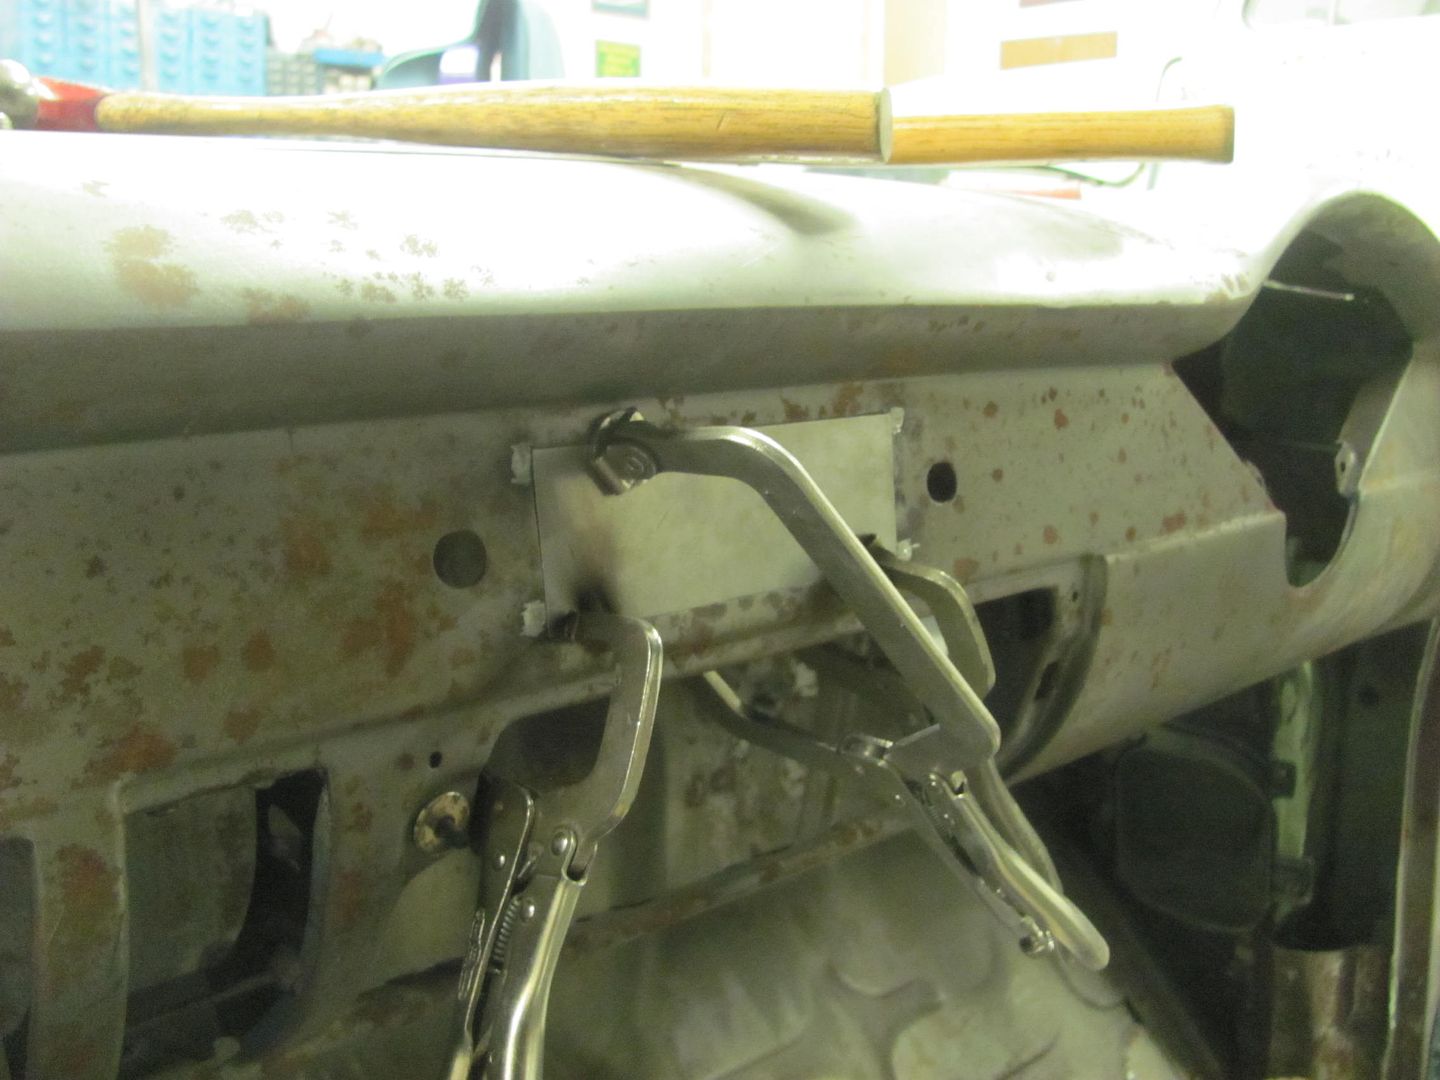
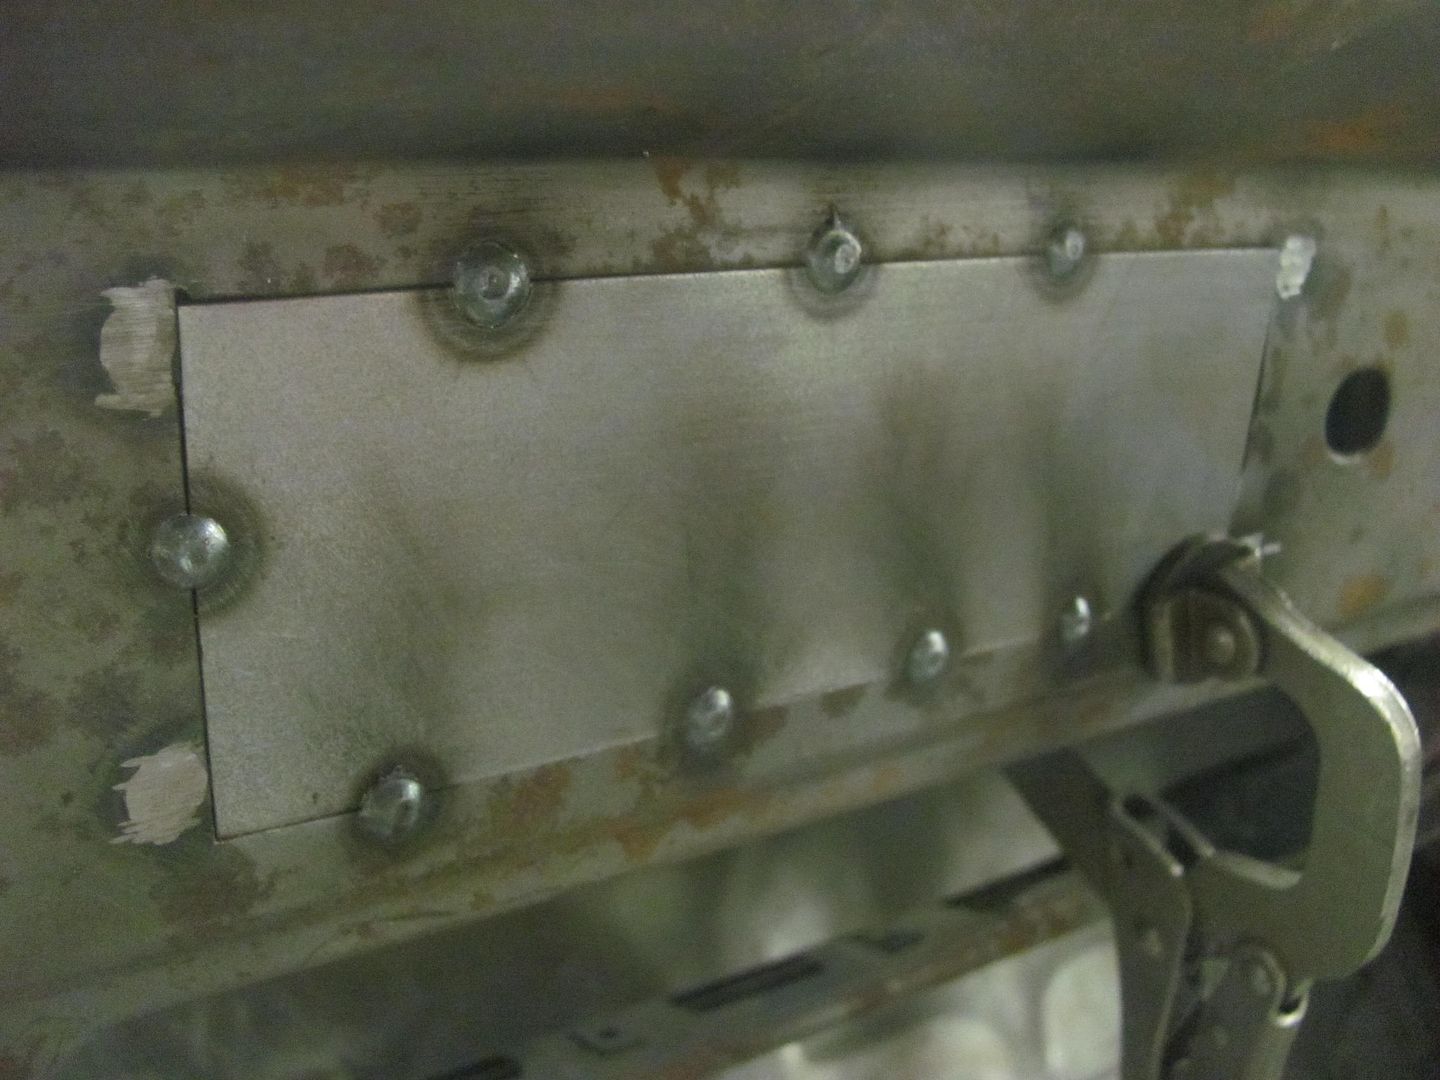
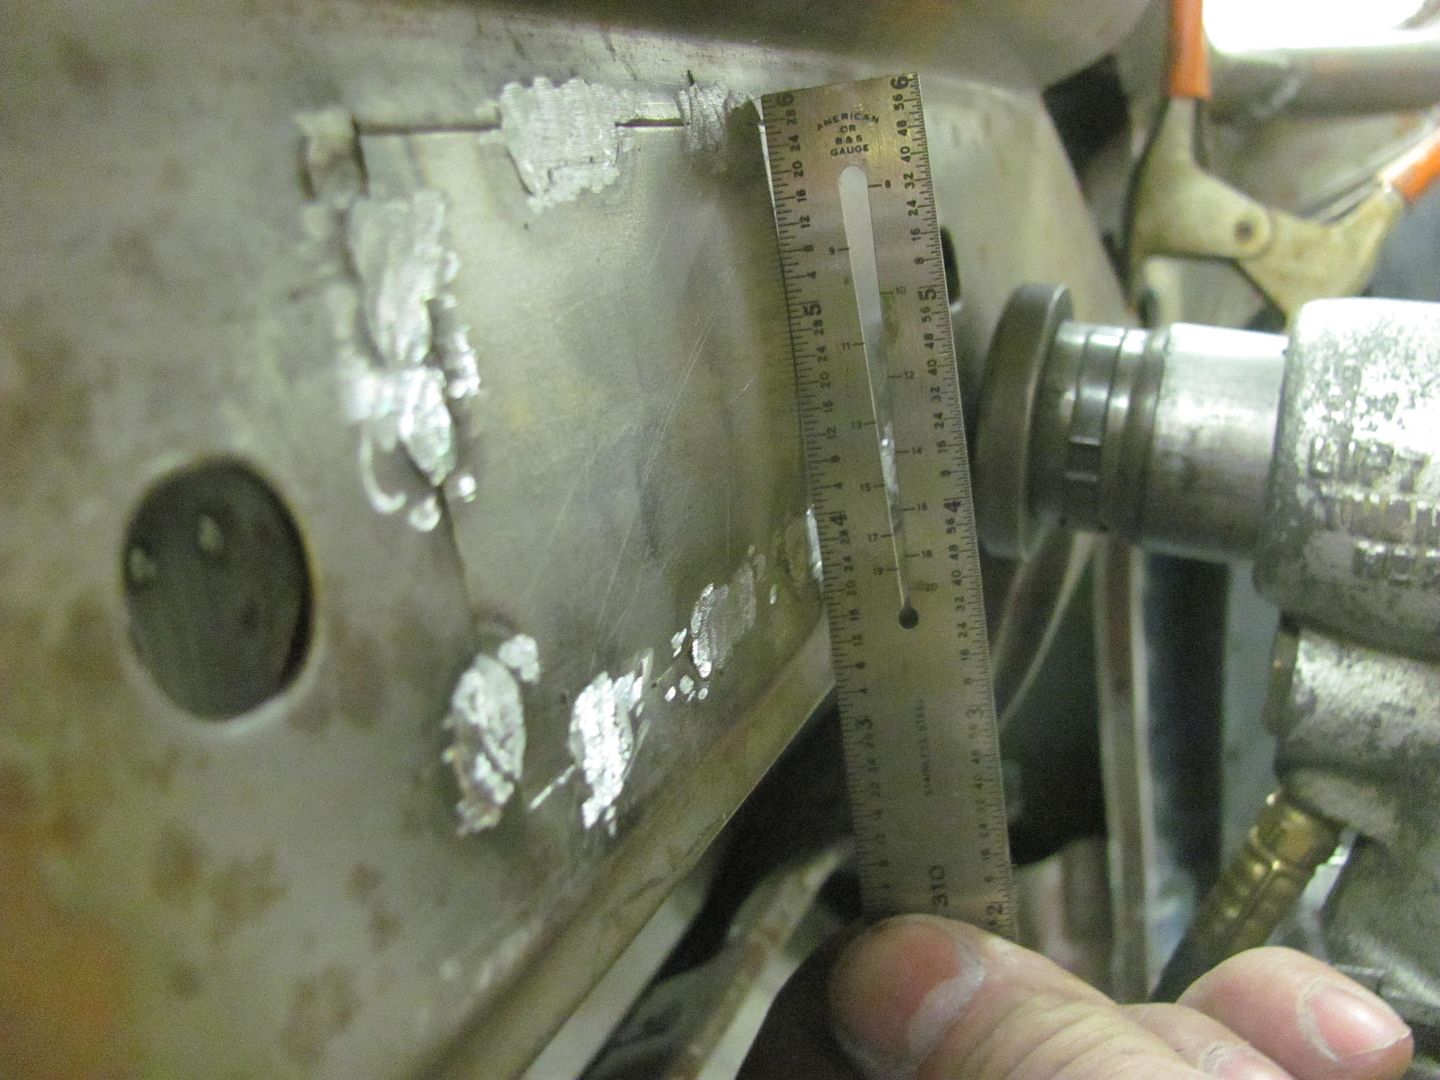
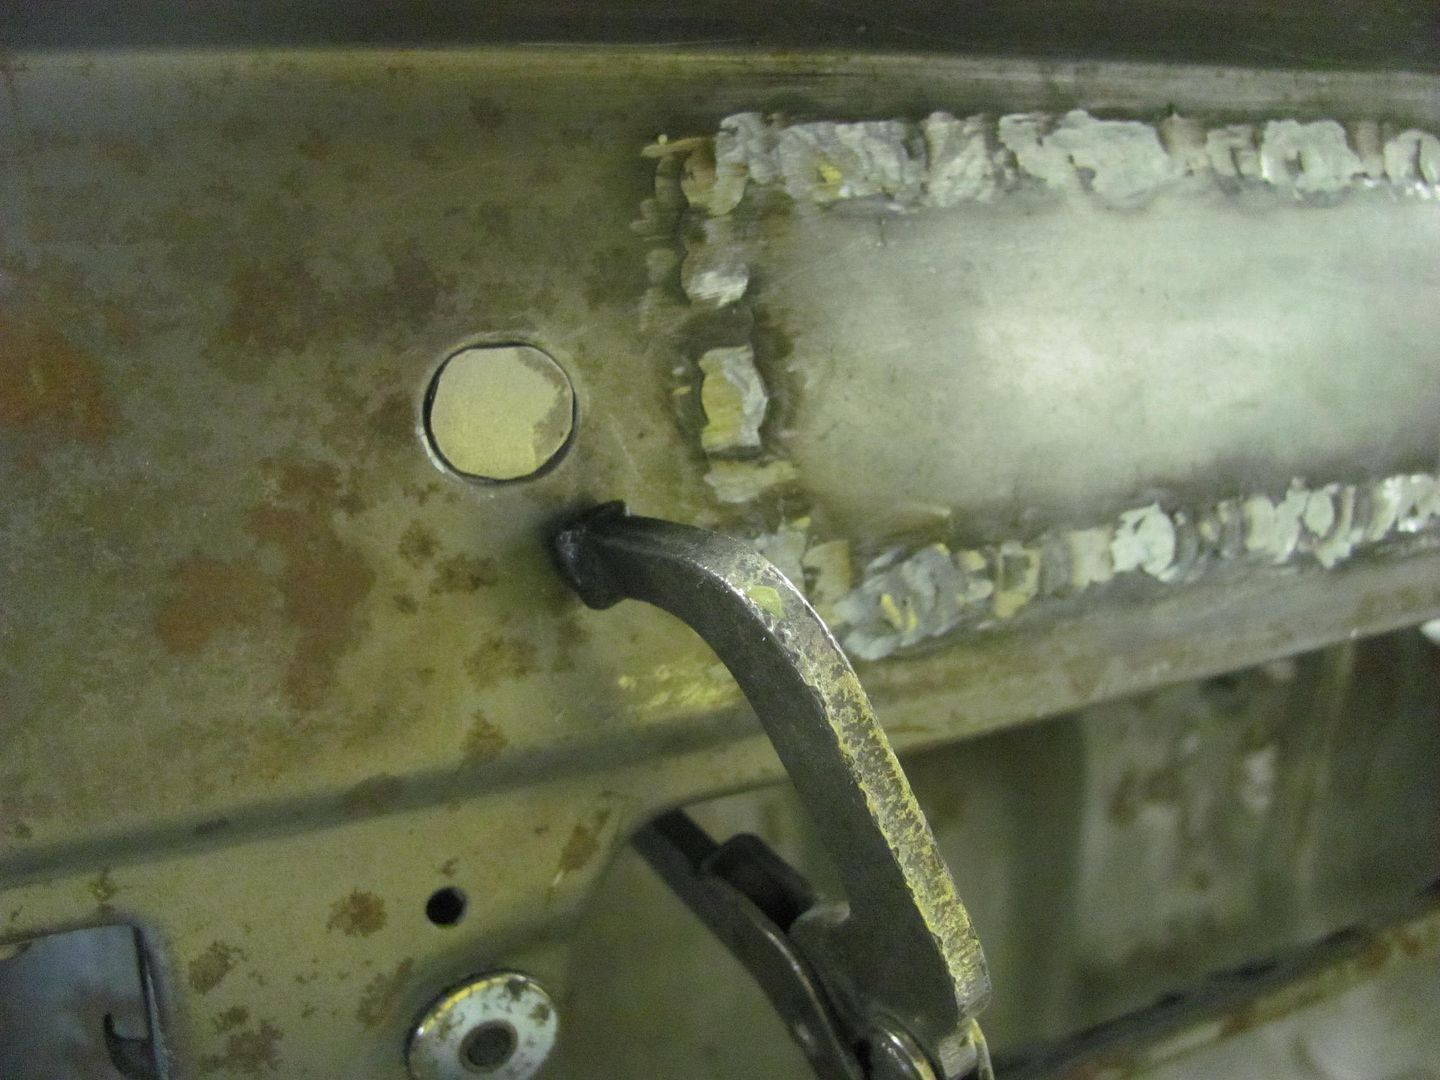
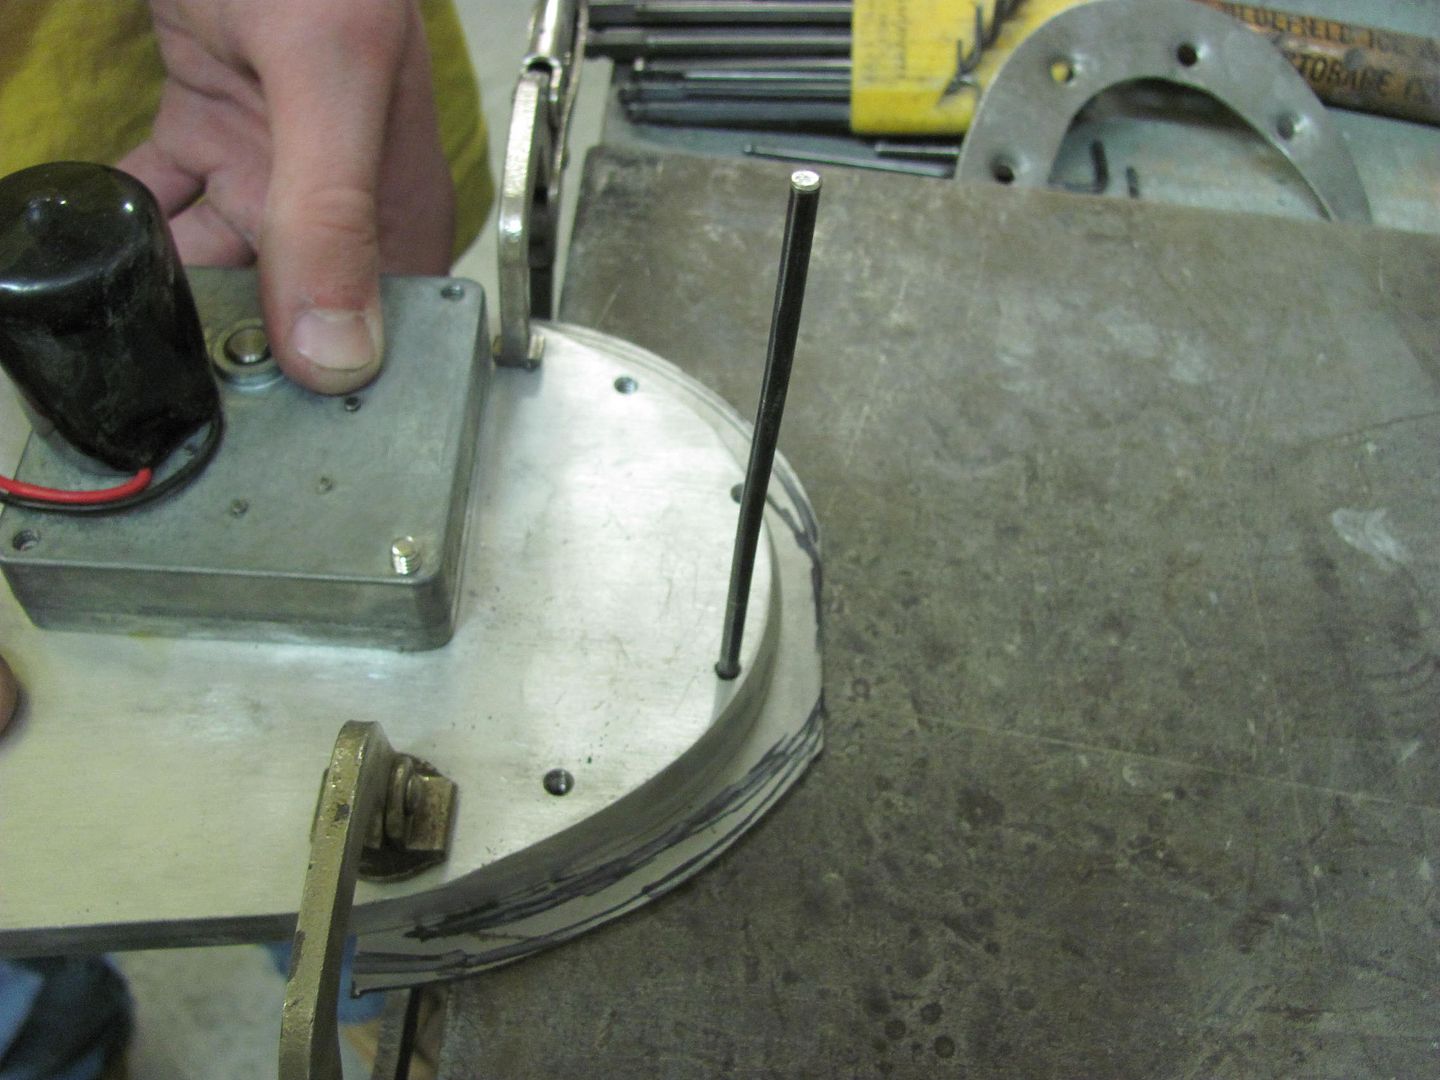
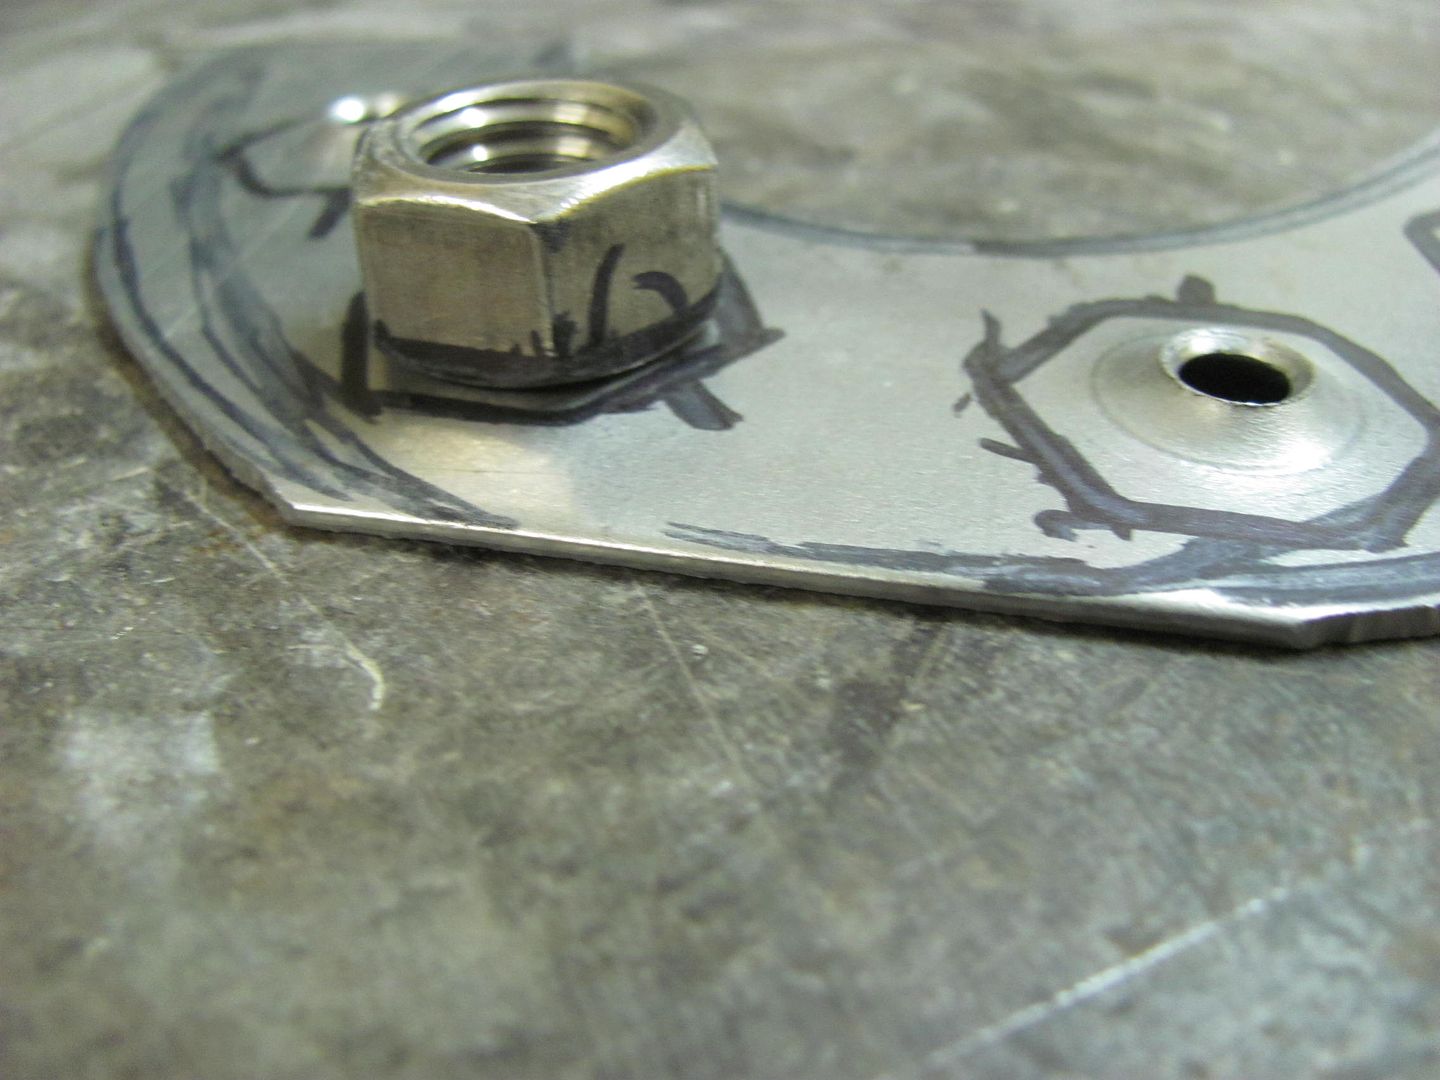
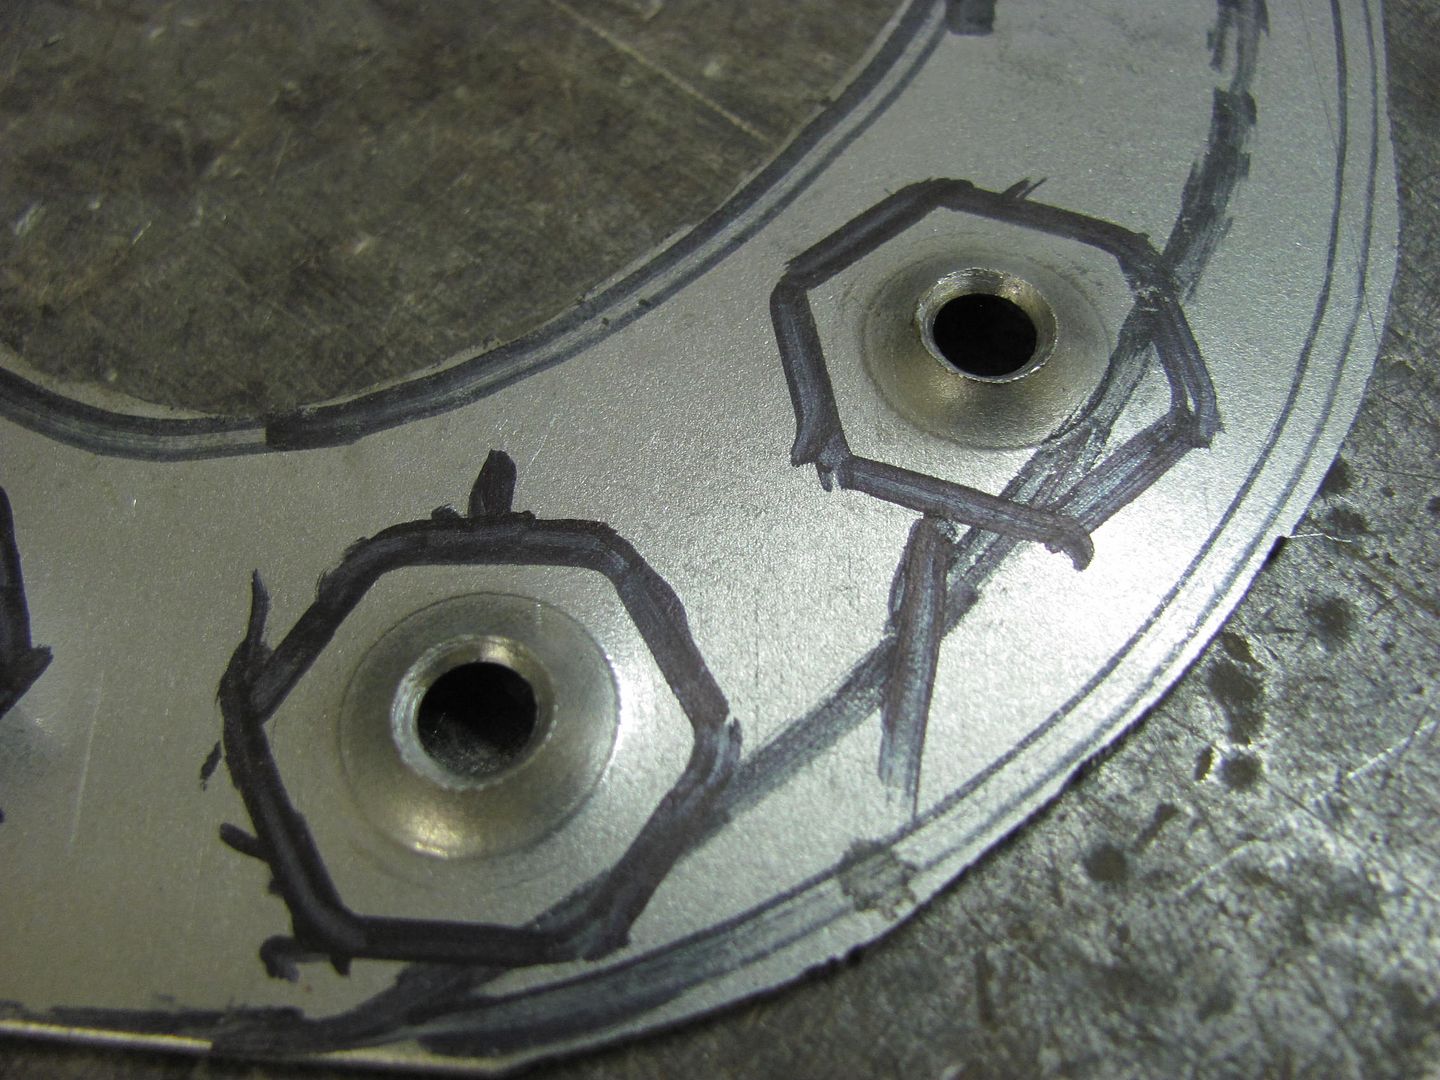
Now with the dash seams all welded and waiting for gauges to be delivered, the moment I've been dreading. Installing the Rocky Hinge fuel "door". First thing noticed was that some of the holes on the weld-in mounting plate were off by half a hole..
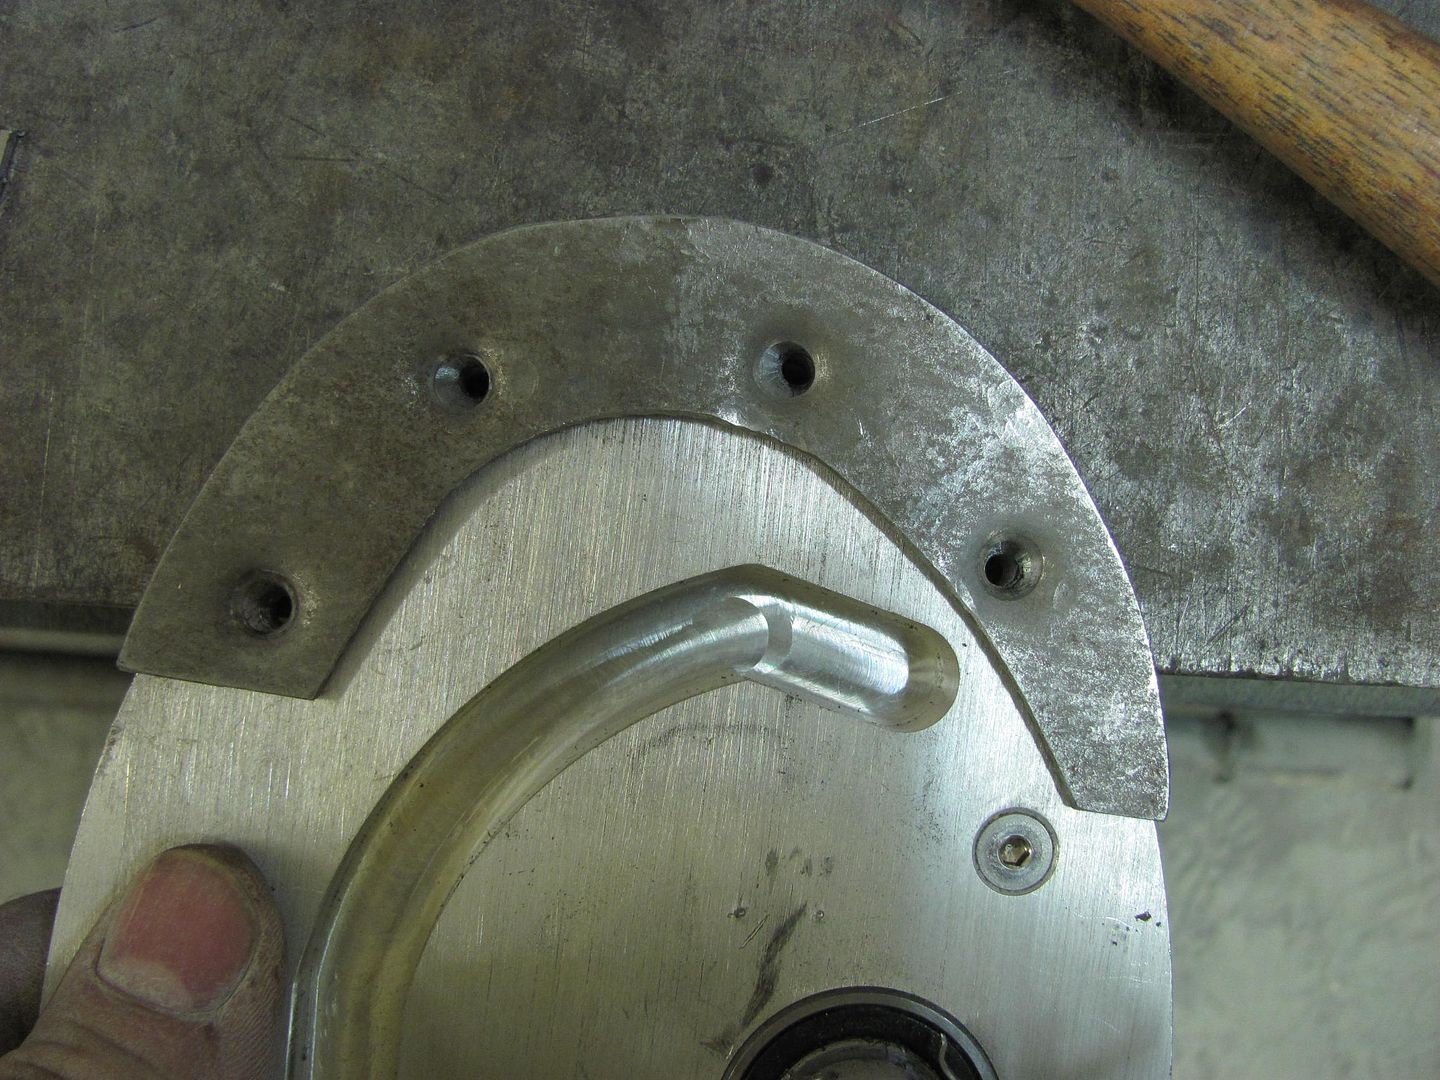
So Kyle cut out a fresh piece of 14 ga crs to make a new one, a bit oversized to trim later. Used some transfer punches to get the bolt holes lined up a bit better on our version of the weld-in plate..
Attachment screws fitting better already....
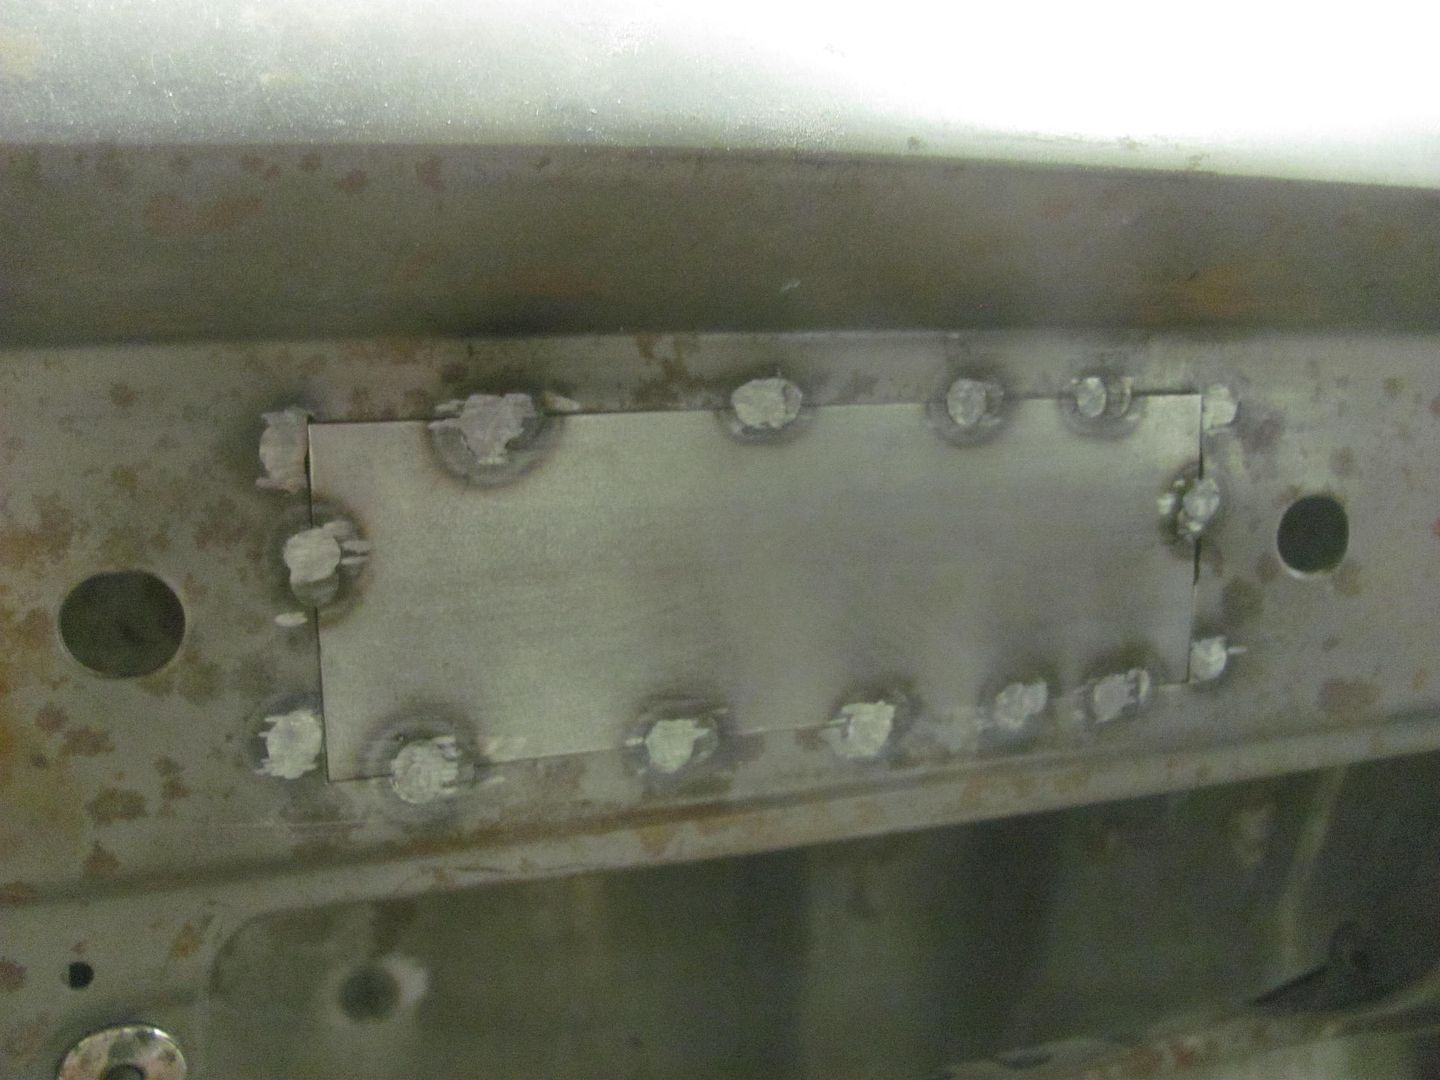
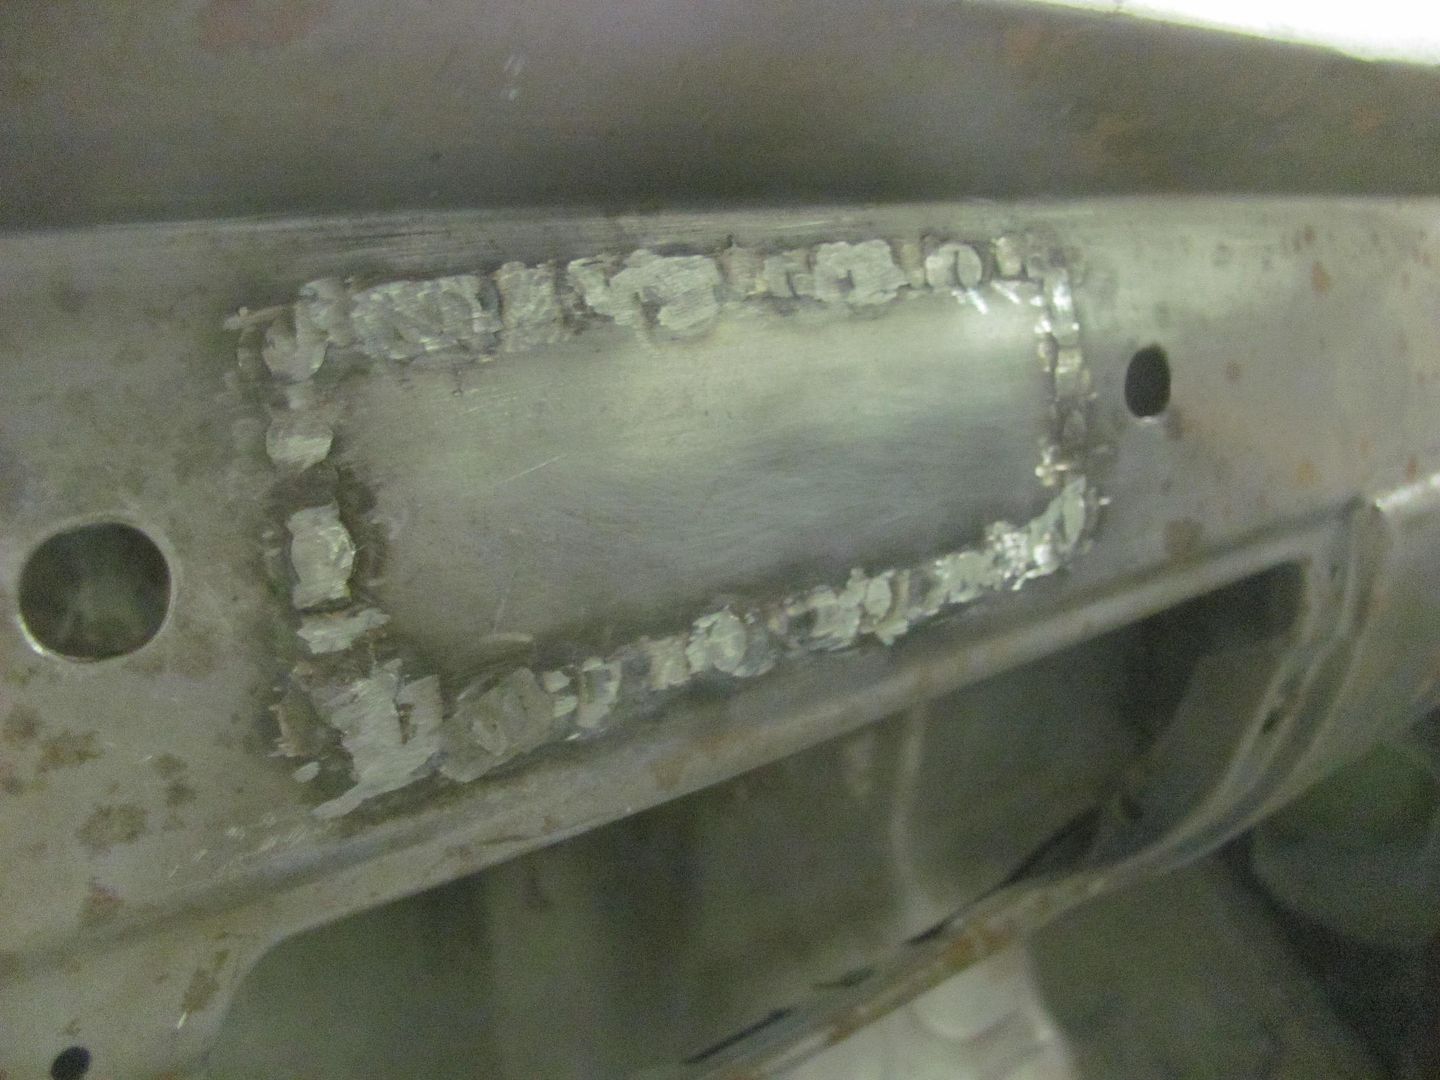
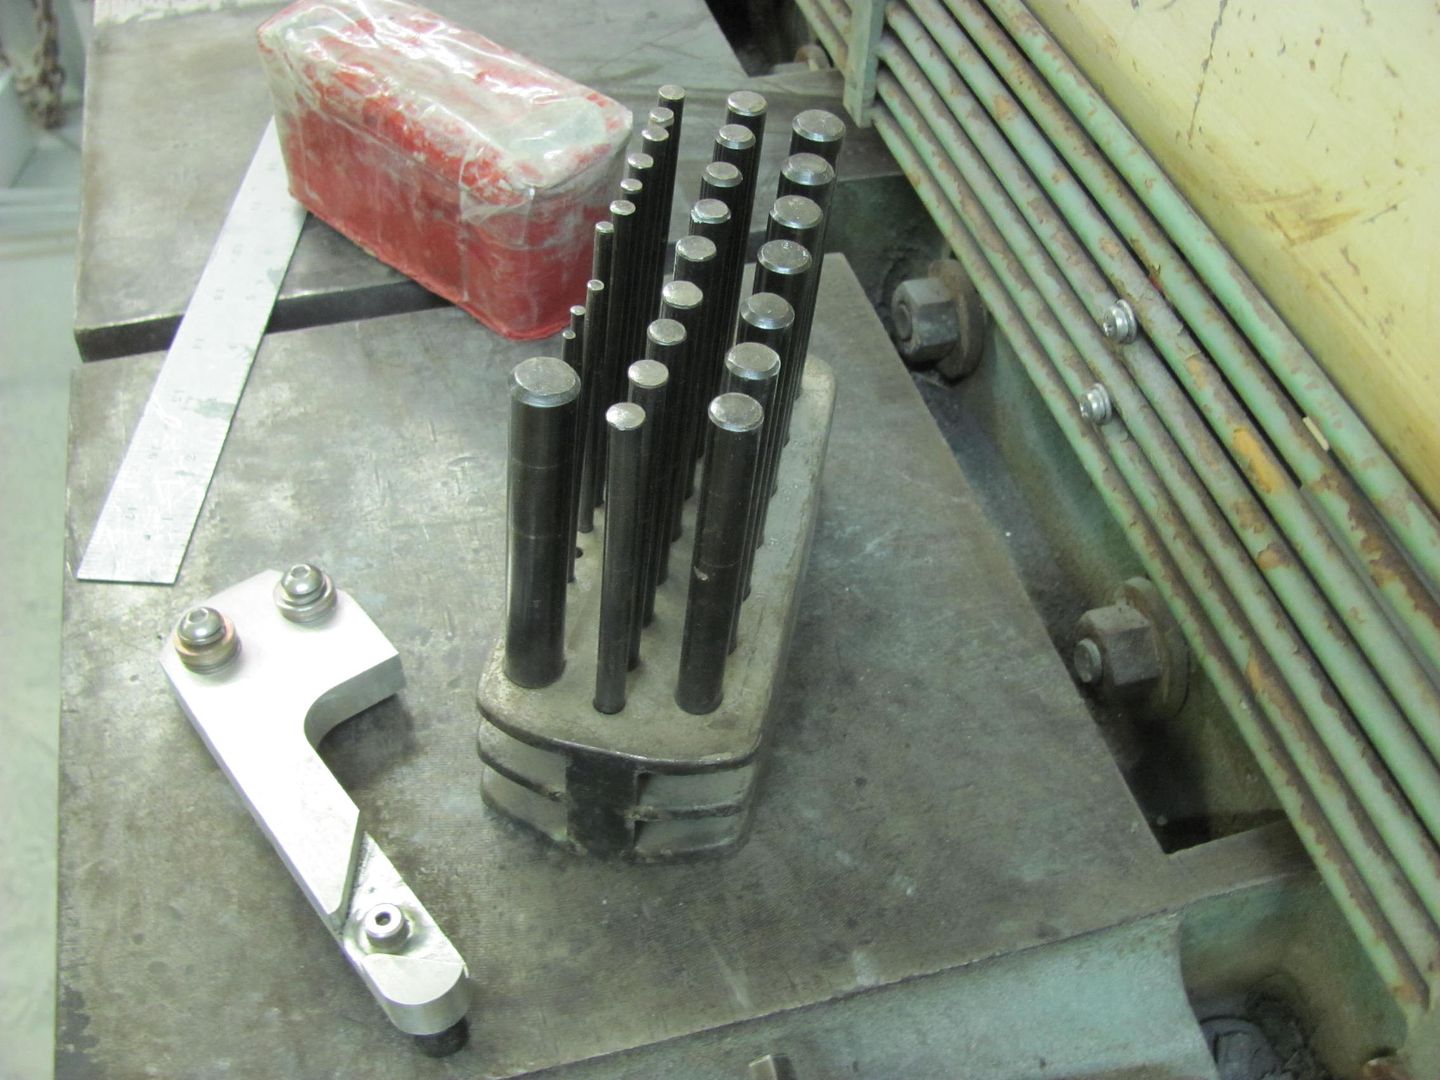
To provide the proper "pressed" countersink, we broke out the tubing flare kit...
Redneck press...
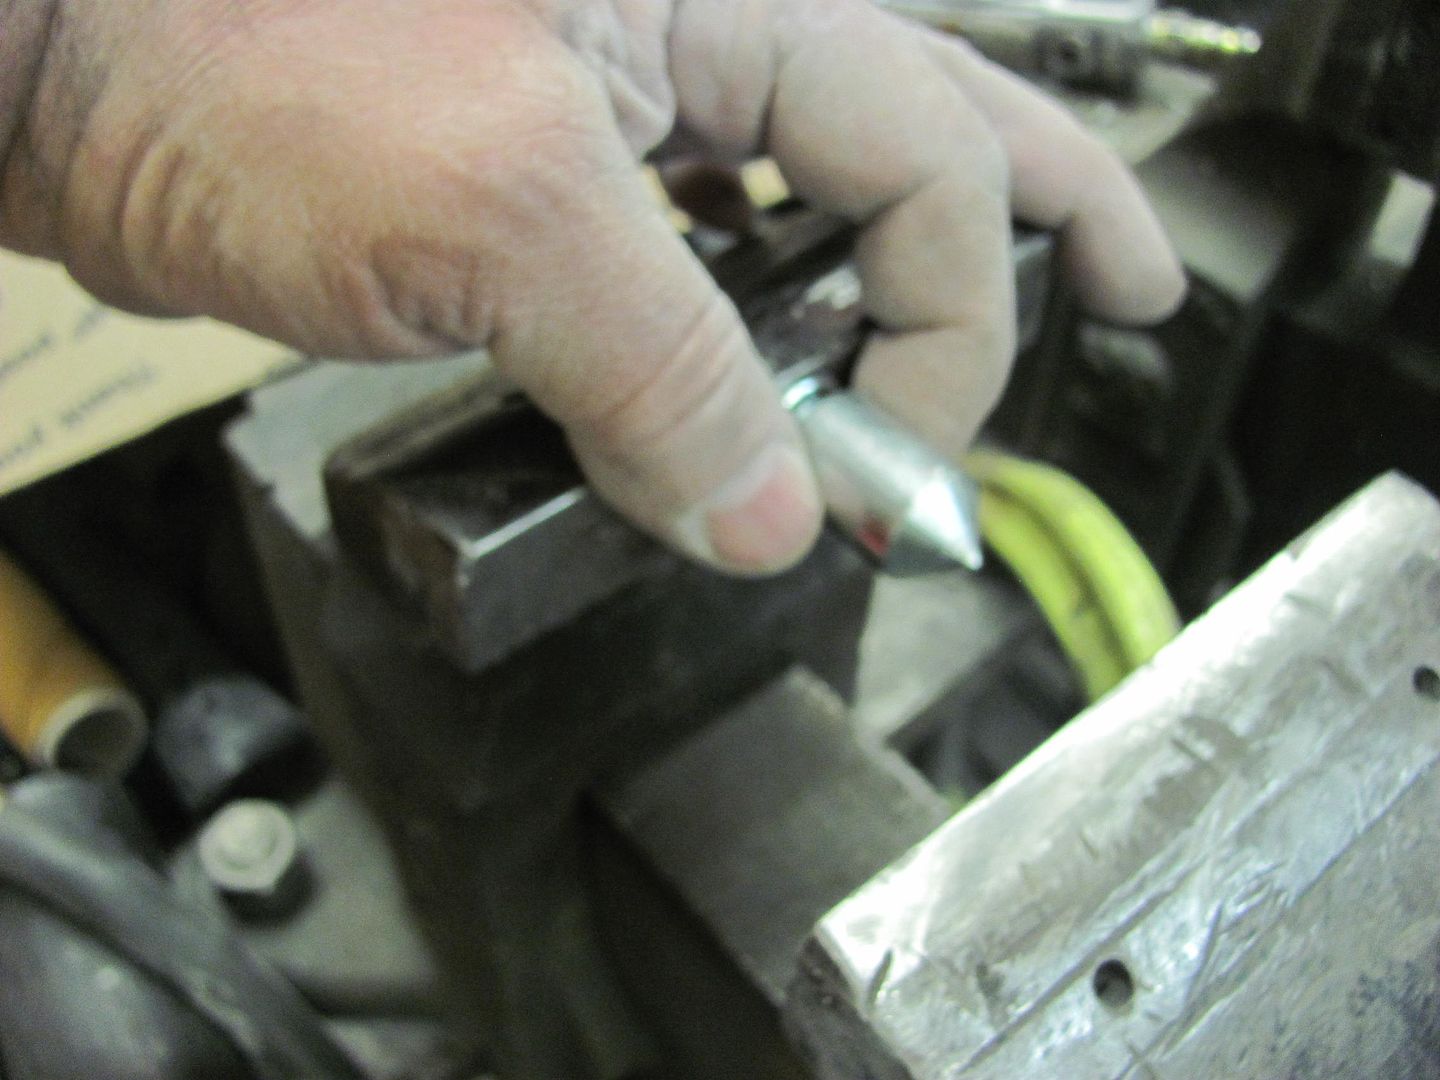
Our lower "die" was a 1/2-13 nut, centered over the hole, perimeter marked, and then taped in place before locating this into the press. Hey, it wasn't pretty, but it worked!
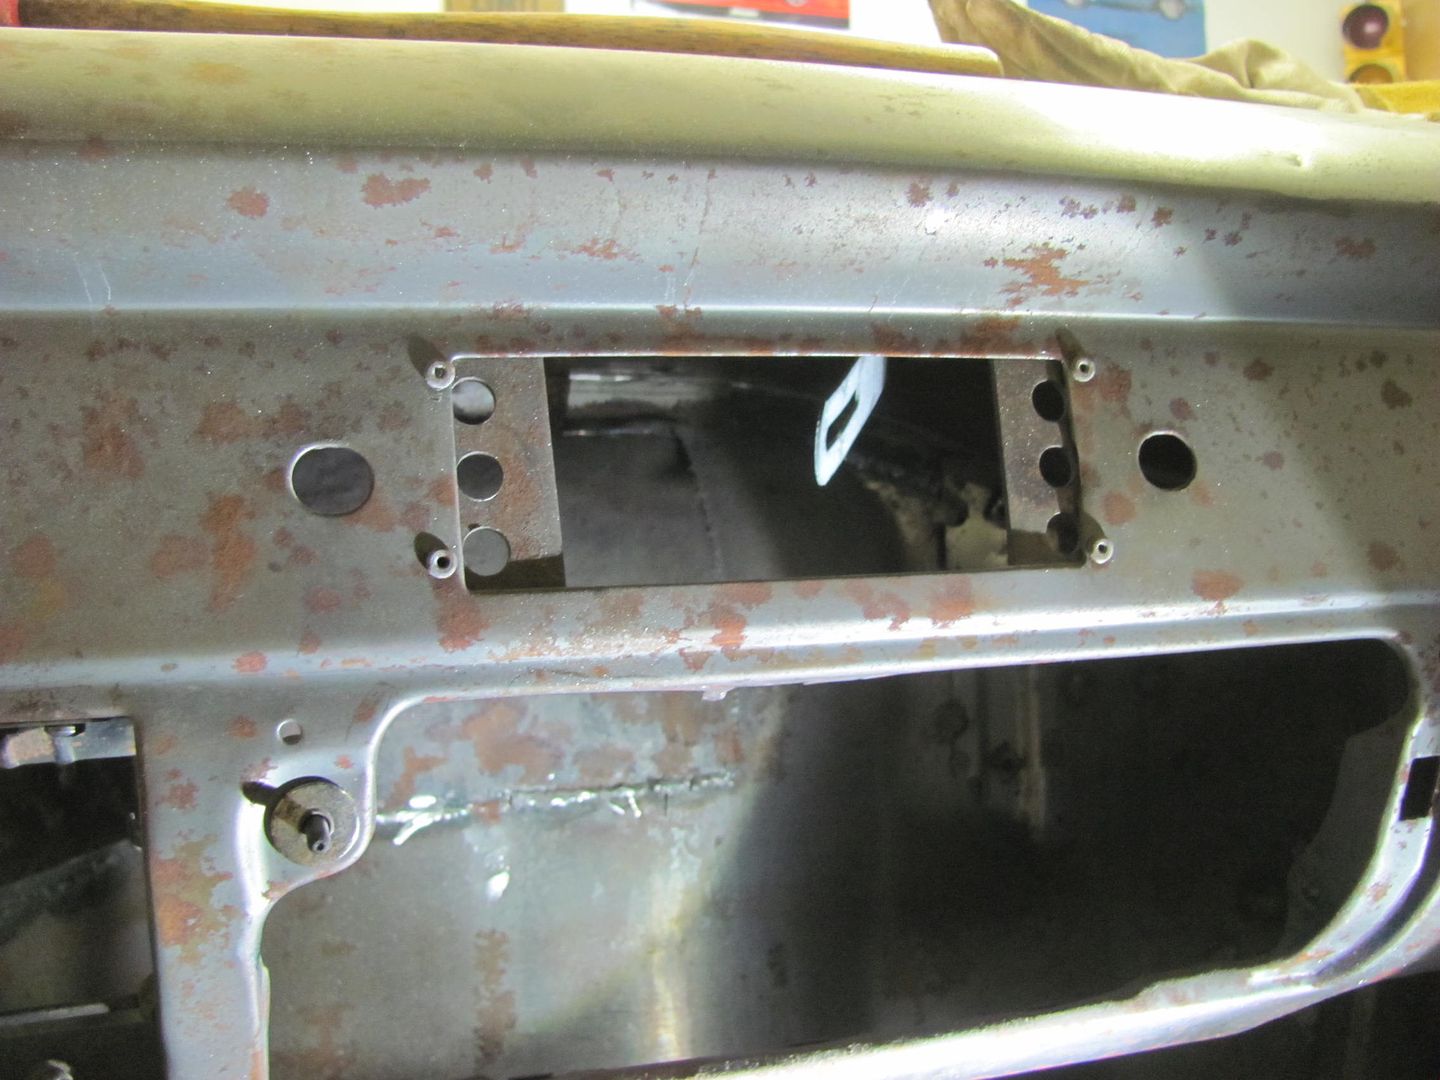
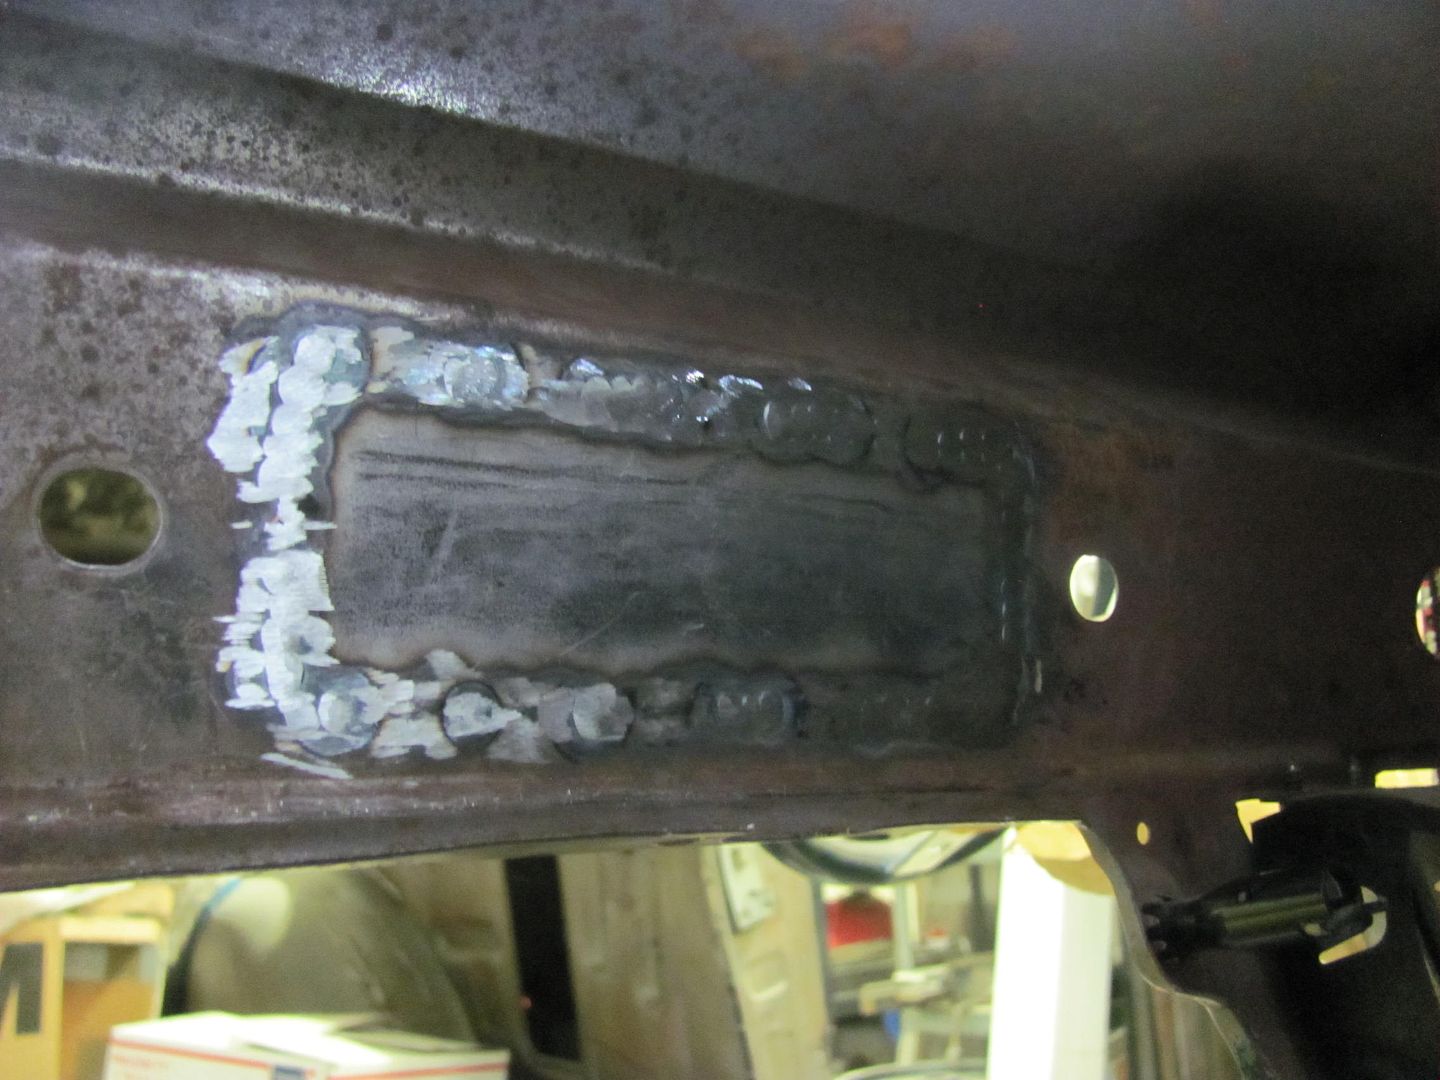
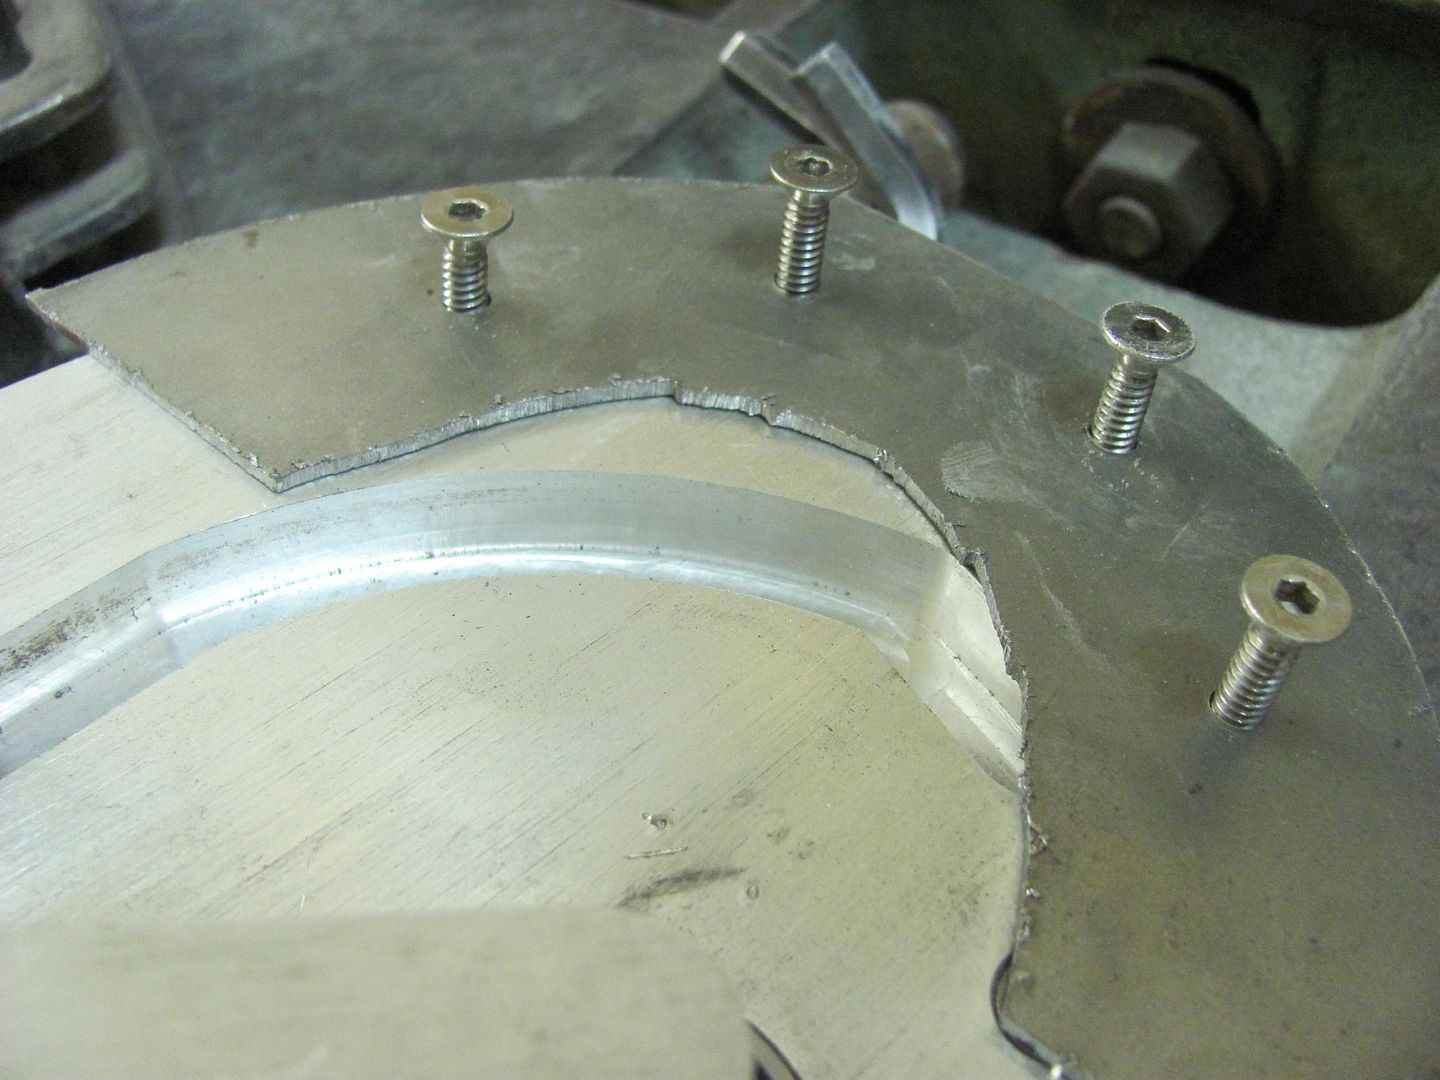
Some trimming of the hole to provide room for the weld-in mounting plate....
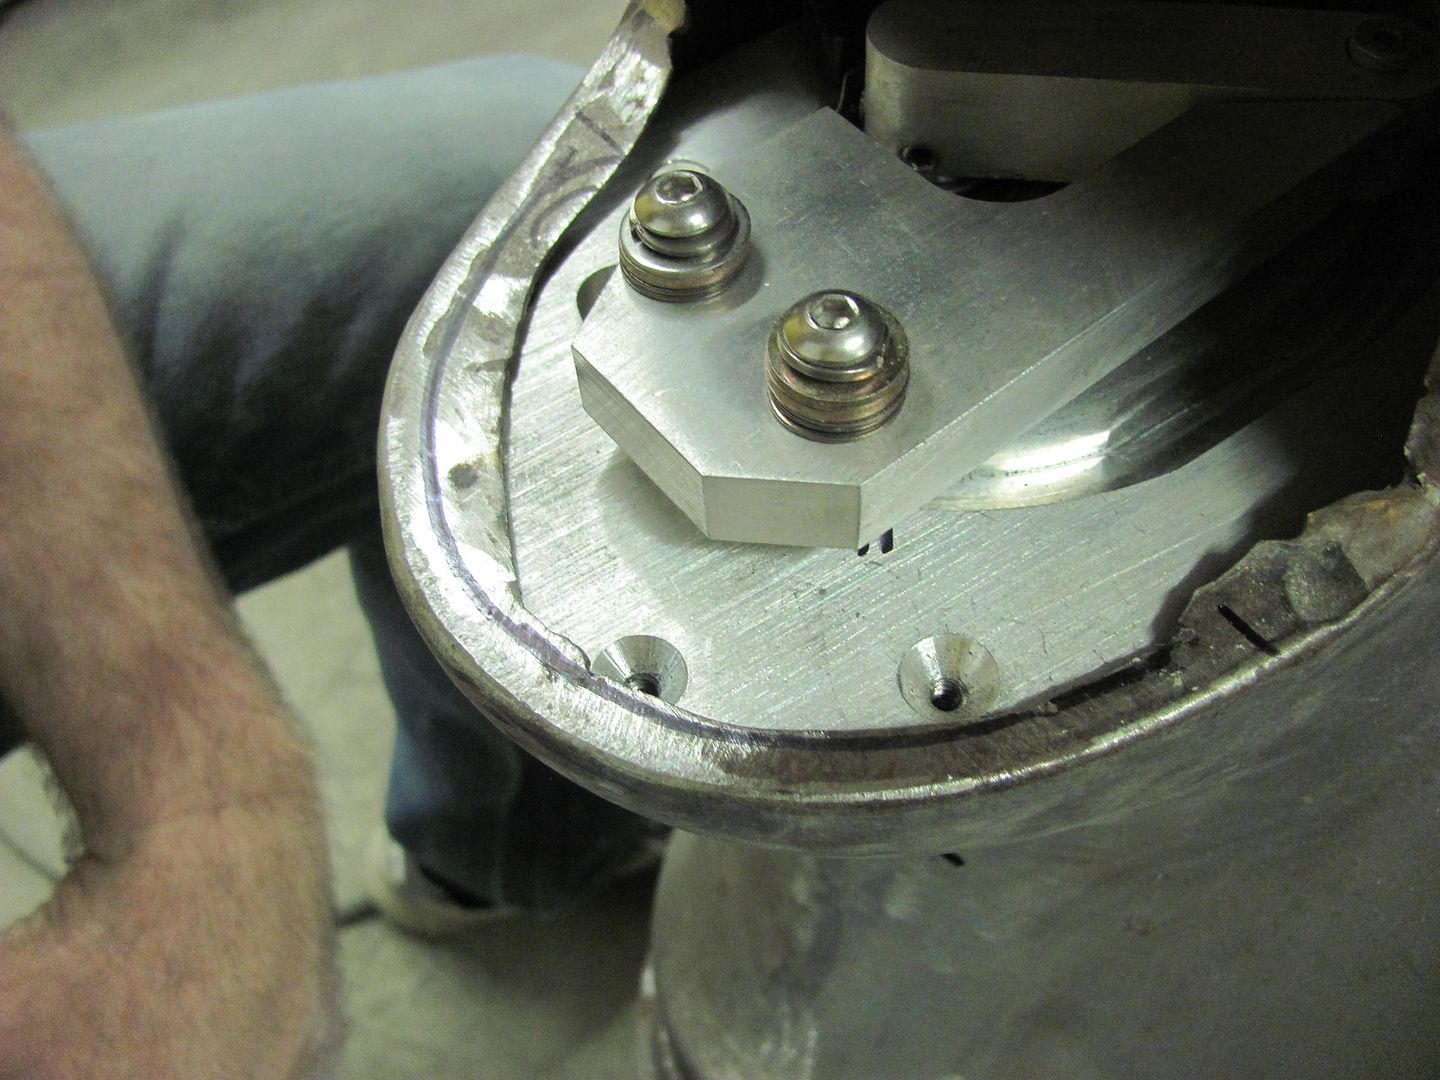
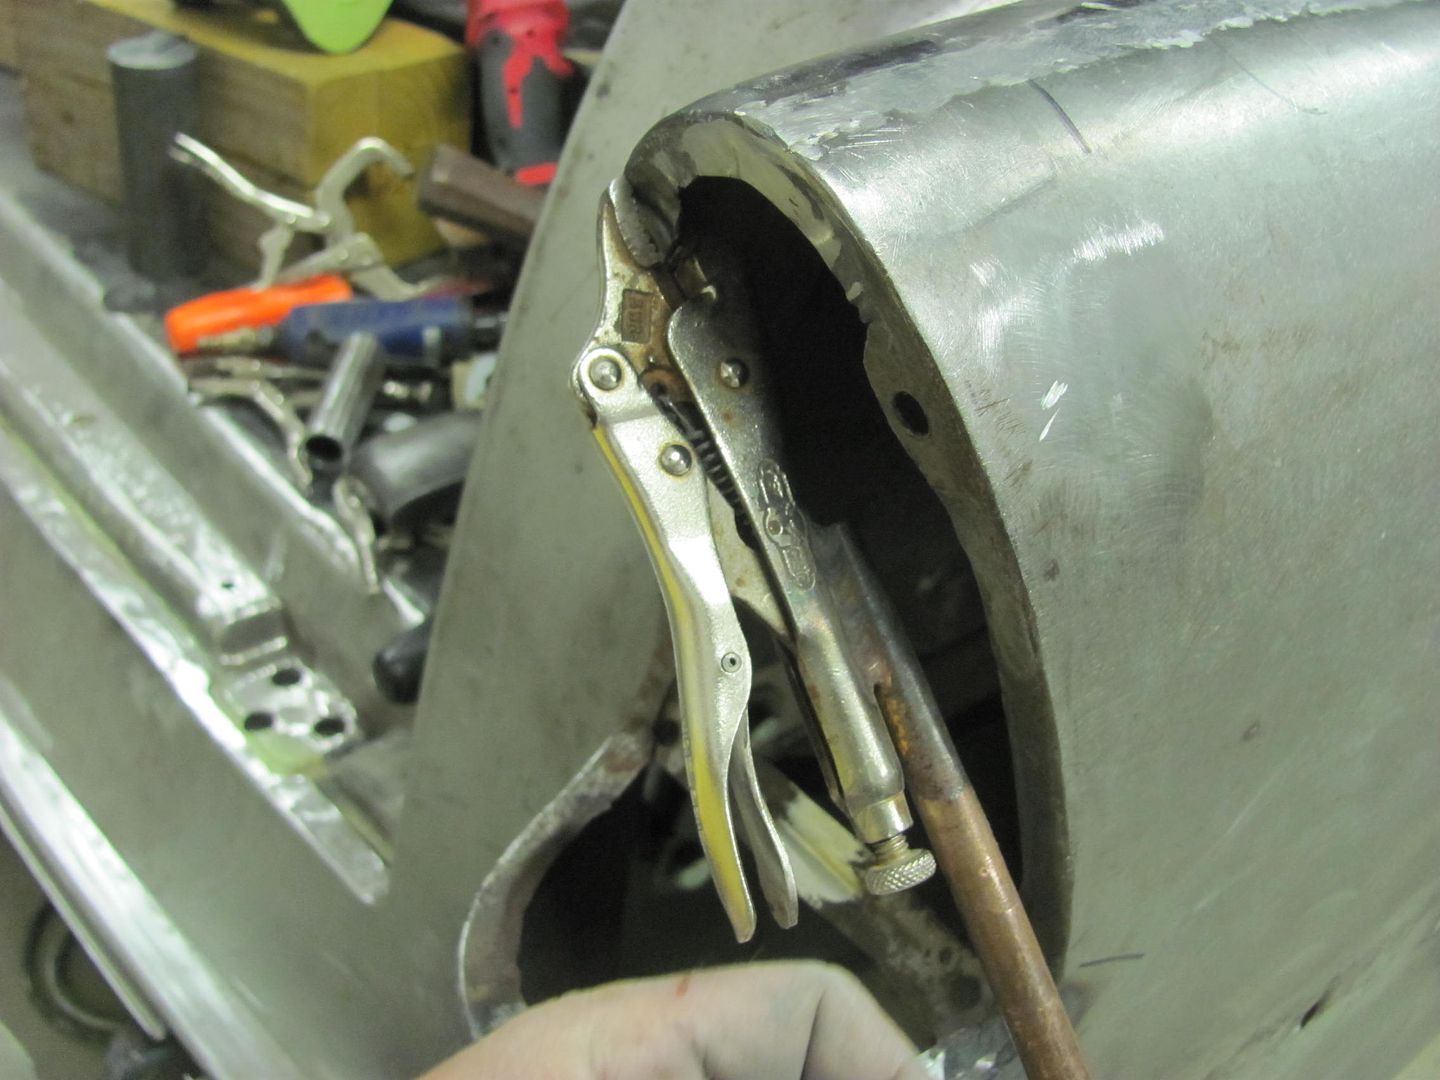
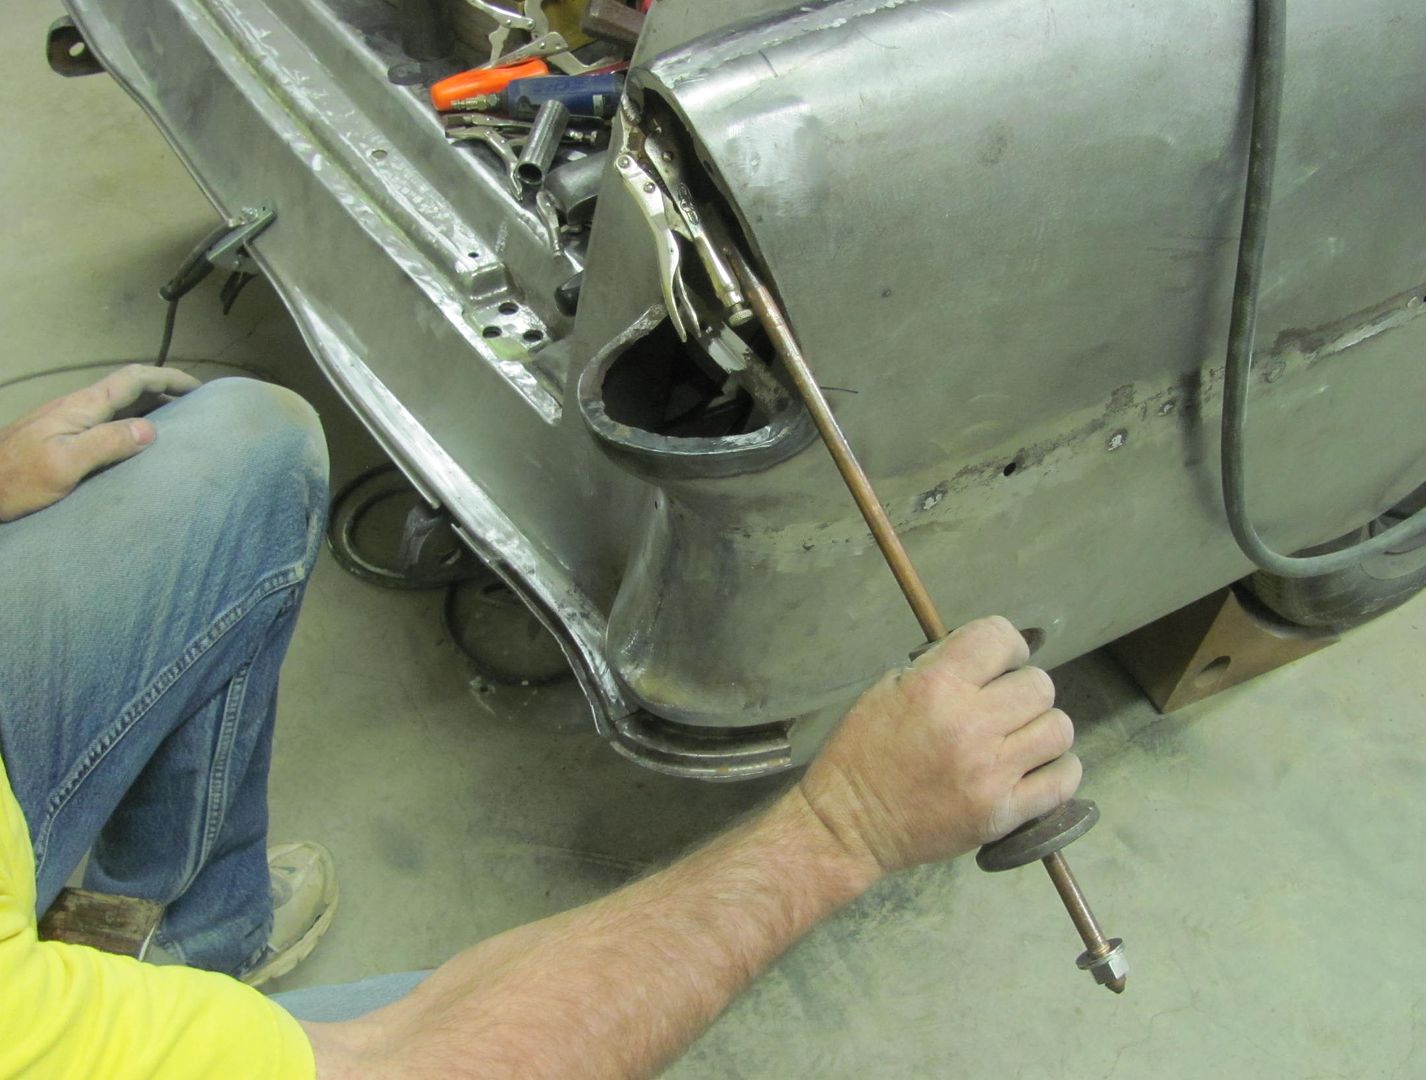
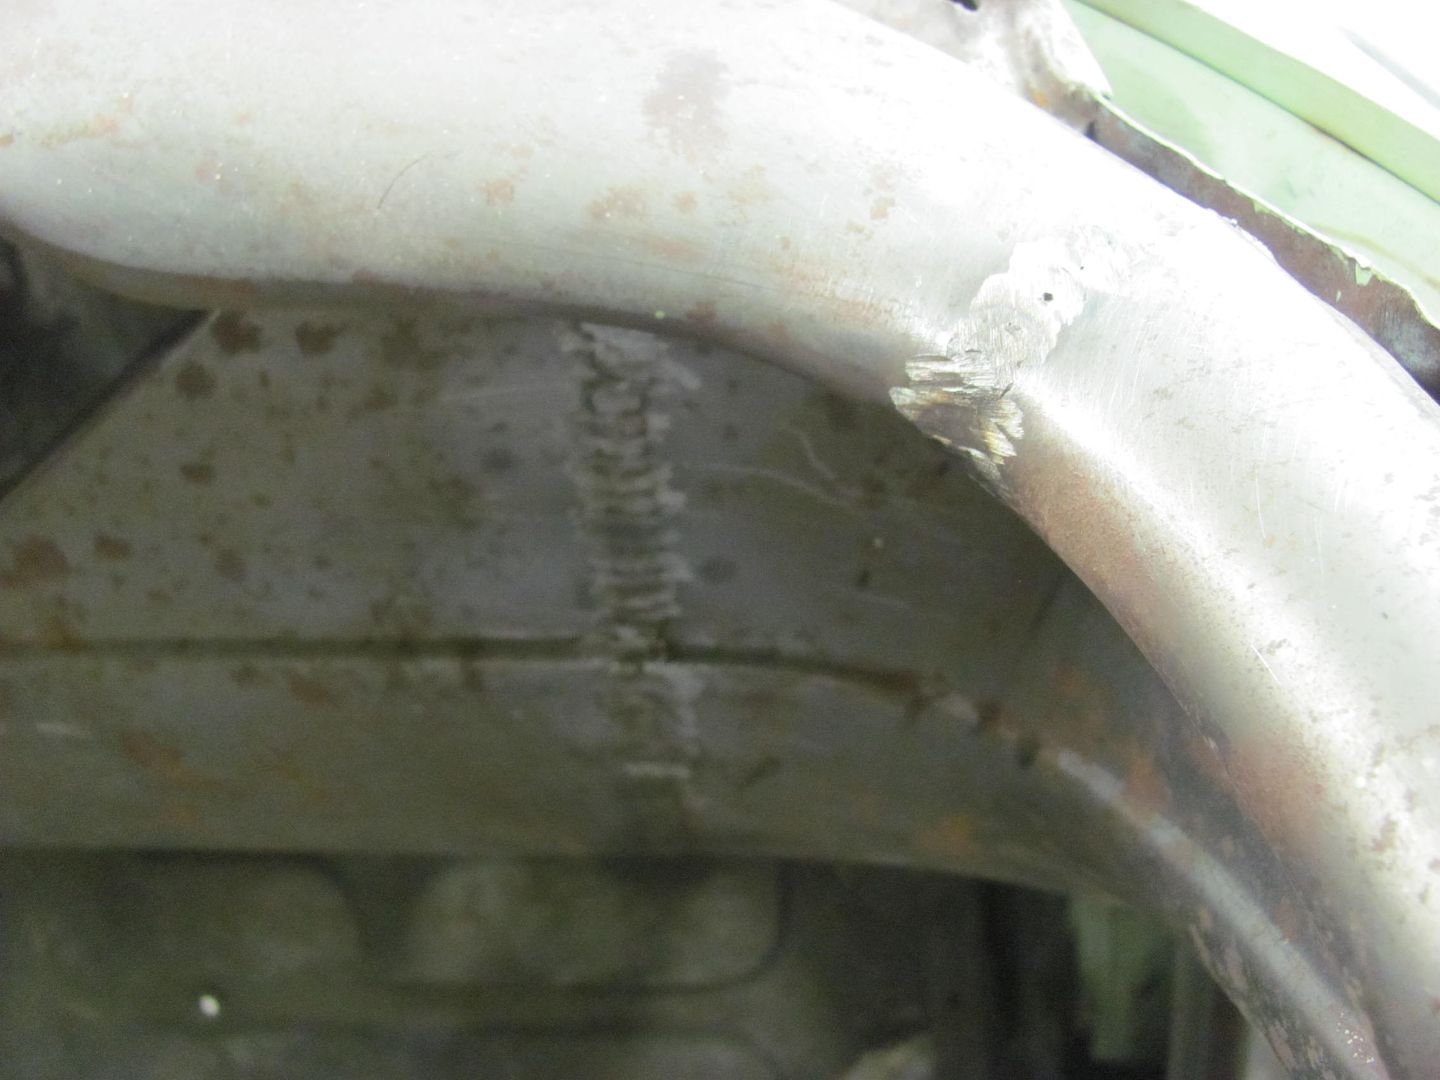
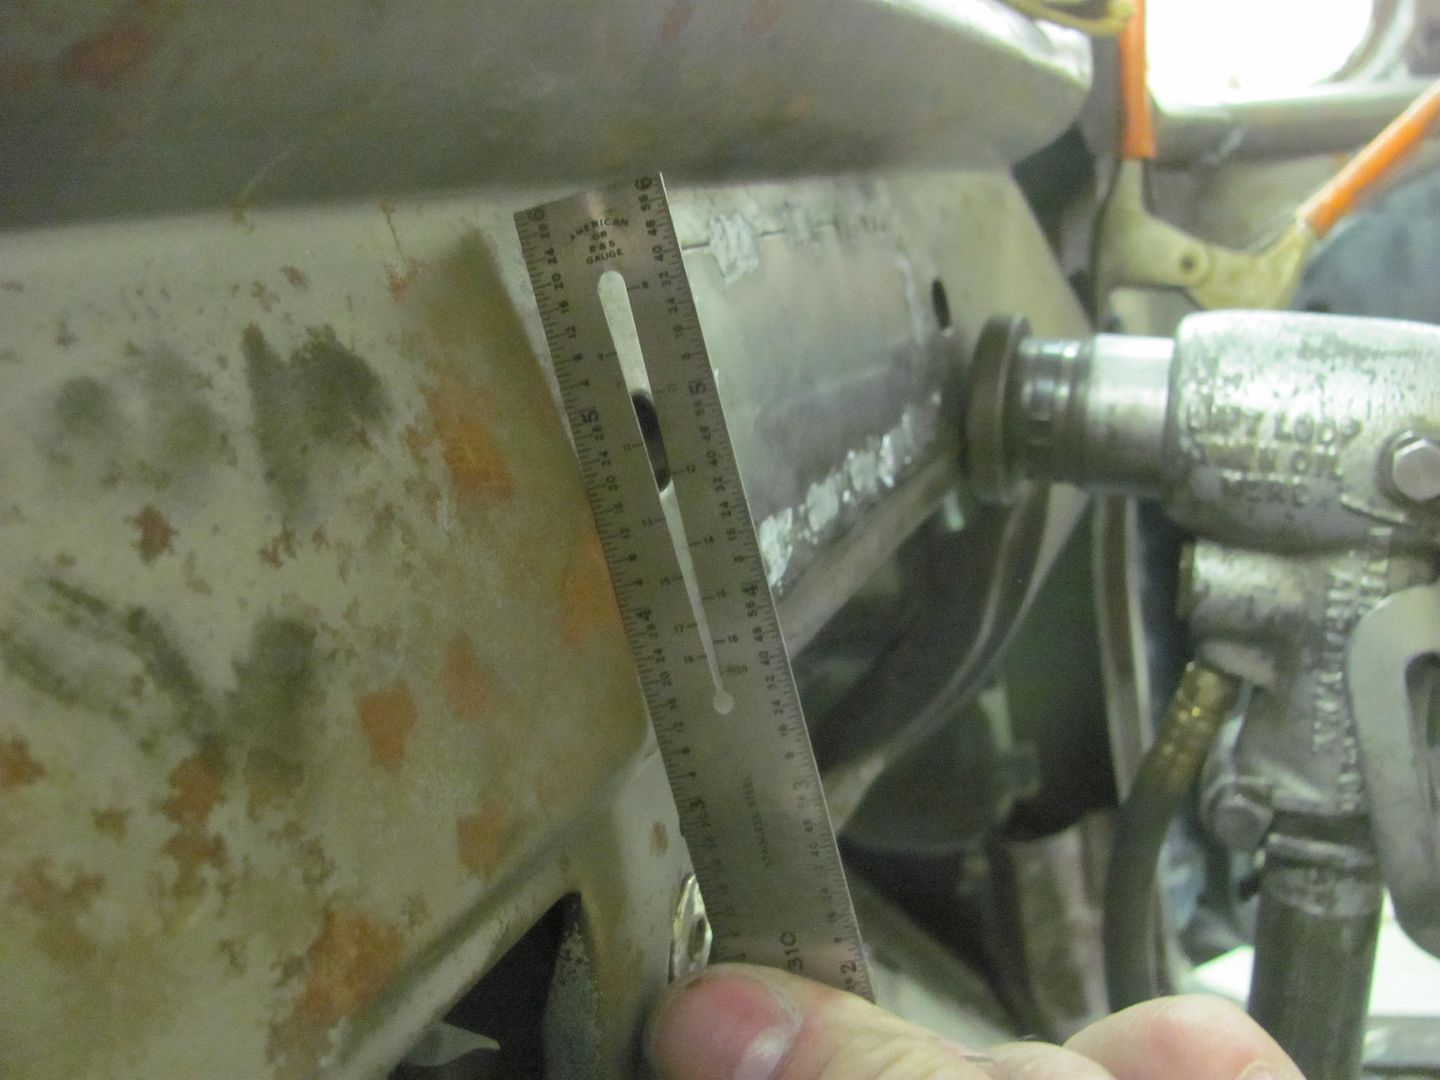
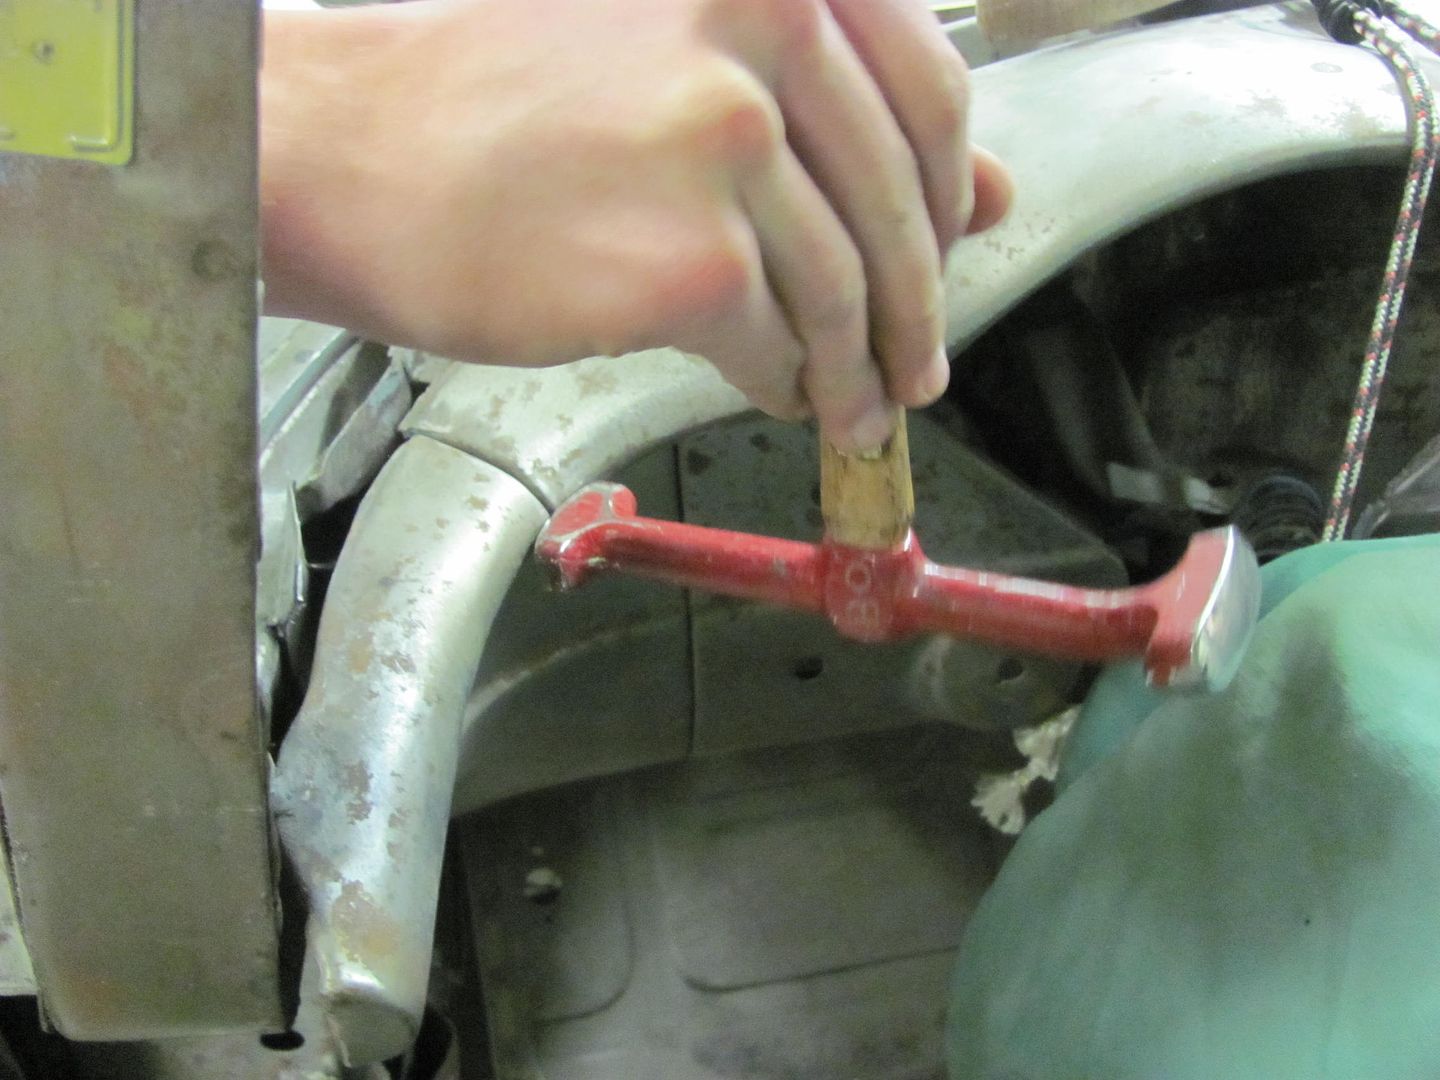
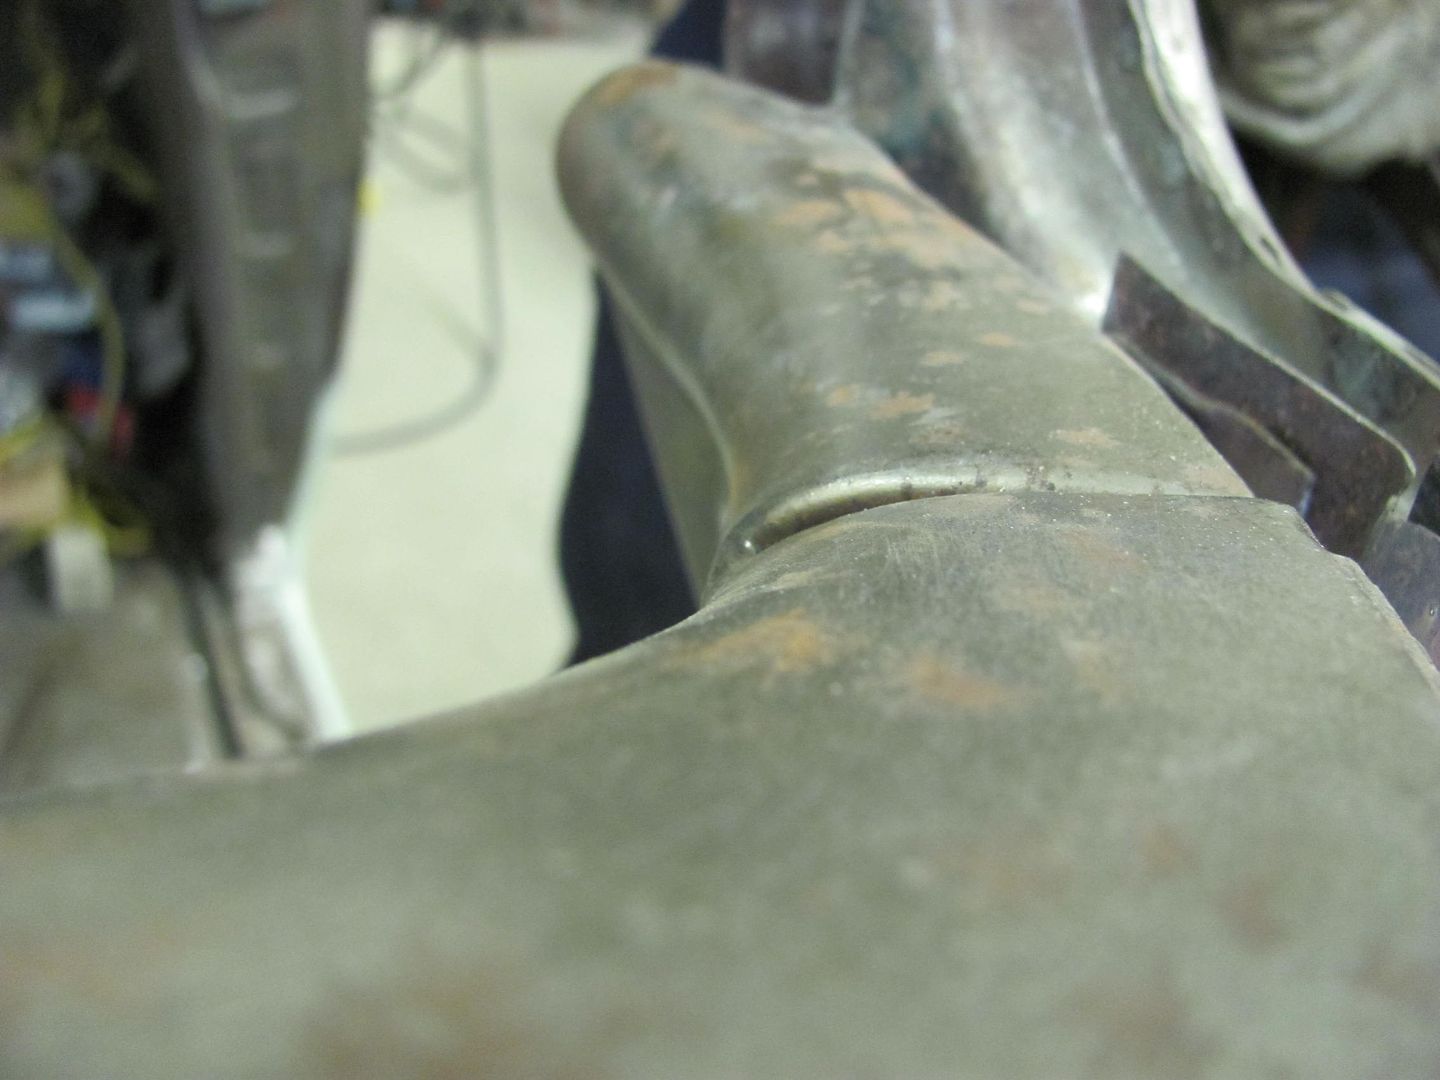
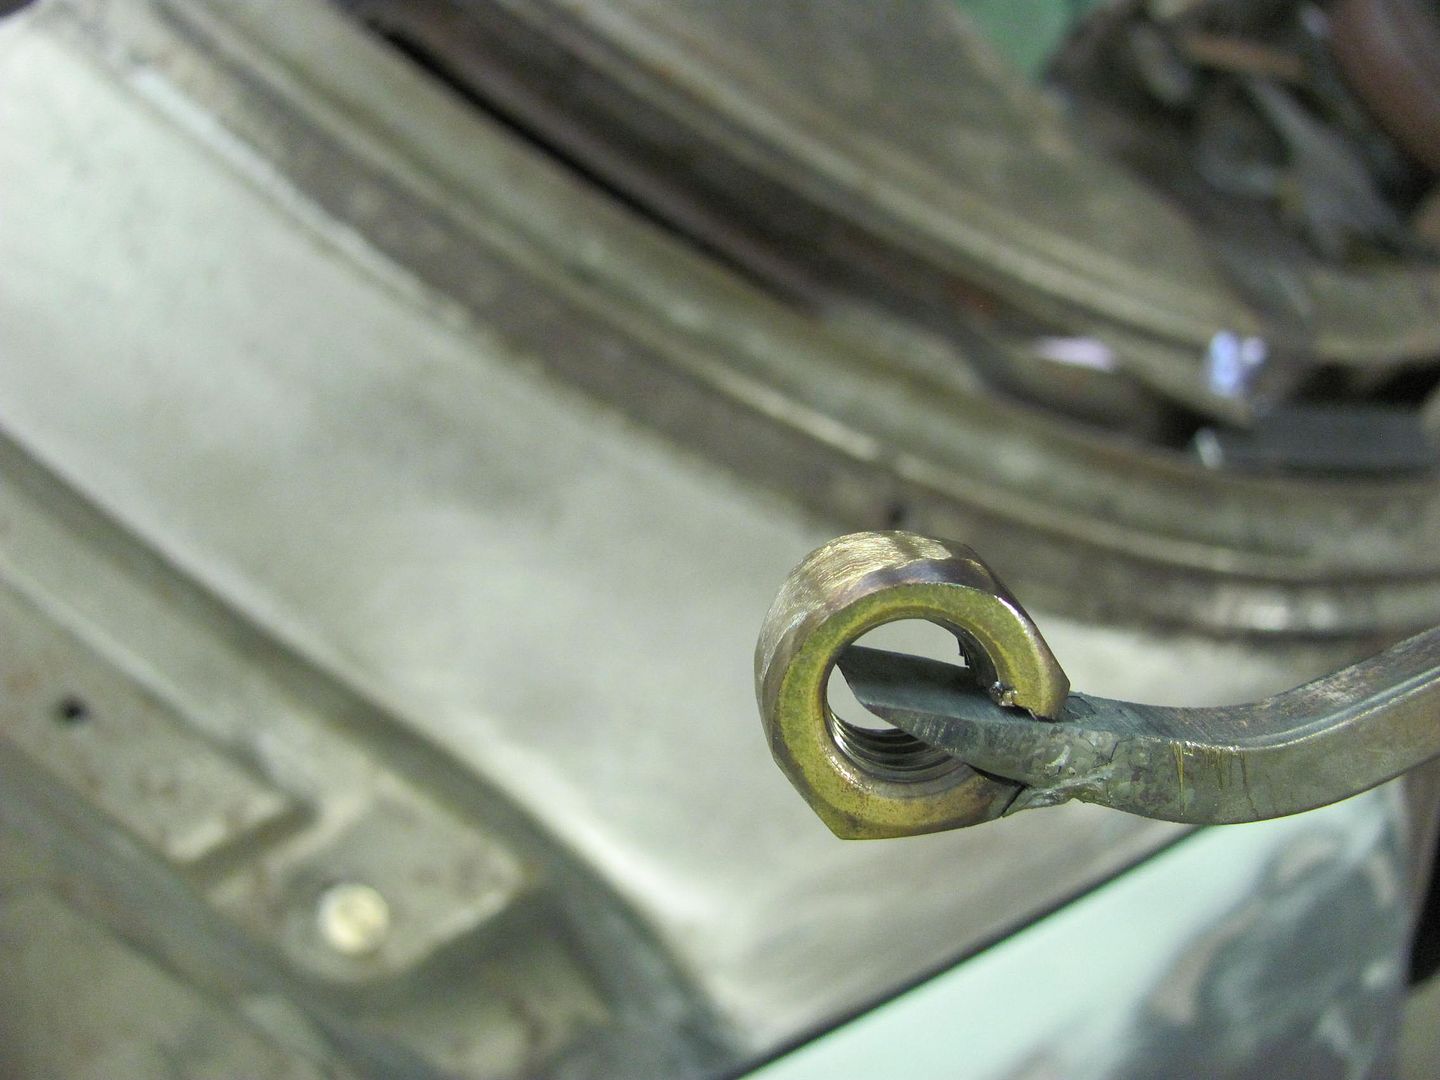
Test fit of the tail light housing showed the opening was a bit wide, especially to the inside towards the tailgate. So some glancing blows with too large a hammer provided a bit of stretch in this inner valley to persuade the panel over to the left, tightening up the opening....
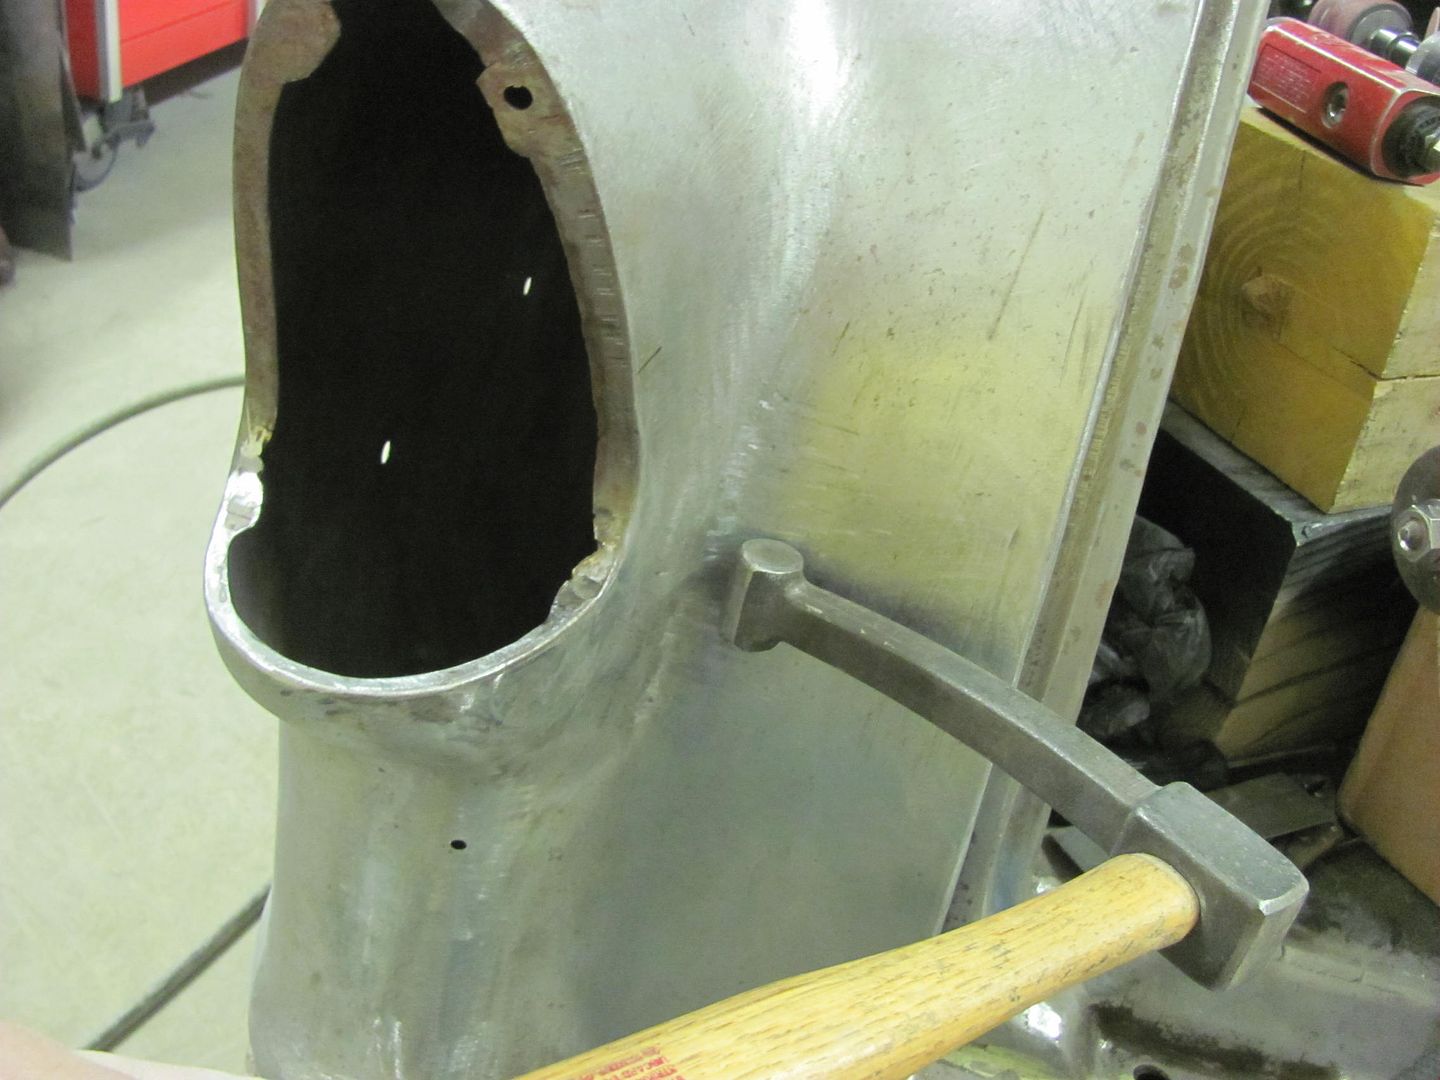
A bit better here, but more tweaking will be needed on the outside before the mounting plate gets welded in place..
Comment
-
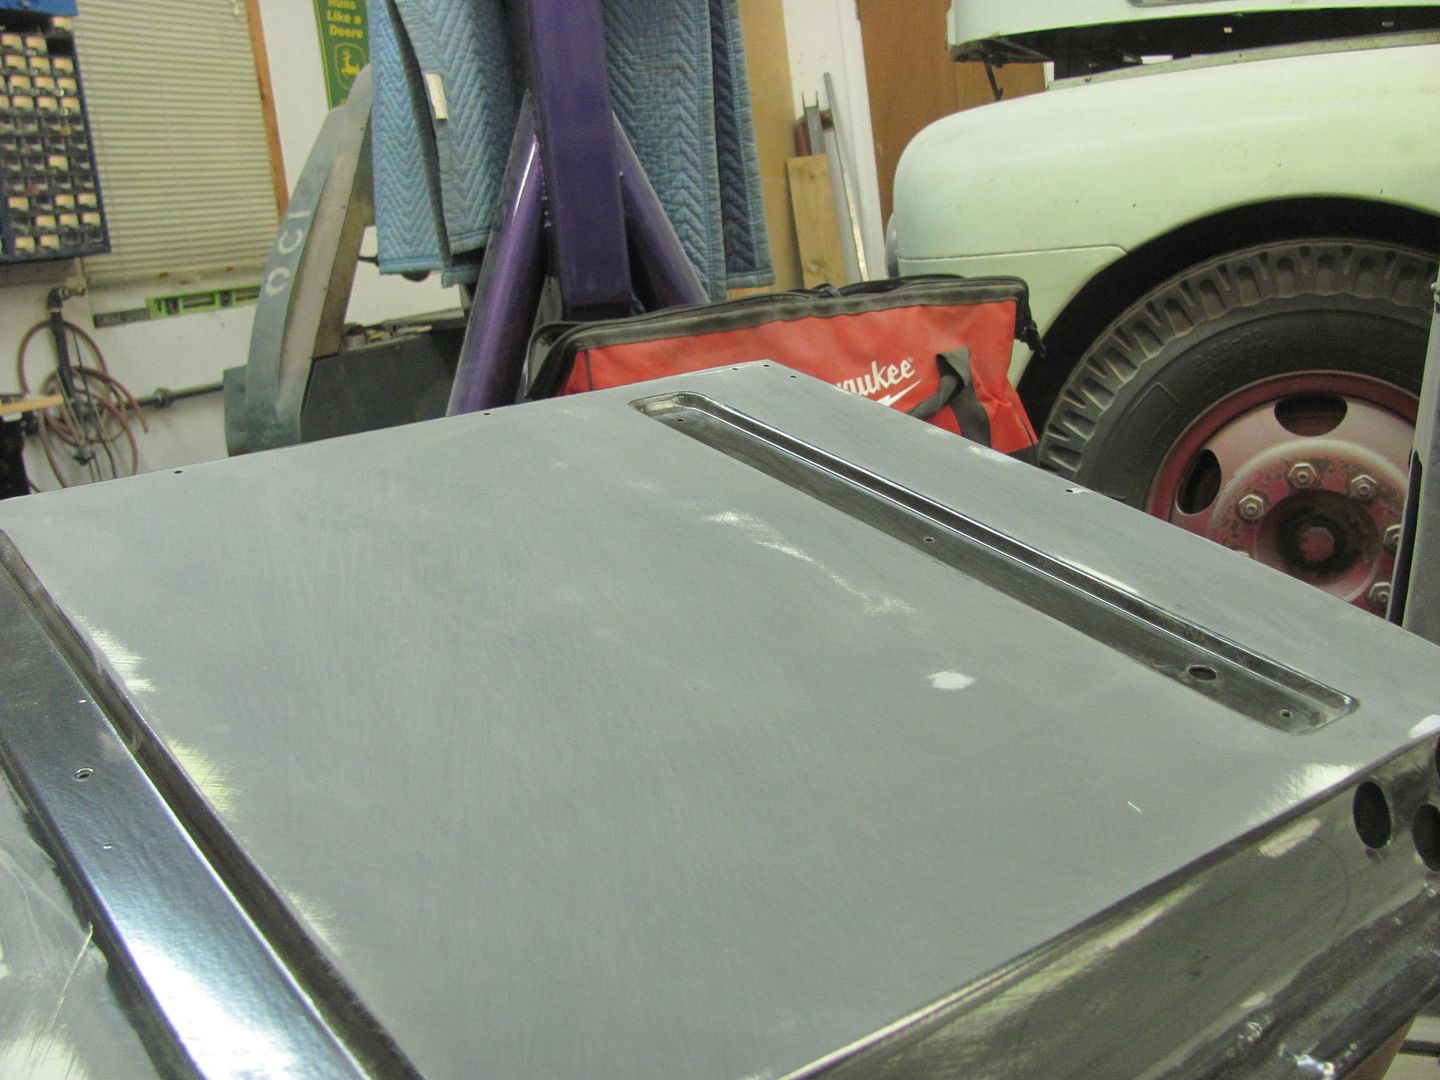
Received a couple of care packages today, first was some of the tailgate hinge trim rings, shown here after Kyle media blasted them. So to all the guys that were watching the ebay auction for these, sorry..
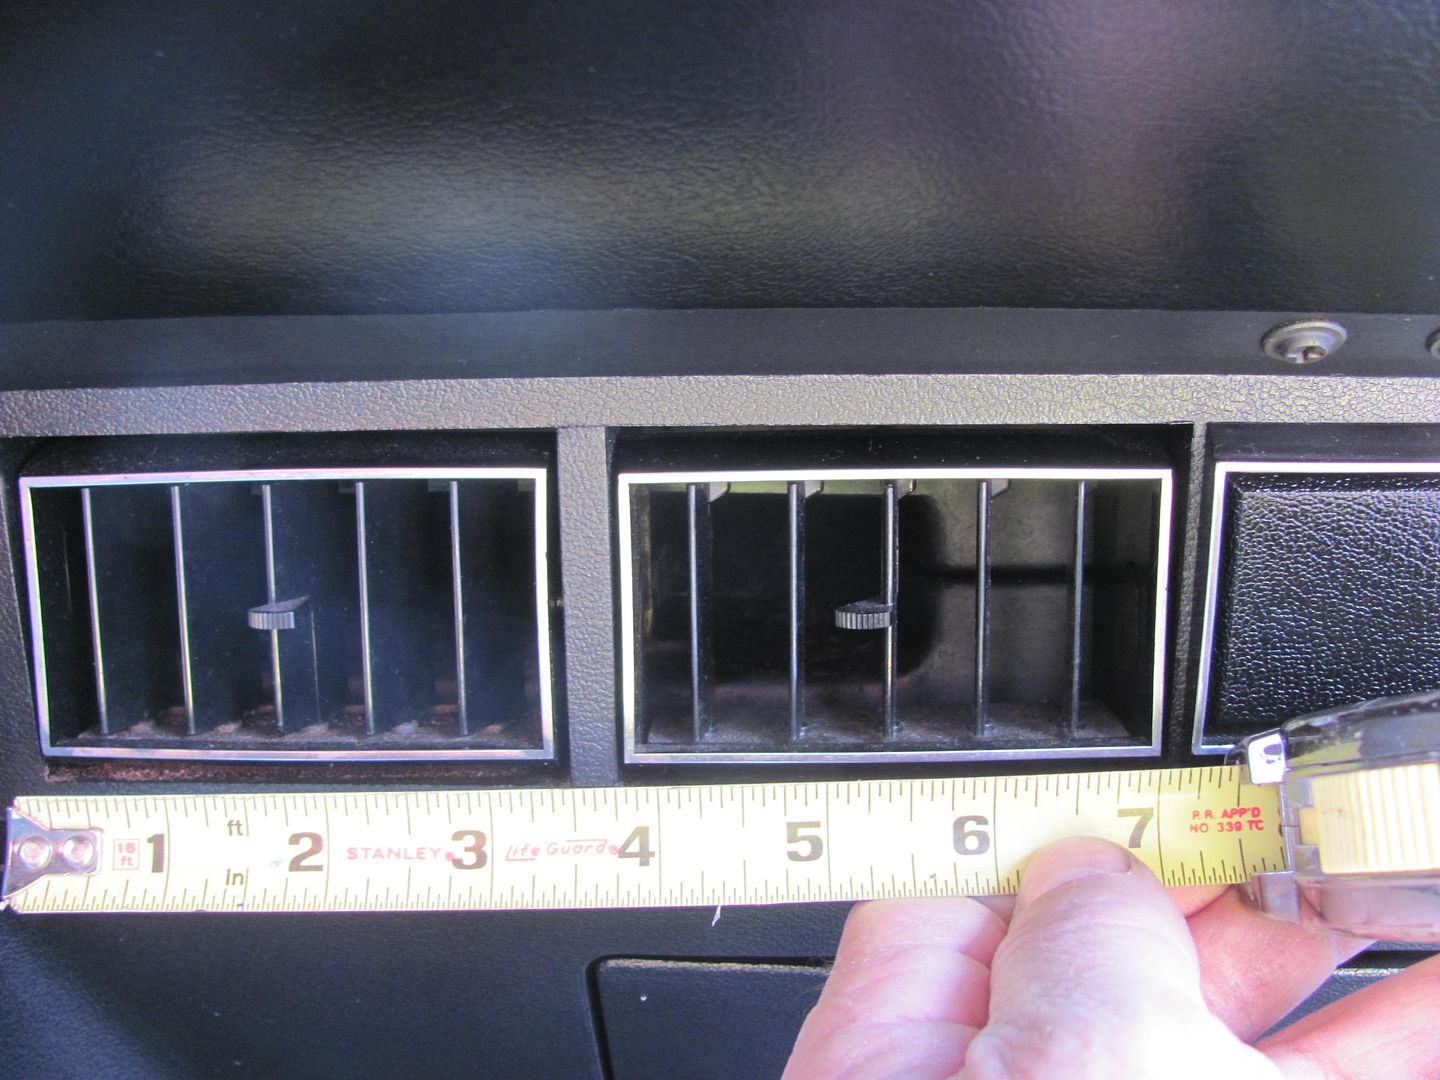
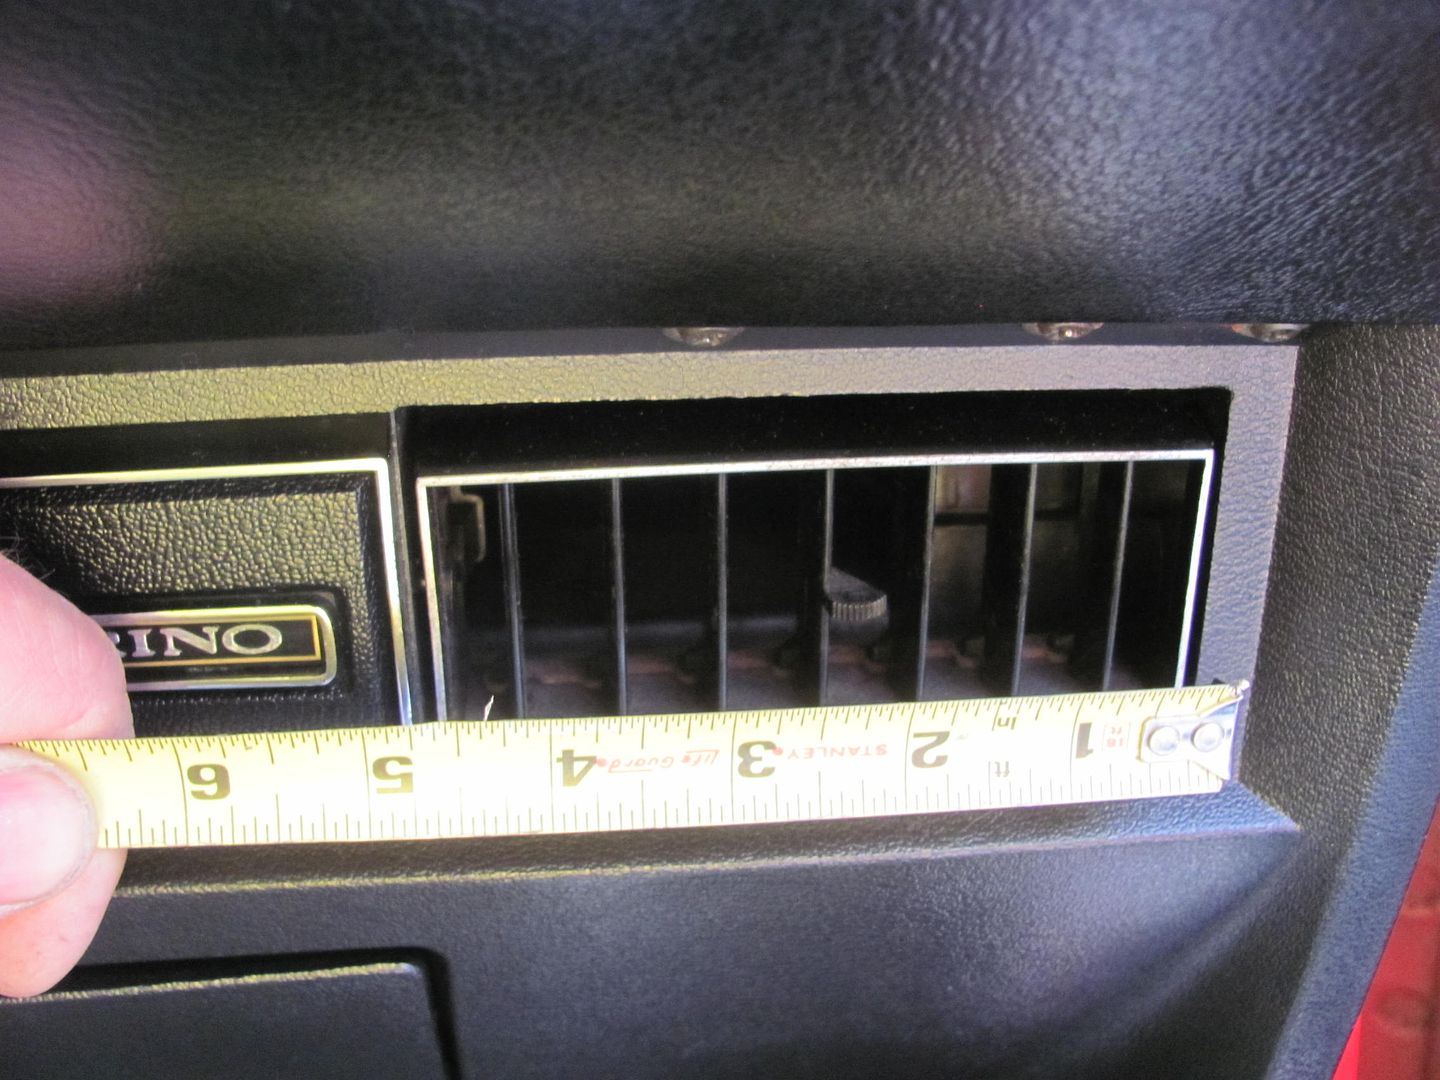
Next, we got our AC vent samples in.. Here is the test fit with tape... Only have two of the round ones to show, but if we go with these there will be three in a row here in the center of the dash.
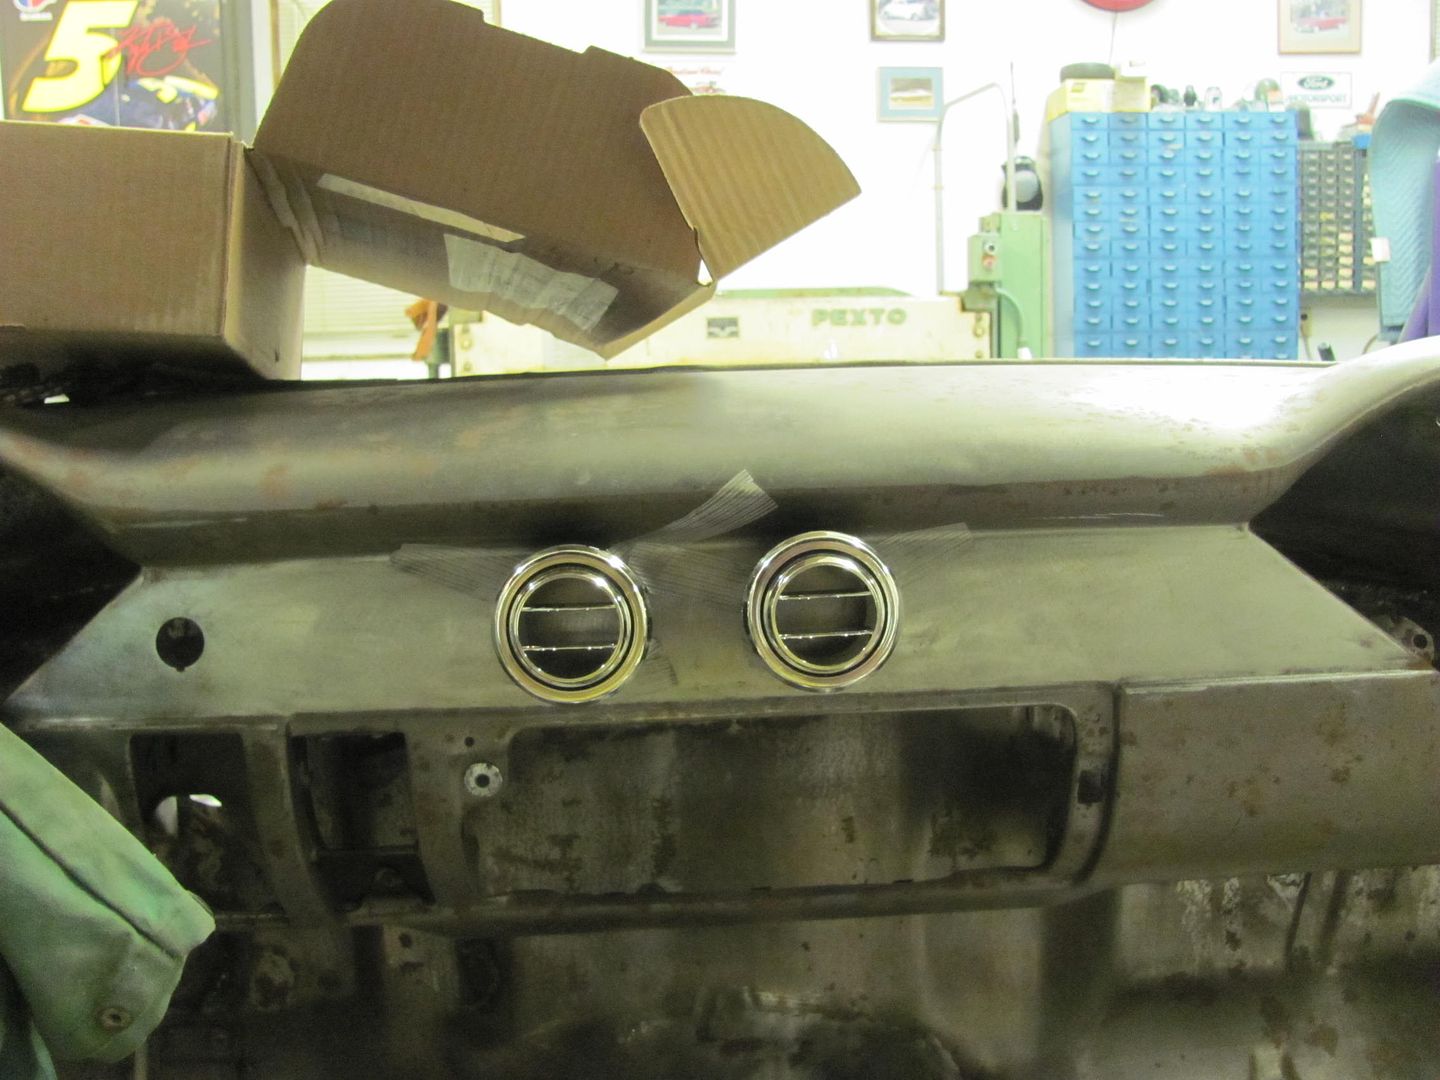
Any thoughts on the vents now with them mocked up?
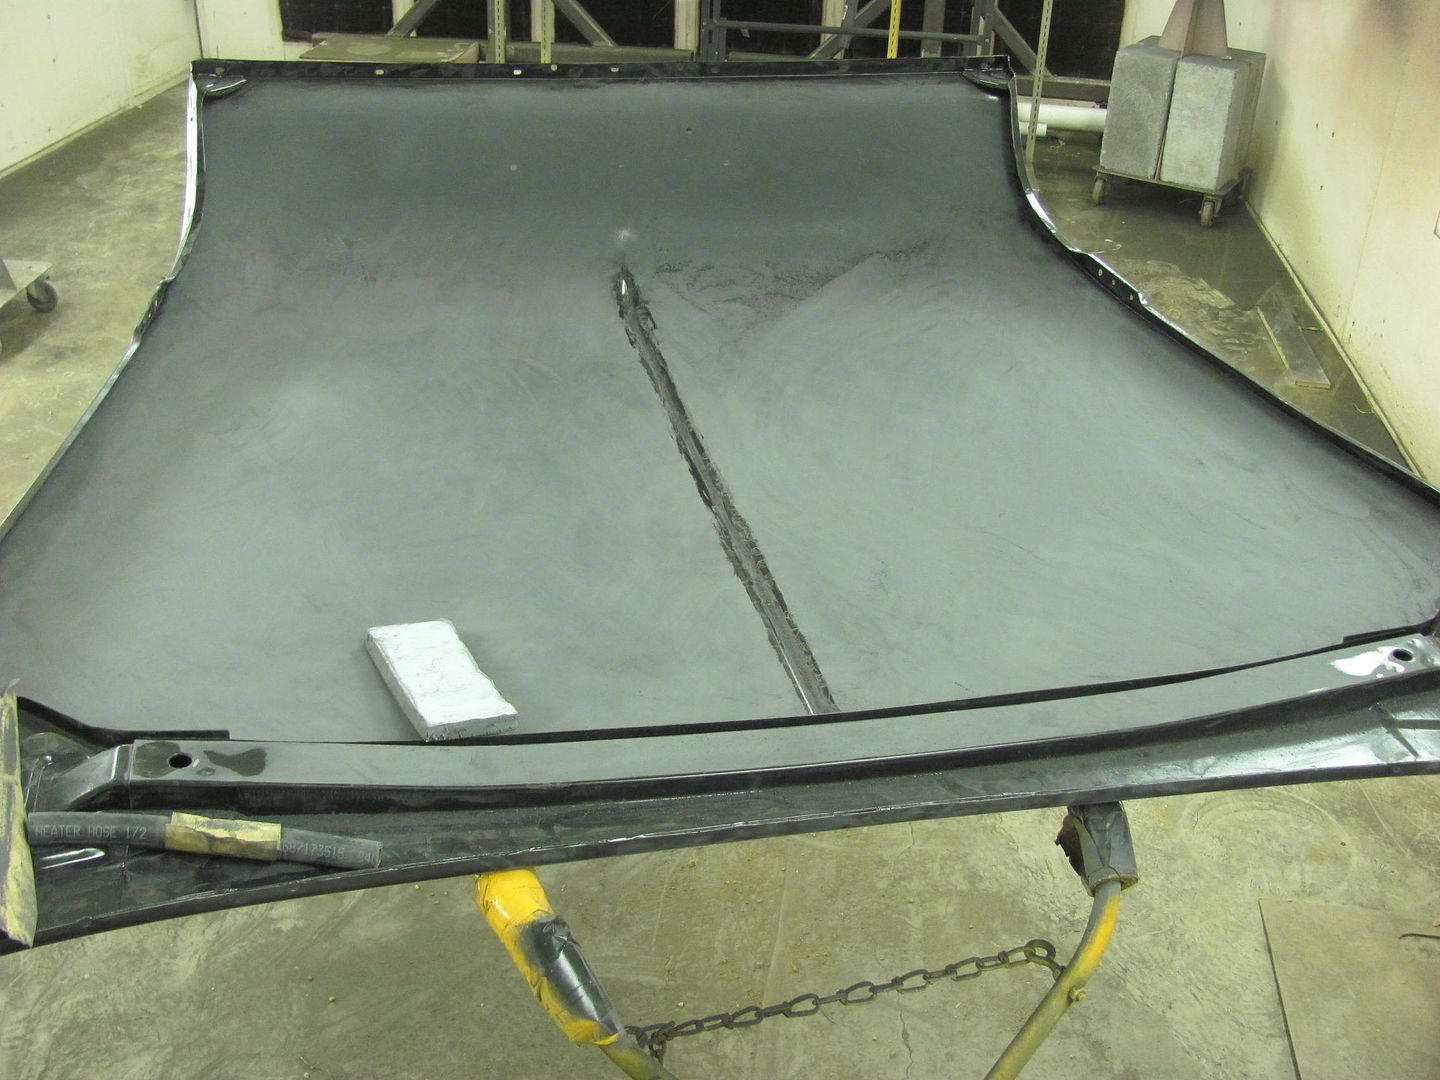
Then Kyle tried his hand at block sanding epoxy on the inside of the hood..
Comment

Comment