Announcement

Collapse
No announcement yet.

Loren Camaro

Collapse
X
 
  • Filter
  • Time
  • Show
Clear All
new posts

  • Loren Camaro

    4-09 This 1967 Camaro has been sitting in the yard waiting for some attention for a long time now. I have owned it for fifteen years, prior to that it was owned by a good freind since 1979.

    It was driven here, partly disassembled, and left to sit...I swore I was going to get right on it, butplenty else had been going on in life so it didn't get much love except for a few things here and there. Will I finally be able to devote some time?

    ...

  • #2
    Re: Loren Camaro

    Thanks for posting a thread. We need more project car threads here.
    BS'er formally known as Rebeldryver

    Resident Instigator

    sigpic

    Comment


    • #3
      Re: Loren Camaro

      Looks like Loren's well-stocked on projects...what's the low-down on this one?

      Originally a 6-popper? SS/RS/? Z28?
      Comment


      • #4
        Re: Loren Camaro

        It was said to be a Z-28 but, tough to prove with a '67. Back when, such cars were for beating on and not "saving" and it definitely got beat on. It was a non-RS manual-trans car in any event.

        It was modified at Dick Guldstrand Engineering in So. Cal. to be a canyon racer sometime between the late sixties and mid-seventies and was said to have a Traco 302. No roll cage so it wasn't a "race car". It was stolen in the mid-seventies then recovered minus engine/trans, front clip and interior...and trim tag (i.d. #s still good). Fortunately the suspension mods remained intact: Corvette discs, upper a-arm pivots moved, steering arms shortened, stiff springs, f/r sway bars, 3.73 12-bolt posi and other minor things. The color was changed from "butternut yellow" to black at some point and the gas filler between the taillights was filled in. A few items were chromed. After the theft recovery an RS front clip and taillights and Z hood were fitted, along with a 350/TH350 drivetrain. I'm trying to get more info on the car during that period, Dick Guldstrand saw some pics of the suspension and confirmed they did it but he couldn't say when.

        I loved this car since I first saw it. I had a '67 RS/SS-350 at the time but was jealous of this one! I didn't keep my '67, wished I had, and eventually got the chance to purchase this. It's one of those deals, however, where the seller (again, a good friend) has first-right-of-refusal if I ever decide to get rid of it, which I am OK with.

        I do not intend to restore it as-such. What I really want is for it to be something similar to what it was in the seventies, that was "it's time" and I'd like to return to it. It needs to be in good condition but if something from back then was a little hacked, I'm going to leave it hacked.
        Last edited by Loren; April 28, 2023, 04:56 AM.
        ...

        Comment


        • #5
          Re: Loren Camaro

          small block car for sure

          Comment


          • #6
            Re: Loren Camaro

            Gezzz,Loren,is that all you and hoard Cars :o ;D :o ;D ;)?! ~J/W-OO6.

            Comment


            • #7
              Re: Loren Camaro

              There are too many cars here. My problem is, I fall in love easy... ;D


              Understand there has been a few things done on this project...which was I guess has been a "project" for much of it's life...and I'm kinda starting in the middle of it here. I've began working on sheet metal for now and here's the first surprise. Bondo! Old slide-hammer screw holes underneath are the worst. The car came with an extra door, now I know why... If I had to I'd re-skin this I would, but the other one's near perfect.


              After replacing the door this car now has no original ext. panels save the rr quarters and roof. Nothing lines up at all. I had to start by shimming up the front of the subframe a little where it bolts to the firewall with some aluminum plate or I wouldn't have a chance of getting the fenders right. Guldstrand had removed the original rubber bushings and bolted the subframe direct to the body, for the most part I'll leave it as they did it but get it aligned better. Looking at it again, I don't think my shims look quite right so I may do them over with large steel washers.


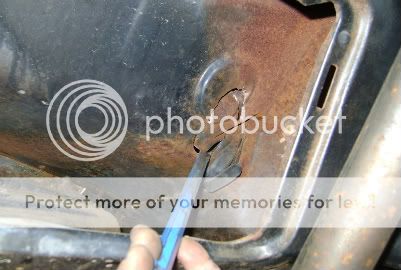
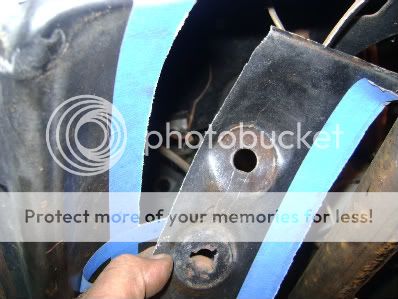
              Par-for-the-course when pulling old panels off, especially at the lower end of the front fenders. The bolt material wasn't too hard and drilled out easy. Just plan on a twenty-second job turning into a twenty minute one (or more) each time you come across one of these... :P


              Remove panels, hammer, install, adjust, remove, hammer...push and pull...eventually stuff starts lining up. Notes on masking tape helped.


              A few hours of work and it's getting close. The rear lower door corner still needs some banging on, then it's over to the other side and repeat process. I may wind up re-painting this in black again and will want it straight, with minimal Bondo.

              ...

              Comment


              • #8
                Re: Loren Camaro

                Originally posted by Beagle
                looks done to me. When do you drive it?
                Seriously, maybe to the Big Bear thing in June...
                ...

                Comment


                • #9
                  Re: Loren Camaro

                  Loren that would be awesome

                  Comment


                  • #10
                    Re: Loren Camaro

                    Looks good man, keep it up.
                    Sounds like a car worth restoring.

                    Comment


                    • #11
                      Re: Loren Camaro

                      12-bolt rr end

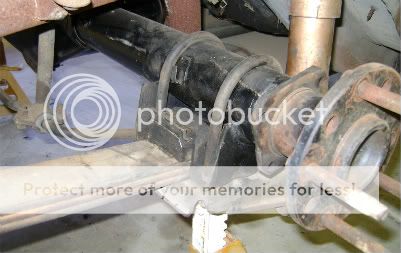
                      It's nice when a car comes with a tough rr axle but this one had some problems which I addressed a couple years ago. The 3.73 posi was a bit chewed up...clutch plates were OK but gears and bearings shot. The bearing caps (which are match/machined to the diff casting) didn't fit correctly, evidentally they were from some different unit, and that probably contributed to the bearing failure. There was other weird damage inside the housing, and it looked like the whole thing was just not going to work.

                      Camaro 12-bolt diffs are getting pricey when you can find one, instead I found a decent Impala housing at a junk yard (also getting scarce) that happened to have 3.36 gears and brought it home. I blew out the plug welds that hold the axle tubes into the center casting on both rears, then pressed the Camaro axle tubes into the Impala center and welded it up. The Camaro axles were toast due to wear at the outer bearings so I got on the phone to Moser and ordered narrower axles that would allow me to fit 8 1/2" wheels under the rear fenders. I cut the ends off the axle tubes and then cut a little more, welding them back together using an alignment jig for the purpose. A buddy who does gears set up the posi with the 3.36 gears and new bearings.

                      Then the whole thing sat outside and turned into a rust ball. I cleaned it up last week using muriatic acid as an experiment. The stuff works but have a look at the Wikipedia articles before you ever use it...just the fumes in the air are enough to cause corrosion to anything nearby, besides the obvious hazards to eyes, skin, lungs etc. I don't think I'll use it when I can possibly avoid so.


                      I installed the housing bare so I wouldn't have so much weight to heft around, then assembled it in the car. Here you can see that the rr is a '68 multi-leaf spring unit instead of a stock '67 mono-leaf which I believe even a Z/28 used...the difference is in the spring bracket which is deeper for multi-leafs. The rubber pads around the spring were not used by Guldstrand and instead were replaced by an aluminum lowering block on each side. U-bolts replace the stock bracket bolts. I modified the lower shock mounts to bring them in a bit for tire clearance which was a fabrication job I think I'll skip here, just know it can be done. Also seen is rr sway bar which mounts behind the axle and 3" wheel studs...and a bit more rust which I'm leaving there. Although I'm cleaning up a lot of obvious grunge, this ain't no show car.


                      Up front you can see Guldstrand's thicker springs, brake caliper bracket, sectioned-and-welded steering arm for a quicker ratio, and stock drum-brake hubs which get Corvette rotors placed over them. Guldstrand had rebuilt this in the early nineties and placed a handfull of thin coin-sized steel shim pieces between the hub and rotor to dial-out runout. Tightening the wheel then warped the hubs. This very Mickey-Mouse solution was easy to fix by re-surfacing the hubs on a brake lathe. Guldstrand had also originally painted the a-arms red but I couldn't quite hang with that and re-shot them black. Don't neccesarily think that '60s road-race heroes were any kind of perfectionists.


                      The wheels I'm using are from when American had just started reproducing their Torque-Thrust D's around '90 or-so (?). I've had them awhile (purchased used) and love the style, a more original set I'd been saving for just such a project as this got sold some time back. These are 5-on-5" bolt pattern from an Impala, I re-drilled the hubs and slotted the rotor holes to fit figuring I'd call the larger-than-normal bolt circle an advantage.

                      I thought these wheels were supposed to clear Corvette calipers but don't. I'll either have to space them out a bit or shave a bit off the spokes.


                      ...

                      Comment


                      • #12
                        Re: Loren Camaro

                        I am really skipping around different areas of this car, I do a little of this and a little of that, then it sits untouched for another few months. For now I'm back to bodywork.

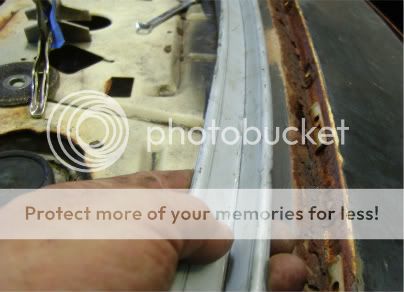
                        Rust is an issue. If ever you can keep an old car at-least out of the rain, it is good to do so, but this one rarely spent a night under cover. The part that is bugging me most is around the rear window, so I'll start there.

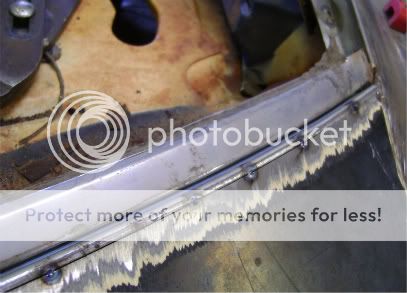
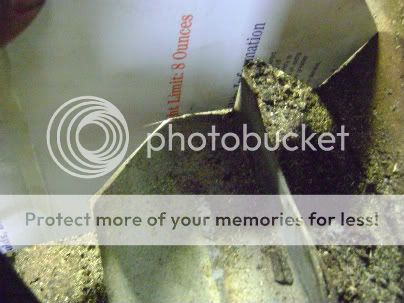
                        This view is of the upper rr window, left side, looking down from the roof. The rr window water leakage problem had once been solved with silicone sealant around the moulding.


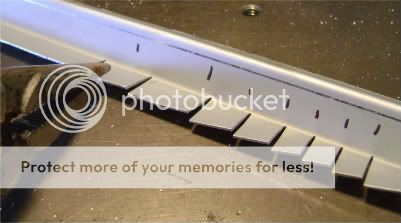
                        I cut out some strips of electro-galvanized sheet steel and formed some basic channel shapes on a press brake, to replace the rusted areas.


                        Where the channel was to go around curves I made some cuts and twisted them a bit with a Vice-Grips.


                        I then bent the piece by hand, using the moulding as a guide...after all, that is what we want to fit to...then marked where the earlier cuts overlapped so I could accurately trim some notches out.


                        With the original rusty area trimmed away, the new part is fit in. It took plenty of additional bending along the straight part, which actually wasn't so straight. All perimeter areas of the window have a slight bend to them.


                        After tig welding. It looks a little ratty but with a cleanup and prime we'll be in shape.


                        I formed a channel for along the base of the glass using the pressbrake, a bead roller and a urethane hammer. You could buy a whole panel for the area between the trunk lid and window if you were so inclined and the install might be easier. I chose to just make the one portion.


                        Again it was fit to the moulding. After lots of careful bending and cutting it was ready to tack weld in.


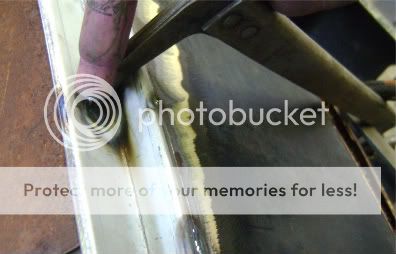
                        Finally the whole window area was welded in complete and the welds ground flush.
                        ...

                        Comment


                        • #13
                          Re: Loren Camaro

                          WOW

                          Great fab work - impressive skills and tools.
                          There's always something new to learn.

                          Comment


                          • #14
                            Re: Loren Camaro

                            oh that brings back the memories of doing that to my 67 Camaros... I was glad to have access to a press brake as well - it sure made the repairs cheaper.
                            Doing it all wrong since 1966

                            Comment


                            • #15
                              Re: Loren Camaro

                              More rust repair.

                              The front of the dash under the windshield is a bad spot with early Camaros, as there is a panel underneath shaped-and-attached in such a way as to collect moisture. The rust comes through from the back side...if you see any at all then the whole area needs to be cut away as you cannot clean it off from the top. Ugh.


                              Areas were cut away with a thin cut-off wheel and fresh material was cut to fit, tacked in then later fully welded.


                              There were other misc. holes to fill, including on the firewall. An easy way to cut a new piece to fit an odd-shaped cutout is to lay masking tape across it, trace the edge with a pen, then stick the tape to a piece of sheetmetal and cut at the line.


                              Some time ago I had purchased re-pop lower rr quarter panel sections to fix rust there, and cut them to fit. This then sat around and collected a good bit of surface rust but is still fine. After a bit of cleanup in the weld area, in they go. I'll do the rest of the cleanup later.


                              Roll Cage

                              While I'm in there doing all this cut and fab work, I think I'll get some progress going on a roll cage. Due to cracking at the A- and C-pillars I think the body could use some reinforcing, plus I'd like to be able to take it out on a race course some day. Also, there is the small matter of that I intend to do a few late-night canyon runs with this car and there is always the chance I will screw up and land on my head.

                              Racing organization rules for roll cage construction vary. NHRA wants .134-wall DOM 1 5/8ths, but I'm not going drag racing with this. SCCA wants 1 3/4" .120"-wall DOM...why DOM? It isn't any stronger than std. cold-roll tubing, it just has the inner diameter cleaned out and is a lot more expensive. SCCA has so many other rules, I don't think I'll be going there with this car although it has it's appeal. SCTA, the land-speed people, just want .120-wall 1 3/4 which is to me the most reasonable. Let's go with their plan, but mind the other organization's methods as there may be some wisdom there.

                              I'll start with the main hoop. It should have four bends, totalling around 180 degrees, and fit the inside of the car as close as practical. If you get your cage-building information from HOT ROD, at this point you'll be getting out a tape measure and studying up on some formulas. Why? Jut make a template from screwed-together pieces of plywood and you'll have the advantages of simplicity and greater accuracy.


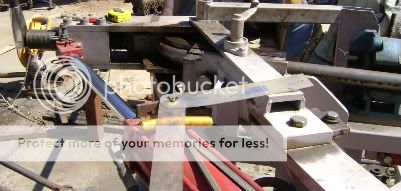
                              The template gets taken to the tubing bender. Seems I can have a particular length or two of the correct tubing for free if I dont' mind cleaning off a little rust later. OK.


                              The plan is to bend the tubing to fit the pattern, and no math. First a short length of scrap tubing is put into the bender for setup and it gets a marker-pen mark at some point where, for example, the edge of the bending die is. It then gets bent to the correct angle while machine operation is checked. Finally we remove it and it can be overlaid and used as a guage to set where the roll-cage tubing should be inserted into the machine for the for-real bends.


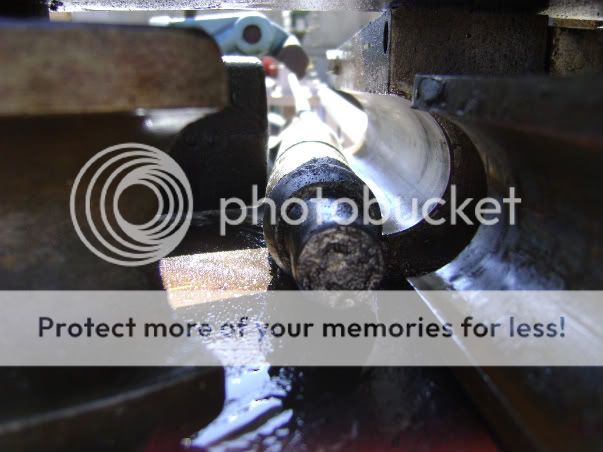
                              By the way, this is a real mandrel bender...not the "mandrel bender" you've read about (yes that is another dig at Hot Rod which by-the-way I love). It has a flexible inner part which goes inside the tubing as the bend is formed from the outside, to maintain the tubing inner diameter. This adds greatly to the cost and complexity of the machine but the work sure comes out nicer. This particular mandrel has a line ground into it to accomodate the weld seam of non-DOM tubing.


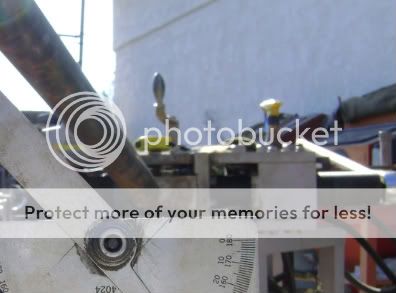
                              For the front A-pillar cage portions, I'm going to do some measuring. First I tape sections of cardboard holiday-wrapping tubing to where I'm going to want the rails to go, then measure the distance between the "bends", and cut a cardboard guage for the angles. With there being two bends leaving three straight parts, I'll sight down the middle straight part to measure with a protractor how much the two "legs" wind up splaying away from each other.


                              Then as I bend the actual material I'll roll the tubing around in the bender appropriately between one bend and the next.


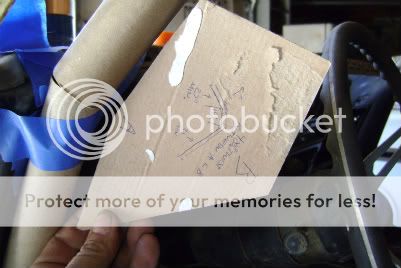
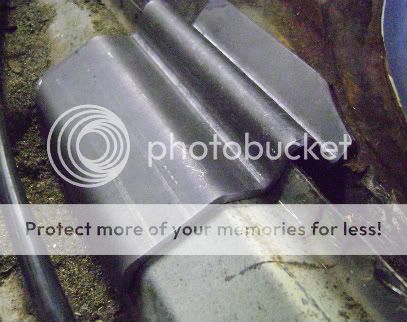
                              Using my patterns I rough-cut the tubing legs to fit the interior, then I need some reinforcing plates to weld to. SCTA wants them to be 6x6", x3/16ths. SCCA thinks they should bite into some vertcal structure of the body. I think I'll try to do both. I'm starting with a cardboard pattern which fits the shape of the rocker area.


                              Then I fit a piece of steel to the shape. Everybody should have a press brake!


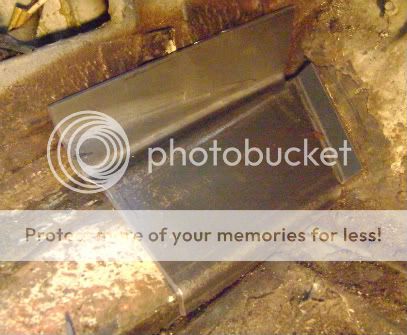
                              Check part "A" against car "B", and there we have it. On a unibody (or semi-unibody) car with no solid frame to weld the roll bar tubing to, this will help keep things strong.


                              Another one for the driver's footwell area.


                              I want a couple of front struts to go out to the subframe. Since I don't want to cut the car up more than I have to I will be careful to pick where the tubing goes through the dash and firewall. At the firewall I have to clear the fender mounting area and will put the hole right next to it. At the driver's side I have a similar position which will "almost" clear a brake booster...but not. I guess we'll be using a hydroboost for clearance.


                              The holes in the dash were carefully chosen, but on the driver's side there was no way to clear the headlight and wiper control knobs enough. So I moved them.


                              The paper pattern is for checking passenger-side vs. driver-side positions.


                              Holes in the cowl area had to be cut with a long chisel, keeping to the minimum possible with the hope of sealing things off later. I don't want to get my feet dripped on in the rain or at the car wash.


                              Finally I bent up some front struts to fit. They have a slight bend right at the firewall which isn't optimum, but they go through the strongest portion of the panel and that should hold everything in place fine.


                              Similar work was done for the rear struts going from the main hoop into the trunk area. Fitting all the ends together was a time-consuming job with a hole saw on a mill, and my trusty Makita grinder. Nice to see some progress! I will pull it all apart for painting and weld it up later.

                              In the meanwhile, I've noticed that you can bring a rainstorm in out of the clear blue sky, by parking a mostly-bare-metal Camaro outside...
                              ...

                              Comment

                              Working...
                              X